Best Ceiling Fans for Beach House

Best Ceiling Fans for Beach House

Welcome to our comprehensive guide on finding the best ceiling fans for beach house. If you’re looking to create the perfect coastal retreat, selecting the right ceiling fan is crucial for both comfort and style. In this guide, we’ll explore the key factors to consider when choosing a ceiling fan for your beach house, highlight top picks from leading brands, and provide expert tips on installation and maintenance. Whether you’re seeking a coastal-inspired design or optimal performance for your seaside sanctuary, we’ve got you covered. Let’s dive in and discover the ideal ceiling fan to elevate your beach house living experience.

Our Top 5 Picks: Best Ceiling Fans for Beach Houses

Product Name

Brand

Special Feature

Color

Price

YITAHOME Tropical Ceiling Fan

YITAHOME

LED Light

Walnut

Check Price


ZMISHIBO 72 inch Large Ceiling Fans

ZMISHIBO

Remote Controlled, Adjustable Height, Timer, 3CCT Adjustable, 18W LED Light

Black & Walnut

Check Price


LEDIARY Ceiling Fans With Lights Remote Control

LEDIARY

Remote Controlled, Timer

Black

Check Price


HUEOCZW 20" Caged Ceiling Fan

HUEOCZW

Reversible motor/6-speed wind speed/1.2.4 hours timing/memory function

White Brush Gold(Includes bulbs)

Check Price


BOJUE 52" Ceiling Fans

BOJUE

Remote Controlled, LED Light, Timer, Wood Blades, DC Motor

Nature wood+White body

Check Price


When it comes to selecting the perfect ceiling fan for a beach house, the emphasis is not just on functionality but also on capturing the essence of coastal living. Here are our top picks from various brands, each contributing a unique touch of style and efficiency.

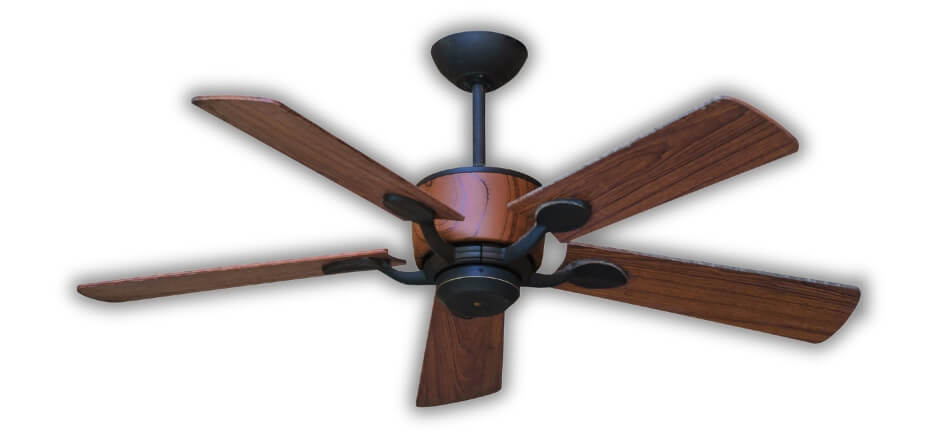
01: YITAHOME Tropical Ceiling Fan

Transform your living spaces into a tropical haven with the YITAHOME Tropical Ceiling Fan. This fan, which is made of beautiful palm leaf blades, elegantly blends design and utility to improve the look of your interior decor. As an ETL, FCC, and EPA certified fan, it not only adds a touch of the tropics but also ensures safety and environmental friendliness.

Features and Specifications:

Immerse yourself in a coastal paradise with five palm leaf blades, creating a stunning tropical island design that enhances the aesthetic appeal of any room. Experience versatile comfort with 4 timing options (1/2/4/8H) and a reversible motor. Change the rotation direction for optimal air distribution year-round, complementing your air conditioning system. Illuminate your space with a wide-angle LED light fixture offering three color temperatures (Warm-3000K/Natural-4000K/Cool-6000K). Provide ample brightness while safeguarding your eyes in various living spaces. Say goodbye to disruptive fan noise. YITAHOME’s innovative design ensures a noise level under 35DB, making it ideal for those seeking a peaceful environment without sacrificing cooling power. Enjoy hassle-free installation with a 5″/10″ downrod included in the package. Choose from three mounting options – standard, sloped, or low – adapting to most ceiling types. Achieve a stylish and functional upgrade within 45 minutes, requiring just one person.

Pros

  • Beautiful tropical design enhances room aesthetics.
  • Versatile 3 in 1 functionality for customized comfort.
  • Eye-protective LED light with adjustable color temperatures.
  • Whisper-quiet operation, perfect for noise-sensitive individuals.
  • Easy installation with flexible mounting options.

Cons

  • Non-replaceable LED may pose challenges if the light malfunctions.
  • The tropical design may not suit all interior styles.

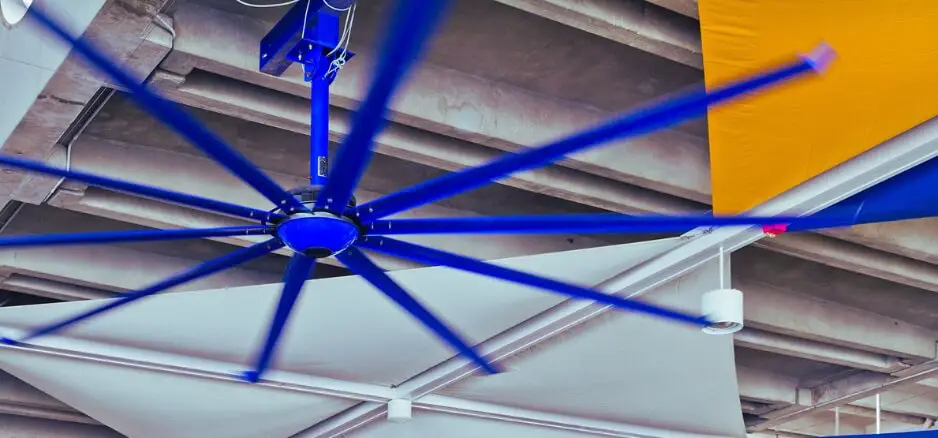
02: ZMISHIBO 72 inch Large Ceiling Fans

Presenting the ZMISHIBO 72-Inch Ceiling Fan, a chic and functional complement to any interior. With its impressive size and thoughtful design, this ceiling fan offers a perfect blend of industrial and farmhouse styles, making it an ideal choice for various environments. From the living room to the covered patio, experience comfort and aesthetic appeal like never before.

Features and Specifications:

With 4″, 8″, and 24″ down rods included, the 72-inch ceiling fan can fit both low and high ceilings (12-32 inches high). Its versatility guarantees a perfect match in every space. The fan blades boast a sleek black and walnut dual-color design, effortlessly merging industrial and farmhouse aesthetics. With 8 blades, this large fan provides a cost-effective and visually striking alternative to multiple smaller ceiling fans. With six programmable fan speeds, you can customize your comfort level and have the ideal breeze for every situation. You can easily adjust between a mild breeze, a natural wind, and a forceful wind with the handy remote control. Utilize the multifunctional remote control that comes with it to simplify your life. From adjusting fan speed and light settings to choosing color temperatures and setting a timer, enjoy complete control at your fingertips. Experience tranquility with the noiseless DC motor, operating at just 35dB. Ideal for households with seniors and children, the energy-saving motor ensures eco-friendly operation, providing 65% more energy efficiency than traditional AC motors.

Pros

  • Impressive 72-inch size for optimal air circulation.
  • chic two-tone design that combines rural and industrial elements.
  • Adjustable 6-speed fan for personalized comfort.
  • Multi-function remote for convenient control.
  • Silent and energy-efficient DC motor for peaceful operation.

Cons

  • Not every interior style will work with the limited color selections.
  • The large size may be challenging for smaller rooms.

03: LEDIARY Ceiling Fans With Lights Remote Control

Elevate your living spaces with the LEDIARY Unique Caged Design Ceiling Fan, a perfect fusion of industrial flair and functionality. This 22-inch small ceiling fan is crafted with a distinctive metal caged frame and 7 ABS fan blades, offering a stylish addition to farmhouse, home, living room, bedroom, or dining room decor. With a focus on convenience and aesthetics, this ceiling fan is designed to enhance your space in more ways than one.

Features and Specifications:

Stand out with the industrial flush mount ceiling fan featuring 7 ABS fan blades and a metal caged frame, adding a touch of uniqueness to your room. Control all functions effortlessly with the simple remote control. For added convenience, fix the remote on the wall with the included wall plate, effectively turning it into a wall switch. Experience perfect, quiet, and powerful airflow with the high-quality pure copper DC motor. Enjoy 6 wind speed settings, catering to your preferences for comfortable, natural, or strong winds. The reversible mode ensures year-round comfort. Illuminate your space with your preferred bulbs (4*E26 bulbs needed). Choose from recommended options like A19, ST19, or T14 incandescent bulbs (Max 60W) or LED bulbs (Max 10W) to match your style and habits. With a 2-year limited guarantee on other parts and a 5-year warranty on motors, LEDIARY offers peace of mind. Thorough testing is conducted on each product to guarantee optimal performance.

Pros

  • Striking unique caged design for added style.
  • Convenient remote control operation with wall plate.
  • Powerful and quiet pure copper DC motor.
  • Adaptable illumination with interchangeable bulbs.
  • Ample 2-year limited warranty and 5-year motor warranty.

Cons

  • Limited size (22 inches) may not suit larger rooms.
  • Bulbs not included, requiring separate purchase.

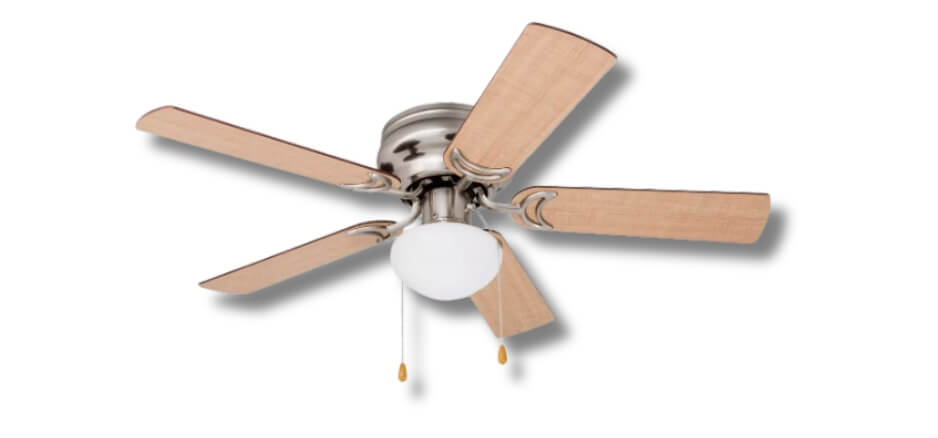
04: HUEOCZW 20″ Caged Ceiling Fan

The HUEOCZW Modern Caged Ceiling Fan will transform your room since it is the ideal balance of style and efficiency. Its matte white and gold finish, complemented by burnished blades, adds a touch of elegance to any room. With included bulbs, caged design, and a range of features, this ceiling fan is designed to enhance both style and comfort in your living spaces.

Features and Specifications:

The modern caged ceiling fan boasts a stylish design with a matte white and gold finish, creating a sophisticated look that complements any decor. The package includes 5 E26 light bulbs – 4 for installation and an extra one for replacement, ensuring hassle-free lighting for your space. Featuring burnished imitation wood blades, this fan offers 6 powerful wind speeds.A genuine wind sensation is provided by the reversible motor, which enables year-round use. The 360-degree safe metal frame and remote control enhance the functionality, while the 1-4 hours timing feature adds convenience, making it perfect for bedrooms. With most functional components pre-assembled, the low-profile ceiling fan is easy to install, allowing you to complete the setup in just a few minutes. For assistance, consult the installation manual and video. HUEOCZW Ceiling Fans Specialty Store provides prompt online support, answering any product-related questions within 24 hours. The group is committed to obtaining complete client satisfaction.

Pros

  • Elegant matte white and gold finish.
  • Inclusive package with 5 E26 light bulbs.
  • Caged design with burnished imitation wood blades.
  • Easy and quick installation process.
  • Responsive after-sale service for customer satisfaction.

Cons

  • Limited color options may not suit all decor styles.
  • The 22-inch size may be better suited for smaller rooms.

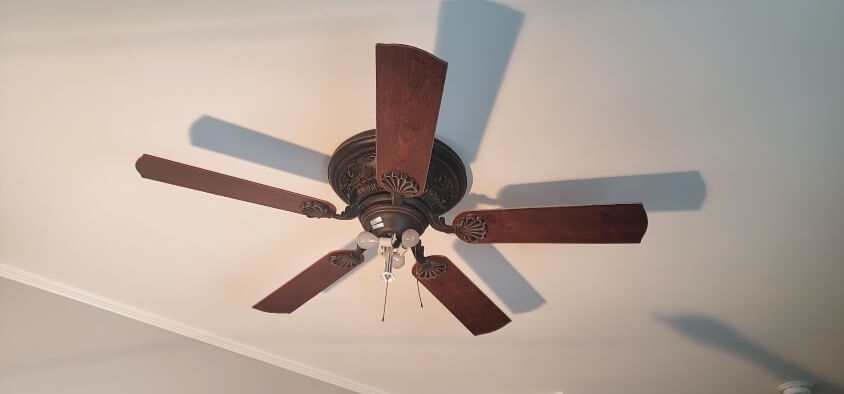
05: BOJUE 52″ Ceiling Fans

Experience convenience and innovation with the BOJUE Easy-to-Install Smart Ceiling Fan. This fan’s pre-assembled attachments make setup hassle-free and help you save money on installation. With adjustable down rods suitable for various ceiling heights and a range of smart features, this fan ensures both ease and functionality in your living space.

Features and Specifications:

Pre-assembled accessories streamline the installation process. Follow the instructions or request the installation video from BOJUE for a quick and straightforward setup, saving you time and installation expenses. Three sizes of down rods (5/10 inches) cater to different ceiling types, including high, low, and sloped ceilings. The recommended minimum ceiling height is 8ft, and the maximum angle for sloped ceilings is 15 degrees. Enjoy modern convenience with a remote control, TRI-COLOR light source, 6-speed wind settings, and timer function, allowing you to personalize your comfort and lighting preferences. Experience tranquility with the fan operating at 190r/Min on the highest speed, generating noise below 20 DB. Enjoy a peaceful atmosphere without disruptive fan sounds. BOJUE prioritizes user experience, offering excellent after-sales service. There is a 2-year warranty on the complete fan, and the motor is guaranteed for ten years. Within three years, BOJUE offers a free replacement service in the event that your remote control is misplaced or destroyed.

​​

Pros

  • Streamlined and easy installation process.
  • Versatile down rods for various ceiling types.
  • Smart features enhance user experience.
  • Whisper-quiet operation for a peaceful environment.
  • comprehensive warranty coverage and prompt customer support.

Cons

  • Not every choice may be accommodated by limited color or design selections.
  • Some users may prefer additional advanced smart features.
  • Remote control replacement service is limited to three years.

Factors to Consider When Choosing Ceiling Fans for a Beach House

When selecting the perfect ceiling fan for your beach house, various factors come into play to ensure both aesthetic appeal and optimal functionality. Let’s delve into these crucial considerations:

A. Style and Aesthetics

  • Coastal and Nautical Themes: Embrace the coastal charm by choosing ceiling fans that resonate with beach house aesthetics. Opt for designs featuring seashells, boat paddles, or marine-inspired patterns to evoke a relaxed and seaside atmosphere.
  • Materials and Finishes: Explore materials and finishes that withstand coastal conditions, such as salt air and humidity. Stainless steel, weather-resistant plastics, and finishes like rust-resistant coatings ensure longevity and preserve the fan’s aesthetic appeal.

B. Size and Blade Span

  • Determining the Ideal Size for Your Space: Tailor the fan size to your room’s dimensions. For spacious beach houses, consider larger blade spans to guarantee sufficient air circulation. On the other hand, compact designs work well in smaller rooms so as not to overtake the available area.
  • Considerations for High Ceilings vs. Low Ceilings: Adapt the fan’s downrod length based on ceiling height. High ceilings demand longer downrods to optimize airflow, while low ceilings benefit from flush or low-profile mounts to prevent safety hazards and ensure efficiency.

C. Performance and Efficiency

  • Airflow Efficiency and Energy Consumption: Prioritize fans with high airflow efficiency to ensure optimal cooling while minimizing energy consumption. To ensure that a model satisfies energy efficiency criteria, look for one with the ENERGY STAR designation.
  • Noise Levels: For a serene beach house ambiance, select fans with low noise levels. Consult product reviews and specifications to identify models that operate quietly, ensuring peaceful relaxation without disruptive fan noise.

D. Additional Features

  • Lighting Options: Elevate both style and functionality by choosing ceiling fans with integrated lighting options. Make sure the fixtures you choose will blend in with the overall design of your beach home and provide enough light for several uses.
  • Remote Control and Smart Home Integration: Enhance convenience with remote-controlled ceiling fans. Consider models with smart home integration, allowing you to adjust settings effortlessly through voice commands or mobile apps for the ultimate in modern comfort.
  • Reversible Motor for Year-Round Use: Maximize the versatility of your ceiling fan with a reversible motor. This feature ensures optimal comfort year-round by allowing you to change the direction of airflow, promoting both cooling and heating efficiency.

As you embark on the journey of selecting the ideal ceiling fan for your beach house, keeping these factors in mind will guide you toward a choice that seamlessly blends style and functionality, creating the perfect coastal retreat.

Installation and Maintenance Tips

Ensuring a seamless installation and effective maintenance routine for your beach house ceiling fan is paramount to its longevity and performance. Let’s delve into comprehensive guidelines to assist you through this process:

A. Hiring a Professional vs. DIY Installation

When it comes to installing your beach house ceiling fan, the decision between hiring a professional or opting for a DIY approach hinges on various factors:

  • Professional Installation:
  • If you’re unfamiliar with electrical work or lack the necessary tools, consider hiring a licensed electrician or experienced installer.
  • Professionals ensure proper wiring, secure mounting, and adherence to safety codes, minimizing the risk of accidents or damage.
  • While this option may incur additional costs, the expertise and assurance of a well-executed installation make it a worthwhile investment.
  • DIY Installation:
  • If you possess electrical installation knowledge and feel confident in your abilities, a DIY approach can be cost-effective.
  • Follow the manufacturer’s directions to the letter, making sure to use the right equipment for a secure and safe installation.
  • However, if uncertainties arise during the process, seeking professional assistance promptly is crucial to avoid potential hazards.

B. Proper Mounting and Location Considerations

The way you mount and position your ceiling fan significantly impacts its efficiency and aesthetic appeal:

  • Ceiling Height and Mounting:
  • Tailor the fan’s downrod length or mounting option based on your ceiling height for optimal airflow and safety.
  • Standard ceilings benefit from downrods or flush mounts, while higher ceilings may require longer downrods to ensure efficient air circulation.
  • Location Considerations:
  • Position your ceiling fan at the room’s center to achieve balanced airflow and enhance aesthetic harmony.
  • Account for factors like room size, furniture placement, and potential obstacles to determine the optimal fan location.

C. Maintenance Tips for Longevity and Performance

Regular maintenance practices are vital to preserving your ceiling fan’s performance over time:

  • Cleaning:
  • Regularly dust the fan blades and motor housing to prevent the accumulation of debris, ensuring optimal airflow.
  • Employ a soft cloth or a vacuum cleaner with a brush attachment to gently remove dust from hard-to-reach areas.
  • Lubrication:
  • Annually lubricate the motor bearings to minimize friction and promote smooth operation. For advice on suitable lubricants and application techniques, see the manufacturer’s instructions.
  • Check for Loose Connections:
  • Periodically inspect the fan’s electrical connections and mounting hardware to ensure they remain secure. For the purpose of avoiding instability or swaying, tighten any loose nuts or screws.

By diligently following these installation and maintenance tips, you contribute to the sustained efficiency and prolonged lifespan of your beach house ceiling fan. To get the most out of your investment in seaside comfort, put safety and thoroughness first whether you decide to hire a contractor or do it yourself.

Conclusion

Choosing the best ceiling fans for beach house is about more than just style; it’s about creating a comfortable oasis. From coastal-themed designs to efficient performance, the ideal fan enhances both aesthetics and functionality. Consider factors like size, materials, and additional features for a personalized touch. Whether you prioritize a whisper-quiet breeze, smart home integration, or a reversible motor for year-round use, the perfect ceiling fan can transform your beach retreat. Dive into a world of coastal comfort with our curated selection of top-notch fans, combining style and functionality to elevate your beach house living experience. Explore the best options and make every day a breeze in your coastal haven.

Frequently Asked Questions

Q1. What is the best ceiling fans for beach house?

Answer: The best beach house ceiling fans blend style, function, and durability. Opt for coastal-themed models resistant to salt air and humidity. Choose the right size with ideal blade span, consider extras like reversible motors and smart features for year-round comfort. Prioritize low-noise options for a peaceful vibe. Your perfect fan complements style, boosts comfort, and stands up to coastal conditions.

Q2. Are coastal-themed ceiling fans suitable for any beach house style?

Answer: Absolutely! Coastal-themed ceiling fans come in various designs, catering to diverse beach house aesthetics. Whether you prefer a nautical touch or a more modern coastal vibe, there’s a fan to complement your style.

Q3. What size ceiling fan is ideal for a beach house with high ceilings?

Answer: For high ceilings, opt for a fan with a longer downrod to ensure optimal air circulation. Consider models with adjustable downrods to customize the installation according to your beach house’s specific ceiling height.

Q4. Are beach house ceiling fans compatible with smart home systems?

Answer: Yes, many modern beach house ceiling fans come equipped with smart features and can be integrated into popular smart home systems. Enjoy the ease of using a voice command or a tap on your mobile device to change the lighting and fan settings.

Q5. Can I use a beach house ceiling fan on an outdoor patio or covered deck?

Answer: Of course! Seek out ceiling fans with weather-resistant materials and finishes that are specifically made for outdoor usage. These fans are ideal for covered outdoor spaces, adding both style and comfort to your beach house patio.

Q6. What maintenance tips can enhance the longevity of a beach house ceiling fan?

Answer: Regular cleaning, annual lubrication of motor bearings, and checking for loose connections are essential maintenance steps. Keep your beach house ceiling fan in top-notch condition by following these simple guidelines to ensure long-lasting performance and efficiency.

Best 84-Inch Ceiling Fan

Best 84-Inch Ceiling Fan

Welcome to the ultimate guide on finding the best 84-inch ceiling fan for your space! As you embark on your quest for the perfect cooling companion, we understand the importance of a fan that not only fits your room size but also adds a touch of style. In this comprehensive overview, we’ll dive into the key factors to consider, highlight the top features to look for, and present our carefully curated list of the finest 84-inch ceiling fans in the market. Whether you’re aiming for optimal airflow, energy efficiency, or a seamless blend of form and function, our guide is here to assist you in making an informed decision. Together, let’s investigate the world of superior 84-inch ceiling fans!

Our Top 5 Picks: Best 84-Inch Ceiling Fans on the Market

Product Name

Brand

Special Feature

Color

Price

ZMISHIBO 84 Inch Industrial DC Motor Ceiling Fan

ZMISHIBO

Remote Controlled, Timer, Reversible DC Motor

Black

Check Price


CJOY Large Ceiling Fan with Lights and Remote

CJOY

Energy Efficient, Adjustable Color Temperature, LED light with memory function, Timer, Remote Control

84 inch Black

Check Price


BiGizmos 84 Inch Industrial DC Motor Ceiling Fan

BiGizmos

Remote Control

Aluminum

Check Price


warmiplanet Ceiling Fan with Lights Remote Control

‎warmiplanet

Remote Control

‎84inch-Nickel

Check Price


ZMISHIBO 84 Inch Industrial DC Motor Ceiling Fan

ZMISHIBO

Remote Controlled, Timer, Reversible DC Motor

Brushed Nickel

Check Price


When it comes to choosing an 84-inch ceiling fan, the market offers a variety of options catering to different preferences. These three options offer a distinct combination of features, advantages, and disadvantages.

01: ZMISHIBO 84 Inch Industrial DC Motor Ceiling Fan

Transform your space with the powerful ZMISHIBO 84-inch Industrial Ceiling Fan, a perfect blend of durability and functionality. Engineered to meet diverse needs, this fan boasts robust aluminum blades, versatile applications, multiple downrod options, and a user-friendly remote control. With a comprehensive 3-year warranty and certifications, make a confident choice for all your cooling needs.

Features and Specifications:

Say goodbye to bending and deformation! The fan’s sturdy 84-inch aluminum blades ensure stable airflow, tackling any challenge with ease. Designed for widespread airflow, this industrial ceiling fan suits various settings – from residential spaces like living rooms and patios to commercial environments like restaurants and gyms. Tailor the fan to your ceiling height with three available downrod sizes (6 inches, 12 inches, and 24 inches) for a seamless and flawless installation. Savor the ease of use that comes with a feature-rich remote control. Effortlessly adjust the fan’s 6-speed settings, timer function, and motor reverse mode without leaving your comfort zone. Backed by a 3-year warranty and FCC, UL, and CE certifications, this outdoor ceiling fan ensures reliability and quality. Trust in your purchase, and if any questions arise, our dedicated after-sales service is ready to assist promptly.

Pros

  • Sturdy and durable aluminum construction
  • Versatile application for residential and commercial spaces
  • Three downrod options for customized installation
  • Convenient remote control with various settings
  • Three-year warranty with reliable certifications

Cons

  • Remote batteries not included
  • Limited color options

02: CJOY Large Ceiling Fan with Lights and Remote

Elevate your living space with the CJOY 84-inch Ceiling Fan – a perfect blend of modern design and cutting-edge technology. Featuring a pure copper DC motor, 9 aluminum blades, and multifunctional remote control, this fan offers silent operation, superior airflow, and convenient customization. With energy efficiency in mind, the CJOY ceiling fan promises a quiet and refreshing experience for spaces up to 500 sq.ft. Examine the characteristics that set it apart as a comfortable and stylish option.

Features and Specifications:

The fan boasts a fully enclosed pure copper DC motor, ensuring silent and stable operation, with up to 65% more energy efficiency than traditional AC motors. Unlike wooden counterparts, the 9 aluminum blades provide exceptional airflow, making this 84-inch fan ideal for large spaces such as living rooms, offices, corridors, and covered outdoor areas. Enjoy effortless control with the remote’s 6-speed wind adjustment, 3-color temperature LED light options, stepless dimming, and timing functions for personalized comfort. The integrated LED lighting module offers three color temperature options (3000K/4000K/6500K) with stepless dimming, contributing to energy savings and creating the perfect ambiance. Equipped with an ETL-listed Reversible DC motor, the fan operates quietly below 30 decibels, ensuring a peaceful environment. The reversible dual-direction fan enhances air circulation for year-round comfort.

Pros

  • Hassle-free installation with modular design
  • DC motor with low energy consumption to save money.
  • Versatile 6-speed wind adjustment
  • Multifunctional remote control for convenient operation
  • 3-year quality-related replacement or refund support

Cons

  • Random rotation during the initial 1-5 seconds is normal
  • DC motor requires blade installation for proper functioning

03: BiGizmos 84 Inch Industrial DC Motor Ceiling Fan

Welcome to the world of BiGizmos! Introducing our Industrial Ceiling Fan, a powerful cooling solution designed to enhance your space with an industrial edge. With its aluminum finish and remote control feature, this 84-inch marvel is perfect for both office and living room settings. Let’s dive into the features that make this fan a standout choice for those seeking style and functionality.

Features and Specifications:

Crafted with longevity in mind, the BiGizmos Industrial Ceiling Fan boasts a sturdy aluminum construction, ensuring both durability and a sleek aesthetic. With its corded electric operation, this fan offers a dependable and steady energy supply for effective, continuous cooling. Embrace the bold and modern industrial design, making a statement in any room. The 84-inch size ensures widespread airflow for optimal cooling. Enjoy the convenience of the included remote control, allowing you to effortlessly adjust settings from the comfort of your space. Designed for various settings, this fan is ideal for both offices and living rooms, providing a versatile cooling solution tailored to your needs.

Pros

  • Sturdy and durable aluminum construction
  • Remote control for convenient operation
  • Powerful and efficient cooling for large spaces
  • Industrial design adds a modern touch to any room
  • Versatile use in both office and living room settings

Cons

  • Limited color options (only available in aluminum)
  • May be larger than necessary for smaller rooms

04: warmiplanet Ceiling Fan with Lights Remote Control

With the warm planet ceiling fan, you may enjoy the ideal blend of design and practicality. This 84-inch indoor fan is not just about cooling – it’s a multifunctional addition to your space. With a dimmable LED light, reversible DC motor, and a convenient remote, this fan brings innovation to your fingertips. Let’s examine the qualities that set it apart for individuals looking for a well-balanced combination of comfort and style.

Features and Specifications:

Enjoy precise control with the multifunction remote, offering 6 speeds, 3 color temperature options, timer, reverse, and dimmer functions for a customized experience. Illuminate your space with the dimmable LED light, allowing you to adjust brightness using the remote. The powerful 24W light offers color temperature options of 3000K/4000K/6000K. Benefit from the energy-efficient and powerful reversible DC motor, ensuring optimal performance. Keep in mind that the aluminum fan blades need to be mounted in order for the fan to function properly. This indoor ceiling fan with light measures 84 x 84 x 20.9 inches, providing ample coverage for large spaces. The DC motor improves performance overall and energy economy. Enjoy peace of mind with a 10-year motor warranty and a 2-year warranty for the entire fan. Our attentive customer service guarantees to respond to your questions or problems within a day.

Pros

  • Versatile remote control with multiple functions
  • LED lamp with a dimmable function for flexible lighting.
  • Reversible DC motor for energy efficiency
  • Generous dimensions for effective cooling in large spaces
  • Long-term warranty for both motor and the entire fan

Cons

  • Limited color options for the fan blades
  • Remote batteries not included

05: ZMISHIBO 84 Inch Industrial DC Motor Ceiling Fan

Elevate your cooling experience with the ZMISHIBO 84-inch Industrial Ceiling Fan – a perfect blend of durability, versatility, and innovation. This outdoor fan is not just about size; it’s about delivering stable airflow in any environment. With reinforced aluminum blades, customizable downrod options, and a comprehensive remote control, ZMISHIBO ensures you’re in control of your comfort. Explore the features that make this industrial ceiling fan a standout choice for both residential and commercial spaces.

Features and Specifications:

Say goodbye to bending and deformation! ZMISHIBO’s 84-inch fan boasts sturdy aluminum blades, ensuring stable and reliable airflow in the face of any challenge. Embrace the sheer size of this industrial ceiling fan, designed for widespread airflow. Suitable for various settings, it caters to both residential spaces like living rooms and patios, and commercial environments such as restaurants and gyms. Tailor the fan to your ceiling height with three downrod sizes: 6 inches, 12 inches, and 24 inches. Choose the perfect length for your room to ensure a flawless and efficient installation. No need to leave your comfort zone! The fan’s remote control offers 6-speed settings, timer function, and motor reverse mode, providing effortless control at your fingertips for a personalized experience. Backed by a 3-year warranty and FCC, UL, and CE certifications, purchase this outdoor ceiling fan with assurance. In case of any questions or concerns, ZMISHIBO’s dedicated after-sales service is ready to assist promptly, ensuring your satisfaction is their commitment.

Pros

  • Sturdy and durable aluminum construction
  • Application that is adaptable for use in commercial and residential settings.
  • Three downrod options for customized installation
  • Comprehensive remote control for effortless operation
  • 3-year warranty with reliable certifications

Cons

  • Remote batteries not included
  • Limited color options

Factors to Consider When Choosing an 84-Inch Ceiling Fan

There are a few important elements to take into account when choosing the ideal 84-inch ceiling fan for your room. These factors not only influence the fan’s performance but also contribute to the overall comfort and aesthetic appeal of your room. Let’s examine the important factors that ought to influence your decision-making process:

A. Room Size and Ceiling Height:

To choose the location of the ceiling fan, first measure the area in the room. Selecting the appropriate fan size for a space depends in large part on its dimensions. For optimal performance, match the fan’s dimensions with the room size. Additionally, consider the height of the ceiling. as certain fans may require specific downrod lengths for efficient air circulation.

B. Blade Material and Design:

The choice of blade material significantly impacts both the fan’s durability and its effectiveness in circulating air. Consider opting for blades made of materials like aluminum, which offers a balance of strength and lightweight design. Additionally, assess the blade design, as this influences the fan’s airflow and overall aesthetic. Fan blades with thoughtful designs enhance the fan’s aesthetic appeal in addition to its functionality.

C. Motor Power and Efficiency:

The heart of any ceiling fan lies in its motor. Evaluate the power and efficiency of the motor, as these factors directly influence the fan’s performance. Even in bigger spaces, a sturdy motor guarantees steady and dependable airflow. Seek for energy-efficient motors to minimize your long-term energy costs and your influence on the environment.

D. Control Options: Remote, Wall Switch, or Pull Chain:

The convenience of controlling your ceiling fan cannot be overstated. Assess the available control options – whether it’s a remote control, wall switch, or traditional pull chain mechanism. Every option has a set of benefits, and the one you choose will rely on your preferences and desired level of accessibility. Remote controls, in particular, offer a hassle-free way to adjust fan settings from the comfort of your seat.

E. Energy Efficiency and Certifications:

In an era where sustainability is paramount, evaluating the energy efficiency of your 84-inch ceiling fan is crucial. Look for models with energy-efficient features and certifications from reputable organizations. Certifications such as FCC, UL, and CE not only validate the fan’s adherence to safety standards but also signify a commitment to quality and performance.

Installation and Maintenance Tips for 84-Inch Ceiling Fans

Installing and maintaining an 84-inch ceiling fan requires careful attention to detail to ensure optimal performance and longevity. From pre-installation considerations to regular maintenance routines, following these steps will help you enjoy the full benefits of your ceiling fan:

A. Pre-installation Considerations:

Give a few important factors some thought before beginning the installation process:

  • Make sure the fan’s weight can be supported by the ceiling. For heavier models, additional support may be necessary.
  • Measure the ceiling height to determine the appropriate downrod length for optimal airflow.
  • Check the electrical wiring and ensure that the junction box is securely mounted and compatible with the fan’s electrical requirements.
  • If installing the fan outdoors, verify that it is rated for outdoor use and suitable for the specific environmental conditions.

B. Step-by-Step Installation Guide:

Follow these steps for a seamless installation process:

  • Turn off the power supply to the ceiling fixture at the circuit breaker to ensure safety during installation.
  • Make sure the mounting bracket is firmly fastened by using the included screws to attach it to the ceiling junction box.
  • Connect the fan’s wiring to the corresponding wires in the junction box, following the manufacturer’s instructions carefully.
  • Using the included screws, raise the fan motor assembly and fasten it to the mounting bracket.
  • Make sure the fan blades are firmly fixed and uniformly spaced when you attach them to the motor assembly.
  • Make that the downrod is firmly fastened to the motor assembly after installing it, if appropriate.
  • Finally, install the fan canopy and any additional accessories, such as a light kit, following the manufacturer’s instructions.

C. Regular Maintenance Routines for Optimal Performance:

To maintain the efficiency and performance of your 84-inch ceiling fan, incorporate the following maintenance routines into your regular schedule:

  • To avoid accumulation and preserve ideal airflow, dust the fan blades on a regular basis.
  • For stability and safety, make sure all screws are snug and check for loose ones.
  • To lower friction and increase the motor’s lifespan, lubricate the fan motor bearings once a year.
  • To make sure the connections and wiring are safe and undamaged, periodically check them.
  • Clean or replace the fan’s air filters, if applicable, to maintain airflow and indoor air quality.

Conclusion

In conclusion, finding the best 84-inch ceiling fan is a breeze with the right blend of size, functionality, and style. Whether you’re looking to cool a spacious living room or enhance a commercial space, the key lies in considering factors like blade material, motor power, and control options. With a diverse range of options available, you’re sure to discover the perfect fit for your needs. Elevate your comfort and style with the top-notch 84-inch ceiling fans – your go-to solution for a refreshing and aesthetically pleasing environment. Browse through our recommendations and make a choice that brings both form and function to your living or working space.

Frequently Asked Questions

Q1. What is the best 84 inch ceiling fan?

Answer: Determining the absolute best 84-inch ceiling fan depends on individual preferences and needs. However, the ZMISHIBO Industrial Ceiling Fan is widely regarded for its robust construction, versatile features, and positive customer reviews, making it a strong contender in the category.

Q2. What room size is suitable for an 84-inch ceiling fan?

Answer: The best 84-inch ceiling fans are ideal for larger spaces such as expansive living rooms, offices, or commercial areas. Ensure optimal airflow by matching the fan size to the room dimensions.

Q3. Are 84-inch ceiling fans suitable for outdoor use?

Answer: Some models are designed for outdoor applications. Check product specifications and ensure the fan is rated for outdoor use if you plan to install it in covered outdoor spaces like patios.

Best Ceiling Fan for Nursery

Best Ceiling Fan for Nursery

Transforming your nursery into a haven of comfort and tranquility starts with choosing the best ceiling fan for nursery. Creating a gentle breeze while maintaining a whisper-quiet atmosphere, the right fan contributes to a soothing ambiance for your little one. We’ll go into the key elements and factors in this guide to assist you in making an informed choice and guaranteeing your nursery is both fashionable and tranquil. Say goodbye to stuffiness and hello to the perfect environment for your baby’s sweet dreams.

Top 5 Picks for Best Ceiling Fan For Nursery

Product Name

Brand

Special Feature

Color

Price 

CJOY Ceiling Fan with Lights Remote Control

CJOY

Energy Efficient, Adjustable Color Temperature, Dimmable, Timer

Elegant White

Check Price


TALOYA 52 inch Ceiling Fans

TALOYA

Remote Controlled, LED Light, Timer

Black

Check Price


Honeywell Ceiling Fans Ocean Breeze

‎Honeywell Ceiling Fans

‎LED Light, Adjustable Tilt

‎Bronze

Check Price


ocioc Quiet Ceiling Fan

ocioc

Remote Controlled, LED Light, Timer

Black

Check Price


Hunter Fan Company 51059 Indoor Low Profile IV Ceiling Fan

‎Hunter Fan Company

‎Pull Chain

‎White Finish

Check Price


Explore comfort and style with “Best Ceiling Fans For Nursery” Elevate your nursery with choices prioritizing safety, serenity, and sophistication. Join us as we unveil top-tier options, ensuring peace of mind and elegance for your baby’s haven. Say goodbye to compromise and embrace the perfect blend of form and function.

Fan 01 : CJOY Ceiling Fan with Lights Remote Control

Discover the practicality and versatility of the CJOY white ceiling fan, designed to optimize space while delivering powerful airflow. With its compact 30-inch diameter and multifunctional remote control, this ceiling fan is ideal for small spaces like bedrooms and study rooms. Enjoy the convenience of adjustable speed, color temperature, and dimming options, along with the ability to use it for both summer cooling and winter circulation. Easy to install and backed by reliable after-sales service, this ceiling fan offers a blend of functionality and style for any space.

Features and Specifications:

Measuring just 30 inches in diameter, the CJOY ceiling fan is compact and space-efficient, perfect for small rooms. The included remote offers a range of functions including speed adjustment, color temperature control, dimming options, and timing settings for added convenience. Equipped with a reversible AC motor, this ceiling fan can switch between downward airflow for summer cooling and upward airflow for winter circulation, promoting year-round comfort. The integrated LED lighting module offers three adjustable color temperatures (3000K/4000K/6500K) with stepless dimming technology, allowing for customizable lighting options. Modular design and detailed instructions make installation a breeze, saving time and installation costs.

Pros

  • Space-saving design ideal for small rooms
  • Comprehensive remote control for easy adjustments
  • Versatile use for both summer and winter
  • Adjustable LED lighting with memory function
  • Simple and cost-effective installation

Cons

  • Limited to smaller room sizes
  • Perhaps unsuitable for bigger living areas

Fan 02 : TALOYA 52 inch Ceiling Fans

With the TALOYA Multifunctional Quiet Fan, you may enjoy the ideal fusion of peace and utility. This ceiling fan, equipped with a remote control, offers a range of features, including 6 speeds, 3 timers, and reversible blades for year-round comfort. The three-color temperature settings and dimmable LED light kit provide customizable illumination, making it ideal for various settings. With easy installation and a silent DC motor, this fan ensures a peaceful environment for sleep, study, and work.

Features and Specifications:

This ceiling fan boasts 6 speeds, 3 timers, and a quiet DC motor, ensuring a tranquil atmosphere without disturbing sleep or study sessions. The reversible control function allows for a switch between summer and winter airflow, enhancing year-round comfort and energy efficiency. The LED light kit offers three color temperature settings with adjustable brightness, creating a bright yet soft illumination perfect for various activities. Easily adjust all settings from anywhere in the room using the included remote control, adding convenience to your user experience. Detailed instructions and installation videos simplify the installation process, allowing for easy setup by a single person and saving on installation costs.

Pros

  • Versatile with 6 speeds and 3 timers for personalized comfort.
  • Reversible blades for efficient summer and winter use.
  • Remote control enhances user convenience.
  • Easy installation with detailed instructions and videos.

Cons

  • Limited color options for the fan’s finish.
  • The light kit may not be replaceable.

Fan 03 : Honeywell Ceiling Fans Ocean Breeze

Stay cool and stylish with the Honeywell Ocean Breeze Ceiling Fan. Designed for smaller spaces like bedrooms and kitchens, this 30-inch indoor fan offers ultimate performance and airflow. With modern blades featuring a bold body and dual-finish wood options, it adds a touch of sophistication to any room. Enjoy the flexibility of dual-mount hanging options, and rest assured with its high-quality material and ETL listing for durability and safety. Embrace year-round comfort with the reversible fan function, making this ceiling fan a versatile and reliable addition to your home.

Features and Specifications:

Perfect for rooms up to 100 sq. ft This 30-inch indoor ceiling fan is tailored for smaller areas like bedrooms and kitchens. The Ocean Breeze 3-blade design ensures optimal airflow and circulation, enhancing comfort in your living spaces.

Dual-Mount Hanging Options: Choose between standard and angle options for versatile installation on both regular and vaulted ceilings. This ceiling fan satisfies ETL safety requirements and is built with a high-capacity motor that ensures strong airflow and silent operation for many years. Adapt to changing seasons with the reversible fan function, optimizing airflow for comfort in both summer and winter.

Pros

  • Ideal size for smaller rooms.
  • Modern and stylish design with dual-finish wood options.
  • Versatile dual-mount hanging options.
  • High-quality motor for powerful and quiet performance.
  • Reversible fan for year-round comfort.

Cons

  • Limited color options for the fan’s finish.
  • Downrod for vaulted ceilings sold separately.

Fan 04 : Ocioc Quiet Ceiling Fan

Experience a perfect blend of functionality and space-saving design with the 22-inch Ocioc Small Ceiling Fan. This little fan is perfect for small rooms since it produces an unexpectedly large amount of air. Equipped with a reversible motor for year-round use, a multifunctional remote for easy adjustments, and three color temperature options for soft and bright lighting, this fan ensures a customized and comfortable environment. With straightforward installation and high-quality materials, including ABS and stainless steel, it’s suitable for both indoor and outdoor use, offering durability and versatility for your space.

Features and Specifications:

With a compact 22-inch diameter, this small ceiling fan is space-saving yet efficient, moving a significant amount of air. The reversible control function allows for switching between summer and winter airflow, ensuring year-round comfort and heat distribution. Six wind speed settings, three timer options, and a quiet operation make this fan suitable for undisturbed sleep or focused learning. High-quality LED components and nano-frosted shades provide bright yet non-blinding light, with three color temperature options for various settings. Simple installation with detailed instructions and videos, offering a cost-effective method. The fan’s waterproof construction shields it from dust and rain both indoors and outdoors.

Pros

  • Compact design with surprising air volume.
  • Reversible motor for year-round use.
  • Multifunctional remote for easy adjustments.
  • Three color temperature options for customizable lighting.
  • Stainless steel and premium ABS construction for long-term durability.

Cons

  • Larger rooms might not be a good fit for limited diameter.
  • May not include additional downrods for various ceiling heights.
  • Limited color options for fan finish.

Fan 05 : Hunter Fan Company 51059 Indoor Low Profile IV Ceiling Fan

The Hunter Classic Ceiling Fan’s classic beauty will elevate your house. With its snow-white blades, this conventional fan elevates any home design. Measuring 44 x 44 x 8.8 inches, it combines style with functionality. With its multi-speed reversible Whisper Wind motor, you can choose between updraft and downdraft mode for the summer and winter, ensuring silent yet strong airflow. With convenient pull-chain control, this white ceiling fan offers easy on/off and speed adjustments for a seamless experience.

Features and Specifications:

The traditional ceiling fan features snow-white blades, enhancing the aesthetic appeal of your home interior. For seasonal comfort, the Whisper Wind motor’s silent operation and incredibly strong airflow let you to alternate between downdraft and updraft modes. With dimensions of 44 x 44 x 8.8 inches, this fan is designed to fit seamlessly into various room sizes. The handy pull chain makes it simple to switch the fan on or off and change its speed, making operation quick and simple. This fan adds comfort and flair to your house and is a flexible addition that is suitable for year-round usage.

Pros

  • Timeless and beautiful design.
  • Whisper Wind motor provides quiet, strong performance.
  • Multi-speed reversible motor for seasonal adaptability.
  • Compact size suitable for various room dimensions.
  • Convenient pull-chain control for easy operation.

Cons

  • May not include additional lighting options.
  • Limited color options for fan finish.

Key Considerations for Choosing the Best Ceiling Fan for Nurseries

Creating a serene and safe environment for nurseries requires careful consideration of various factors when selecting the ideal ceiling fan. These key considerations focus on safety features, appropriate size and design for nursery aesthetics, and managing noise levels and motor efficiency for a peaceful atmosphere.

A. Safety Features Tailored for Nurseries:

Prioritizing safety is crucial while selecting ceiling fans for nurseries. Look for fans with features specifically designed to address nursery safety concerns. These may include enclosed blades or blade guards to prevent accidental contact, ensuring the well-being of curious little ones. Additionally, certification from safety organizations can provide reassurance that the fan meets stringent safety standards.

B. Appropriate Size and Design for Nursery Aesthetics:

Enhancing the nursery’s overall beauty is mostly dependent on the size and style of the ceiling fan. Opt for a fan that complements the room’s decor while fitting appropriately within the available space. Consider the dimensions of the nursery and choose a fan size that provides optimal airflow without overwhelming the room. The fan’s design should align with the nursery’s theme, creating a harmonious and visually appealing environment for both parents and children.

C. Noise Levels and Motor Efficiency for a Peaceful Atmosphere:

Nurseries demand a tranquil atmosphere conducive to sleep and relaxation. Assess the noise levels of prospective ceiling fans, aiming for models with quiet operation to prevent disturbances during naptime. Additionally, prioritize fans with efficient motors that balance performance with energy conservation. Energy-efficient options not only contribute to a sustainable environment but also ensure a cost-effective solution for continuous use in the nursery.

Installation and Safety Tips for Nursery Ceiling Fans

Ensuring the proper installation and safe usage of a ceiling fan in a nursery is paramount for creating a secure and comfortable environment for infants and toddlers. The following guidelines offer insights into the installation process and essential safety precautions for child-friendly fan usage.

A. Proper Installation Guidelines for Nursery Ceiling Fans:

  • Secure Mounting: Begin by ensuring the ceiling fan is securely mounted. Use the appropriate mounting bracket and hardware, following the manufacturer’s instructions meticulously. A secure installation is foundational for the fan’s safe operation.
  • Balanced Blades: To remove any swaying or uneven spinning, examine and balance the fan blades. Blades that are balanced properly make operations go more smoothly and lower the possibility of problems.
  • Ideal Height: Position the fan at an optimal height to provide effective air circulation without compromising safety. The recommended distance between the fan blades and the floor is typically around 7 feet, ensuring both functionality and safety.
  • Safe Wiring Practices: You should think about hiring a professional electrician to do the wire installation if you are not experienced with electrical work. Ensure all electrical connections are secure and in compliance with local building codes.

B. Safety Precautions for Child-Friendly Fan Usage:

  • Blade Guards or Enclosures: Opt for ceiling fans equipped with blade guards or enclosures designed to prevent accidental contact with the rotating blades. This function provides an additional degree of security, particularly in locations where inquisitive kids may access.
  • Remote Control Accessibility: If you want easy operation, get a ceiling fan with a remote. It is important to keep the remote control securely out of the reach of little hands to avoid any unintentional modifications.
  • Secure Pull Chains: If the fan includes pull chains, ensure they are securely fastened and not hanging excessively low. Pull chains should be inaccessible to children, minimizing the risk of entanglement or pulling.
  • Regular Maintenance Checks: Maintain the fan at the recommended level by performing regular maintenance inspections. For safe operation, keep any loose screws tight, oil moving components as the manufacturer advises, and take quick action to resolve any problems.
  • Educate Caregivers: If the nursery is not solely under parental supervision, ensure that all caregivers are educated on the safe usage and operation of the ceiling fan. Share guidelines for proper control usage and potential safety concerns.

By adhering to these installation guidelines and safety precautions, parents can create a secure and comfortable nursery environment where the ceiling fan contributes to both airflow and peace of mind.

Conclusion

Selecting the ideal ceiling fan for a nursery is an important choice that extends beyond design. It’s all about giving your child a setting that is secure, calming, and cozy. Safety features, appropriate size, and design are paramount considerations, ensuring the fan complements the nursery’s ambiance while keeping your child secure. Opting for a fan with quiet operation and energy efficiency contributes to a peaceful atmosphere, promoting better sleep for both baby and parents. Make a mindful choice, and let the gentle breeze of the right ceiling fan enhance the tranquility of your nursery.

Frequently Asked Questions

Q1. What is the best ceiling fan for nursery?

Answer: The best ceiling fan for a nursery combines safety, functionality, and aesthetics. Look for one with enclosed blades or blade guards to ensure child safety. Optimal size, quiet operation, and an appealing design that complements the nursery’s theme are key factors. Consider fans specifically designed for nurseries, featuring child-friendly elements. Explore options with low noise levels for a peaceful environment, promoting better sleep for your little one.

Q2. What safety features should I look for in a nursery ceiling fan?

Answer: Look for fans with enclosed blades, blade guards, or blade enclosures to prevent accidental contact. Safety certifications provide added assurance of meeting stringent safety standards.

Q3. How do I determine the right size of a ceiling fan for my nursery?

Answer: Consider the nursery’s dimensions and choose a fan size that offers optimal airflow without overwhelming the space. Ensure a balance between functionality and fitting seamlessly into the room.

Q4. Are there ceiling fans specifically designed for nurseries?

Answer: Yes, some ceiling fans are designed with nurseries in mind, featuring child-friendly elements like blade guards, quiet operation, and appealing designs to enhance the nursery’s aesthetic.

Q5. What role does noise level play in selecting a nursery ceiling fan?

Answer: Low noise levels are crucial for maintaining a peaceful environment. Choose a fan with quiet operation to avoid disturbances during naptime and create a serene atmosphere for your baby.

Q6. Can I install a ceiling fan in a nursery if I lack electrical expertise?

Answer: While it’s recommended to hire a professional for electrical work, many fans come with user-friendly installation instructions. To guarantee a safe and correct installation, get advice from an electrician if you’re unsure.

Best Ceiling Fan for Garage

Best Ceiling Fan for Garage

Welcome to the ultimate guide on finding the best ceiling fan for garage – your go-to solution for optimal ventilation and comfort in your workspace. We will go through key elements and considerations in this comprehensive assessment to help you make an informed decision. Whether excellent ventilation, durability, or energy efficiency are what you’re searching for, we have it all.  Let’s dive into the world of garage ceiling fans, where functionality meets performance.

Top 5 Picks for Best Ceiling Fan for Garage

Product Name

Brand

Color

Material

Price

Warm planet Ceiling Fan

warmiplanet

62inch-Black

Wood, Metal

Check Price


BECLOG Ceiling Fan with Light

BECLOG

60" black

Plastic

Check Price


Wurzee 52'' Flush Mount Ceiling Fan

wurzee

Black

Wood, Metal

Check Price


Biukis Black 60-inch Modern Ceiling Fans with Lights

Biukis

Black

Plastic, Acrylonitrile Butadiene Styrene

Check Price


Ocioc 52 inch Ceiling Fans with Lights

ocioc

Black

Plastic, Metal

Check Price


Discovering the perfect ceiling fan for your garage? Let’s delve into our top picks, where each fan brings a unique blend of features. From impressive airflow to standout attributes, we’ll explore what makes these choices stand out. Join us in finding the best fit for your garage space.

01. Warm planet Ceiling Fan

Looking for the ideal ceiling fan to elevate your garage space? Look no further. Our Warmiplanet Ceiling Fan with Multifunction Remote and Dimmable LED Light offers a perfect blend of style and functionality. 

Features and Specifications: 

The included remote provides you with 6 speeds, 3 color temperature options, timer functionality, reverse mode, and a dimmer function for ultimate control. With a 24W dimmable LED light, you can light your room and change the brightness to suit your needs. 3000K, 4000K, and 6000K color temperatures are available for selection. Experience energy efficiency and power with the reversible DC motor. Note that proper installation of fan blades is essential for optimal performance. This indoor ceiling fan with light measures 62 x 62 x 20.87 inches, providing both style and substance to your living space. The DC motor ensures energy efficiency without compromising power. A 2-year guarantee for the entire fan and a 10-year warranty for the motor provide peace of mind. Our responsive customer service team ensures queries are addressed within 24 hours.

Pros

  • Versatile remote control with various functions.
  • Dimmable LED light enhances ambiance.
  • Reversible DC motor for energy efficiency.
  • Generous dimensions for effective room coverage.
  • Long-term warranty for both motor and the entire fan.

Cons

  • Installation requires proper attachment of fan blades.
  • Limited color temperature options for LED light.

02. BECLOG Ceiling Fan with Light

Upgrade your garage space with the BECLOG Modern Recessed Ceiling Fan with Light, a 60-inch marvel that seamlessly blends style and functionality. This ceiling fan is perfect for a variety of settings, from indoor spaces like bedrooms and living rooms to outdoor areas like garages and yards. With customizable features and a sleek design, it adds a touch of modern elegance to any decor.

Features and Specifications:

With a 60-inch size and dual-color reversible blades, this ceiling fan lets you choose the perfect look to complement your home decor. Illuminate your space with the adjustable LED light offering three color options: cool white, natural white, and warm white, catering to different lighting preferences. With the remote control in hand, you can choose from six different fan speed settings, set timers for one, two, or four hours, and transition between summer and winter modes. A comfortable atmosphere is created in any season thanks to the reversible DC motor, which guarantees effective airflow at a noise level of less than 35dB. Easy to install on a 15° sloped ceiling, this fan comes with a 5″/10″ down pole, along with all necessary hardware and instructions for a hassle-free setup.

Pros

  • Versatile dual-color reversible blades.
  • Adjustable LED light for varied lighting atmospheres.
  • Multi-function remote control for convenient operation.
  • Quiet operation with impressive airflow.
  • Easy installation with included hardware.

Cons

  • Not suitable for use in rainy or sunny environments.
  • Limited to a 15° sloped ceiling installation.

03. Wurzee 52” Flush Mount Ceiling Fan

The Wurzee Flush Mount Ceiling Fan will enhance your room since it is the ideal combination of contemporary style and practicality. This 52-inch low profile ceiling fan brings sophistication to any room with its sleek black metal motor housing, five wooden blades, and a flicker-free LED light encased in an acrylic cover. Explore the characteristics that set this fan apart and enter a world of comfort and style.

Features and Specifications:

The metal motor housing and black wooden blades create a contemporary, upscale look, enhancing the overall style of your room. The 52″ low profile ceiling fan with light offers three color options – cool white (6500K), natural white (4000K), and warm white (3000K), catering to various lighting preferences. Enjoy effortless control with the 6-speed remote, allowing you to adjust fan speeds and set a 1, 3, or 6-hour timer for the perfect cooling experience. Experience superb airflow with the quiet reversible motor, providing efficient cooling in summer and distributing warm air evenly in winter. Ideal for various spaces, this ceiling fan is perfect for bedrooms, patios, farmhouses, and more, providing not just cooling but also eye-catching style and classic lighting.

Pros

  • Striking modern design enhances room aesthetics.
  • LED lighting that is adaptable and has programmable color temperatures.
  • Convenient 6-speed remote control for easy operation.
  • A quiet atmosphere is guaranteed by quiet engine running.
  • Perfect for many indoor and outdoor settings.

Cons

  • Limited to a specific color scheme.
  • Demand may determine variations in availability

04. Biukis Black 60-inch Modern Ceiling Fans with Lights

Experience the Biukis 60-inch Moisture-Proof Outdoor Ceiling Fan, the ideal fusion of design and functionality. Designed for both indoor and covered patio use, this fan boasts a durable construction that not only withstands humid weather but also brings a touch of modern elegance to your living spaces. Let’s examine the characteristics that make this fan a fantastic addition to your house.

Features and Specifications:

Crafted with 3 pieces of ABS black plastic fan blades, this 60-inch outdoor ceiling fan can endure humid conditions, ensuring longevity and preventing deformation during rotation. Illuminate your space with the modern black ceiling fan featuring an acrylic shade. With its changeable LED light, you can create the ideal mood for any event with color temperatures ranging from warm white (3000K) to cool white (6000K) to natural light (4500K). Contribute to energy efficiency with the reversible DC motor, consuming 50% less energy than traditional AC motors. Enjoy a noise level below 35 decibels, making it an eco-friendly and quiet choice for your home. Take control with the remote, managing 6 fan speeds and setting a timer for 1, 2, or 4 hours. Ideal for various indoor settings, including farmhouses, bedrooms, living rooms, and more. This black ceiling fan, including 5″, 10″, and 24″ down rods, is easy to install and clean. Suitable for sloping ceilings up to 18°, it comes with a worry-free 12-month after-sales warranty, providing peace of mind and efficient customer service.

Pros

  • Moisture-proof construction for durability.
  • Adjustable LED light for versatile lighting.
  • Energy-efficient reversible DC motor.
  • Convenient remote control with multiple functions.
  • Easy installation and worry-free warranty.

Cons

  • Limited to an 18° sloping ceiling installation.
  • Availability may be subject to demand.

05. Ocioc 52 inch Ceiling Fans with Lights

Transform your space with the Ocioc Ceiling Fan with Lights, a modern marvel that combines style, functionality, and comfort. Designed to provide exceptional airflow and lighting, this fan is ideal for both indoor and covered areas. Let’s examine the characteristics that set this ceiling fan apart as a superior option for any space.

Features and Specifications:

This ceiling fan boasts a high-quality DC motor and 5-blade design, ensuring exceptional airflow and quiet operation. It effortlessly provides strong airflow for quick cooling, long-lasting comfort, and a sleek, contemporary appeal for any area. Enjoy year-round comfort with the reversible DC motor, allowing the fan to provide powerful downward airflow for effective room cooling in summer and reverse its rotation for upward airflow in winter, ensuring even distribution of warm air throughout the room. With multiple speeds and timer function choices, this flush mount ceiling fan offers precise control over cooling and lighting. Operating at less than 30 dB, it offers a quiet atmosphere for working, reading, or getting a good night’s sleep. Customization is simple with the remote control that is included. Choose from three color temperature options to accommodate various lighting preferences, while the memory function keeps your preferred lighting settings. Whether restoring the previous color temperature or your custom choice, the fan light adjusts automatically for personalized comfort. With a straightforward and useful overall design, installation is made simple and comes with comprehensive instructions. Take advantage of a lifetime motor warranty and a 5-year worry-free quality guarantee for extra piece of mind. Contact us with any questions.

Pros

  • Exceptional airflow and quiet operation.
  • Year-round comfort with reversible motors.
  • Precise control with remote and timer function.
  • Versatile lighting options with memory function.
  • Easy installation and generous warranty coverage.

Cons

  • Limited availability may vary.

Key Features to Consider for Best Ceiling Fan for Garage

Which ceiling fan is ideal for your garage? Here’s a quick guide to key features:

A. Size and Capacity

  • When selecting a ceiling fan for your garage, it’s crucial to match the fan size with the dimensions of the space. This ensures that the fan is not only proportionate to the area but also capable of providing effective ventilation throughout the entire garage.
  • Assessing the airflow capacity is equally important. Understanding the volume of air the fan can circulate per minute (CFM) ensures that the chosen fan is powerful enough to maintain proper air circulation, keeping the garage environment well-ventilated.

B. Mounting Options

  • Consider the mounting options available and choose between flush mount and downrod choices based on the specific design and layout of your garage. Flush mount fans are ideal for lower ceilings, while downrod options provide flexibility for spaces with varying ceiling heights.
  • Verify the compatibility of the selected fan with various ceiling heights. This is essential for a seamless installation process, ensuring that the fan is appropriately positioned to optimize air circulation in the garage.

C. Durability and Build Quality

  • Prioritize materials that guarantee longevity. Opting for a fan constructed with durable materials enhances the lifespan of the unit, providing a reliable and lasting solution for your garage.
  • Resistance to environmental elements is key in a garage setting. Choose a fan that can withstand potential challenges such as moisture, dust, and temperature fluctuations, ensuring it remains effective and operational over time.

D. Energy Efficiency

  • Look for energy-saving features in the ceiling fan. Opting for a fan with efficient motor technology and energy-saving capabilities helps reduce electricity consumption, contributing to both cost savings and environmental sustainability.
  • Consideration of Energy Star rated options is a wise choice. Energy Star certification indicates that the fan meets stringent energy efficiency standards, providing assurance that your chosen fan is both eco-friendly and cost-effective in the long run.

Tips for Ensuring Fan Longevity

To extend the lifespan of your ceiling fan and ensure consistent performance, consider these essential tips:

  • Regular Dusting: Dust accumulation on fan blades can affect efficiency. Periodically dust the blades using a soft cloth or a duster to keep the fan running smoothly.
  • Tighten Loose Components:  Inspect and secure any loose fasteners, nuts, or connections.
  •  Regular maintenance prevents unnecessary wobbling or noise during operation.
  • Balancing the Blades: Maintain balance by checking for any uneven blade alignment. Adjust the balance if needed to prevent excess wear on the motor and enhance performance.
  • Lubrication: Ensure the motor stays well-lubricated. To avoid wear and friction, schedule routine lubrication and consult the manufacturer’s instructions for suggested lubricants.
  • Secure Electrical Connections: Verify the connections and wiring to make sure they are secure. Loose or damaged wiring can impact the fan’s functionality and safety.

Cleaning and Troubleshooting Guidelines

Keeping your ceiling fan clean and addressing common issues is crucial for optimal performance. Follow these cleaning and troubleshooting guidelines:

  • Cleaning Fan Blades: Use a moist towel or a mild cleaning solution to give the blades a thorough cleaning. Take care that the motor doesn’t get overly wet.
  • Inspecting Light Fixtures: Regularly check and clean light fixtures. If the fan has a removable cover, remove it and clean both sides to maintain bright and clear lighting.
  • Checking for Wobbling: If the fan wobbles excessively, it may be a balance issue. Use a balancing kit or adjust the blade alignment to rectify the problem.
  • Addressing Unusual Noises: Unusual noises may indicate loose components or wear. Investigate the source of the sound, tighten any loose parts, and lubricate the motor as needed.
  • Consulting the User Manual: If you encounter persistent issues, refer to the user manual for specific troubleshooting steps. For more complicated issues, getting in touch with the manufacturer or an expert might be required.

Regular maintenance and prompt troubleshooting contribute to a well-functioning and durable ceiling fan, ensuring it continues to provide comfort and efficiency in your space.

Conclusion

In the quest for the best ceiling fan for your garage, prioritize a blend of size, efficiency, and durability. Choose a fan that matches your garage dimensions, offers optimal airflow, and boasts features like Energy Star certification for energy efficiency. A reliable maintenance routine ensures long-lasting performance, making your garage a comfortable and well-ventilated space. Make the appropriate decision, and you’ll be able to enjoy a welcoming and practical garage atmosphere.

Frequently Asked Questions

Q1. What is the best ceiling fan for a garage?

Answer: Consider features like longevity, efficiency, and utility when choosing the best garage ceiling fan. Opt for a fan that matches your garage size for optimal airflow and consider Energy Star-rated options for eco-friendly benefits. For long-lasting performance, look for a quiet DC motor, balanced blades, and robust materials. Prioritize maintenance-friendly features for hassle-free ownership. Choose wisely based on size, energy efficiency, and build quality.

Q2. What size ceiling fan is ideal for my garage?

Answer: Choosing the right size is crucial. Measure your garage dimensions and select a fan that complements the space. This guarantees effective airflow and ideal ventilation.

Q3. Are Energy Star-rated ceiling fans worth considering?

Answer: Absolutely. Energy Star-rated fans are energy-efficient, reducing electricity consumption and lowering your utility bills. Look for this certification for a more eco-friendly and cost-effective option.

Q4. How do I maintain my garage ceiling fan for longevity?

Answer: Regular dusting, tightening loose components, and proper lubrication are key. Follow a maintenance routine outlined in the user manual to ensure your fan lasts longer and operates smoothly.

Q5. Can I install a ceiling fan in a garage with a sloped ceiling?

Answer: Yes, you can. Ensure the fan you choose is compatible with sloped ceilings and comes with the necessary mounting options. This provides flexibility for installation in various garage layouts.

Q6. What features contribute to a quiet garage ceiling fan?

Answer: A quiet DC motor, balanced blades, and quality construction materials all contribute to a noise-free operation. Look for these features to create a peaceful environment in your garage while staying cool.

How to Remove a Hampton Bay Ceiling Fan: 7 Easy Steps

How to Remove a Hampton Bay Ceiling Fan: 7 Easy Steps

Welcome to our guide on how to remove a Hampton Bay ceiling fan – your go-to resource for a hassle-free disassembly process. Whether you’re upgrading to a new model or tackling maintenance tasks, understanding how to safely remove your Hampton Bay ceiling fan is essential. In this step-by-step walkthrough, we’ll cover everything you need to know, ensuring you can accomplish the task efficiently and confidently. Let’s dive in and make the removal process a breeze!

Tools and Materials

When gearing up for the task of removing your Hampton Bay ceiling fan, it’s crucial to have the right set of tools and materials at your disposal. This ensures a smooth and efficient disassembly process, making your job much easier. The equipment and supplies you’ll need are listed in full below.

A. List of Necessary Tools for the Removal Process:

Before embarking on the how to remove a Hampton Bay ceiling fan, it’s crucial to gather the right tools to ensure a smooth and efficient disassembly process. A detailed inventory of the equipment required is provided here.

  • Screwdriver Set: A collection of screwdrivers with different head styles (flathead, Phillips, etc.) to suit the range of fasteners and fasteners used in the fan assembly.
  • Pliers: Both needle-nose and regular pliers can be handy for gripping and manipulating small parts during the removal process.
  • Wire Strippers/Cutters: Necessary for safely disconnecting electrical wiring from the fan.
  • Voltage Tester: Essential for confirming that the power supply to the fan has been properly turned off before beginning the removal process.
  • Ladder or Step Stool: To access the fan, you’ll need to use a strong ladder or step stool, depending on how high your ceiling is.
  • Work Gloves: Keep your hands clean and away from sharp objects during disassembling.
  • Safety Glasses: During overhead work, protect your eyes from dust and debris..
  • Allen Wrench Set: Having a set of Allen wrenches in different sizes might be helpful because certain Hampton Bay ceiling fans may require Allen screws.
  • Adjustable Wrench: Great for adjusting the tightness and looseness of nuts and bolts, especially those holding the fan blades in place.
  • Non-contact Voltage Detector: This device is a helpful replacement for a voltage tester since it can detect the presence of electrical current without coming into contact with anything.
  • Tape Measure: Helpful for measuring distances and ensuring proper alignment during reinstallation or replacement.
  • Container for Small Parts: Keep track of screws, nuts, and other small components by storing them in a container or bag to prevent loss.

B. Required Materials for a Smooth Disassembly

In addition to the necessary tools, you’ll also need a few materials to aid in the disassembly of your Hampton Bay ceiling fan. Here’s what you’ll need:

  • Drop Cloth or Tarp: Lay down a protective covering beneath the fan to catch any debris or falling parts during disassembly.
  • Electrical Tape: To secure disconnected wires and keep them from touching other metal surfaces or one another, use electrical tape.
  • Zip Ties: Use zip ties to bundle cables together to keep them neat and safe.
  • Pen and Paper or Smartphone: Take notes or photos of the wiring connections and assembly process to aid in reinstallation or troubleshooting.
  • Cleaning Supplies: Prepare cleaning supplies such as a dust cloth, mild detergent, and a vacuum cleaner to clean the fan components during disassembly, if necessary.

Safety Precautions for How to Remove a Hampton Bay Ceiling Fan

How to Remove a Hampton Bay Ceiling Fan

Undertaking the task of replacing a pull chain on your ceiling fan involves not only technical know-how but also a commitment to safety. Prioritizing safety precautions ensures a secure environment for both you and your home. Before beginning the replacement procedure, take into account the following important safety precautions: 

A. The Significance of Disabling Power.

  • Electrical Hazards: The ceiling fan is directly connected to your home’s electrical system, presenting a potential risk of electric shock during maintenance. Find the circuit breaker or fuse box and switch off the ceiling fan’s power source before starting any repair.
  • Preventing Accidents: Deactivating the power eliminates the risk of accidental activation during the replacement process. This precaution is crucial for your safety and the integrity of the fan’s electrical components.
  • Verify Power Deactivation: To make sure the electricity is truly disconnected after turning off the power, use a voltage tester.
  •  This extra step adds an additional layer of safety, ensuring a secure working environment.

B. Using Appropriate Safety Gear

  • Wear safety glasses or goggles as protective eyewear to protect your eyes from dust, debris, and other potentially dangerous particles that might be knocked out during the replacement.
  • Gloves: Utilize work gloves to protect your hands from sharp edges, fasteners, or any abrasive surfaces. Wearing gloves when handling tools improves your grip and adds an extra degree of safety.
  • Appropriate Attire: Wear clothing that covers your body to prevent exposure to any dust or materials that may be present in the ceiling fan housing. This helps minimize skin contact with potential irritants.

C. Ensuring a Stable Ladder or Platform

  • Proper Ladder Selection: If using a ladder, ensure it is the appropriate height for the task and is in good condition. A flat surface is best for placing a ladder with non-slip feet.
  • Level and Stable Platform: Whether using a ladder or platform, make sure it is level and securely positioned. Avoid placing the ladder on slick or uneven surfaces to prevent accidents.
  • Weight Capacity: Verify that the platform or ladder can support your body weight plus any extra tools or equipment you might be carrying.
  • Avoid Overreaching: Position the ladder or platform so that you can reach all areas comfortably without overstretching. Overreaching can compromise your balance and lead to accidents.

Step-by-Step Guide

How to Remove a Hampton Bay Ceiling Fan

  Undertaking the replacement of a pull chain on your ceiling fan requires a systematic approach to ensure a smooth and secure process. You may confidently move through each step by following this detailed step-by-step guide: 

A. Turning the power source off.

  • Track down the fuse box or circuit breaker: To commence, locate the electrical panel in your residence that houses the fuses or circuit breakers.A utility room, cellar, or garage are the usual locations for this panel.
  • Turn off the Power: After locating the electrical panel, identify the fuse or circuit breaker that specifically matches the ceiling fan. Either remove the fan’s fuse or turn off the circuit breaker.By efficiently cutting off the fan’s power source, this step reduces the possibility of an electrical mishap occurring while replacing the pull chain.
  • Check for Successful Power Deactivation: As an extra safety measure, make sure the ceiling fan’s power is indeed off by using a voltage tester.A portable gadget called a voltage tester can identify whether electrical voltage is present or not. By verifying power deactivation, you ensure a safe working environment for yourself and prevent the risk of electrical shocks.

B. Identifying and Documenting the Wiring

  • Take Photographs: Begin by capturing clear photographs of the existing wiring configuration before proceeding with any disassembly. Make sure the pictures show the electrical connections from various perspectives and are well-lit. These photographs will serve as valuable visual references, offering a detailed overview of the original setup.
  • Label Wires: Whenever possible, take the time to label each wire using masking tape and a marker. This easy-to-follow but useful step helps to arrange the dismantled parts. Assign clear labels to each wire, indicating its specific role or connection point. For instance, you might label wires as “fan,” “light,” or “neutral.” This labeling system significantly facilitates the identification of correct connections during the reinstallation phase.

C. Removing the Blades

  • Use a Screwdriver: Begin by identifying the screws securing each fan blade to the blade iron. Typically, these screws are located near the base of each blade. Select an appropriate screwdriver based on the screw type to ensure a secure grip and prevent any potential damage.
  • Locate and Remove Screws: Carefully locate and inspect the screws that hold each fan blade in place. You could need more than one screw for every blade on your ceiling fan, depending on the type. Use the screwdriver to systematically remove these screws, exercising caution to avoid stripping the screw heads or causing any damage to the blade iron.
  • Carefully Remove the Blades: After removing the screws, carefully take out each fan blade from the blade iron.Take note of the orientation of each blade to ensure proper reattachment later in the process. Take extra caution when handling the removed blades to avoid any warping or bending.
  • Secure Screws for Safekeeping: To stay organized, place the removed screws in a container for safekeeping. This precautionary measure ensures that you won’t misplace essential components during the pull chain replacement process. A small container or bag designated for the screws keeps everything in one place for easy retrieval.

D. Detaching the Light Fixture (if applicable)

  • Remove Light Bulbs: Begin by unscrewing and removing any light bulbs associated with your ceiling fan’s light fixture. Safely set the light bulbs aside for later reinstallation. This initial step provides clear access to the light fixture components.
  • Remove Light Fixture: Proceed to carefully unscrew any screws holding the light fixture to the fan using a screwdriver. Depending on the model of your ceiling fan, these screws may be placed differently, but generally speaking, they are found on the bottom or around the edges of the light fixture.
  • Detach the Light Fixture: With the screws removed, gently detach the light fixture from the ceiling fan. Exercise caution to prevent any undue stress on the electrical wires connected to the fixture. Keep in mind that some fixtures may have additional securing mechanisms, so observe and identify these as you proceed.

E. Uninstalling the Mounting Bracket

  • Locate Mounting Bracket Screws: Begin by identifying the screws that secure the mounting bracket to the ceiling. These screws are usually positioned around the canopy cover, providing stability to the ceiling fan assembly. Take note of their placement for efficient reinstallation later.
  • Use a Screwdriver: Armed with this knowledge, employ a suitable screwdriver to carefully unscrew and remove the mounting bracket from the ceiling. To avoid any unintentional falls at this phase, make sure you keep a firm grasp on the bracket. The mounting bracket serves as a crucial support structure, so handle it with care.

F. Disconnecting the Wiring

  • Examine Wire Connections: Begin by carefully inspecting the wire connections located within the fan’s canopy. This is the central hub where various wires converge, including those associated with the pull chain mechanism. Take a moment to clearly identify these wires visually, making sure you know how they are arranged.
  • Use Wire Nuts: Once you’ve identified the wires connected to the pull chain, proceed to the next phase by dealing with the wire nuts. These wire nuts guarantee a strong electrical connection while securely fastening the fan’s wires. To disconnect the wires, use a suitable tool to loosen the wire nuts. Untwist the wire nuts carefully, separating the wires cleanly.

G. Safely Lowering the Fan from the Ceiling

  • Enlist Assistance: If possible, seek the assistance of a helper to provide support for the weight of the fan. Having an extra set of hands ensures that you can focus on the intricate details of the pull chain replacement without the added strain of managing the fan’s weight.
  • Lower the Fan: With your helper in place, begin the process of gradually lowering the fan from its position on the ceiling. Keep a watchful eye on the fan’s wires to make sure they stay free and unobstructed during the descent. Take extreme care to avoid making any abrupt moves that can endanger people or harm property.

Troubleshooting Tips

How to Remove a Hampton Bay Ceiling Fan

Even with meticulous planning, there could be difficulties when replacing the pull chain on your ceiling fan during the removal stage. Don’t be disheartened – addressing these common issues requires patience and the right approach. Here are valuable troubleshooting tips to overcome hurdles during the removal process:

A. Dealing with Stubborn Screws or Bolts

  • Apply Penetrating Oil: For screws or bolts that resist turning, applying a penetrating oil, such as WD-40, can help loosen the grip. Before attempting to turn the fastener again, let the oil seep through for a few minutes.
  • Use the Correct Tool: Make sure the screwdriver or wrench you’re using is appropriate for the task at hand. Incompatible tools have the potential to peel screw heads or break bolts, making their removal more difficult.
  • Apply Heat: In cases of extreme resistance, gently heat the stubborn screw or bolt with a hairdryer or heat gun. Thermal expansion may aid in loosening the metal threads.

B. Addressing Stuck or Jammed Components

  • Gentle Tapping: If a component is stuck, use a soft mallet or the handle of a screwdriver to gently tap around the edges. This might aid in releasing any rust or adhesive binds.
  • Lubricate Moving Parts: A tiny bit of lubrication could be helpful for parts that slide or rotate. To facilitate motion and lessen friction, lubricate with a silicone-based product.
  • Check for Hidden Fasteners: Inspect the fan thoroughly for hidden screws or bolts that may be securing stuck components. Sometimes, these fasteners are not immediately visible.

C. Common Challenges During Removal

  • Rusty Fasteners: If fasteners show signs of rust, the rust may need to be removed before attempting removal. To gently remove rust, use steel wool or a wire brush.
  • Ceiling Texture Issues: In some cases, ceiling textures may conceal fasteners. Use a utility knife or paint scraper to carefully cut or scrape away any texture around the canopy cover or mounting bracket.
  • Stuck Canopy Cover: If the canopy cover is stuck, check for screws or bolts securing it to the mounting bracket. Loosen these fasteners before attempting to remove the canopy cover.
  • Wire Tangles: During removal, be mindful of entangled wires. Gently untangle any wires to ensure a smooth and safe disconnection.

Maintenance and Storage

How to Remove a Hampton Bay Ceiling Fan

As you successfully complete the pull chain replacement on your ceiling fan, ensuring proper maintenance and storage is essential to preserve its longevity and functionality for future use. To maintain your fan at its best when not in use, adhere to these detailed steps:

A. Cleaning Components Before Storage

  • Dust Removal: Thoroughly clean the fan blades, motor housing, and other components using a soft, lint-free cloth or a duster. Remove accumulated dust to prevent it from settling and hardening during storage.
  • Gentle Cleaning Solutions: Wet the cloth with a solution of water and mild soap to remove tough dirt or stains.Because abrasive cleansers might damage the finish, they should not be used to clean fans.
  • Cleaning the Pull Chain: Pay special attention to the newly replaced pull chain. Gently wipe it with a clean, slightly damp cloth to ensure it remains free from dust or any residue.
  • Inspect for Wear: While cleaning, inspect the fan components for any signs of wear, loose screws, or other issues. To stop additional harm, take immediate action to address any issues.

B. Properly Storing the Fan for Future Use

  • Secure Packaging: If you have retained the fan’s original packaging, consider placing it back into the box. If not, use a large, sturdy box with ample padding to protect the fan from potential damage.
  • Labeling Parts: Before disassembling further for storage, label any small parts, screws, or components that were removed during the pull chain replacement. This aids in reassembly when the fan is put back into use.
  • Store in a Dry Location: Choose a dry storage location to prevent moisture accumulation, which could lead to rust or corrosion. Avoid areas with extreme temperature fluctuations.
  • Avoid Direct Sunlight: If possible, store the fan away from direct sunlight. Certain materials may get damaged or discolored after prolonged exposure to sunlight.
  • Protect Against Pests: Consider placing the fan in a sealed plastic bag or covering it with a cloth to protect against dust, insects, or other potential pests.
  • Store in Upright Position: If storing the fan in a horizontal position, ensure it is well-supported to prevent warping of blades. Ideally, store it in an upright position.
  • Secure the Pull Chain: If the pull chain is removable, consider securing it in a small plastic bag and attaching it to the fan or packaging to prevent it from getting lost.

Conclusion

In conclusion, how to remove a Hampton Bay ceiling fan is a straightforward process that enhances accessibility for maintenance or upgrades. You can safely disassemble your fan, take care of specific problems, or start a replacement project by carefully following the instructions provided in this article. Remember to prioritize safety, document wiring configurations, and troubleshoot common challenges as needed. Whether you’re preparing for a new fan installation or storing the current one, these steps ensure a smooth and efficient experience. Embrace the DIY spirit, and with a little effort, you’ll have your Hampton Bay ceiling fan in optimal condition or ready for an exciting upgrade.

Frequently Asked Questions

Q1. How to remove a Hampton bay ceiling fan perfectly?

Answer: Turn off the power at the circuit breaker to begin a seamless Hampton Bay ceiling fan removal. Use a ladder to reach the fan, unscrew and label the blades, and remove any light fixtures. Detach the canopy cover to reveal the mounting bracket. Safely disconnect and document the wiring. Gently lower the fan once it’s free. Our step-by-step guide ensures an easy process, perfect for maintenance, upgrades, or replacements.

Q2. Are special tools required for removing a Hampton Bay ceiling fan?

Answer: Not necessarily. Usually , a screwdriver, pliers, and maybe a ladder are enough for basic tools. Our guide outlines the tools needed and offers tips on using them effectively.

Q3. How long does it take to remove a Hampton Bay ceiling fan?

Answer: The removal process can typically be completed in under an hour, depending on your familiarity with the fan and any unforeseen challenges. Our guide provides a clear timeline to help you plan accordingly.

Q4. Is it necessary to turn off the power before removing the fan?

Answer: Sure, it’s really important for security. We strongly recommend turning off the power to the fan at the circuit breaker before starting the removal process. Safety precautions are a top priority in our guide.

Q5. Can I reinstall the same Hampton Bay fan after removal?

Answer: Certainly! If you’re upgrading or performing maintenance, our guide helps you preserve the fan for future use. Proper storage and documentation ensure a smooth reinstallation process when you’re ready.

How to Remove Fan Blades from Hunter Ceiling Fan: Easy 7 Steps

How to Remove Fan Blades from Hunter Ceiling Fan: Easy 7 Steps

Welcome to a quick and efficient guide on how to remove fan blades from Hunter ceiling fan. Whether you’re looking to replace a worn-out blade, upgrade to a new style, or simply perform maintenance, knowing how to safely remove the blades is essential. We’ll guide you through the procedure in this step-by-step guide, so you can add to the Hunter ceiling fan’s usefulness and style without any trouble at all. Let’s dive into the details to make the blade removal from your Hunter ceiling fan a breeze.

Tools and Materials

When embarking on the task of how to remove fan blades from Hunter ceiling fan, having the right tools and materials at your disposal is crucial for a smooth and efficient process.

A. List of Required Tools for the Task:

  • Screwdriver: A standard screwdriver, preferably with multiple interchangeable heads, will be essential for unscrewing the blades from the fan.
  • Ladder or Platform: Ensure you have a stable and secure ladder or platform to safely access the fan. Throughout the entire procedure, safety needs to come first.
  • Labels and Marker: Having labels and a marker on hand will assist you in properly labeling each blade as you remove them. Afterwards, this step is essential for reassembly.
  • Safety Gear: To safeguard yourself from any potential risks, think about using protective gear like gloves and safety glasses.

B. Additional Materials that May Be Helpful:

  • Flashlight: A flashlight can be handy for providing additional illumination, especially if you are working in a dimly lit area.
  • Zip Ties or Twist Ties: Use these to secure the fan blades after removal, keeping them organized and preventing any accidental damage.
  • Container or Bag: Having a container or bag nearby to collect and store screws and small parts ensures that nothing gets misplaced during the process.
  • Tape Measure: If you need to take precise measures or want to change the blades, a tape measure could be helpful in guaranteeing accuracy.

Having these supplies and tools ready in advance will help ensure that the fan blade removal procedure goes well. With this extensive list, you can be sure you have everything you need to do the work confidently and effectively.

Turning Off Power

How to Remove Fan Blades from Hunter Ceiling Fan

Before you embark on the process of how to remove fan blades from Hunter ceiling fan, it’s paramount to prioritize safety by disconnecting the power. This crucial step ensures a secure environment for you to work in and minimizes the risk of accidents.

A. Importance of Disconnecting Power for Safety:

The fan blades are connected to the motor, and even though the task seems straightforward, safety should always be the top concern. You can prevent electrical shocks and other possible risks during the removal procedure by turning off the power. Remember that a Hunter ceiling fan may have both a light fixture and the fan itself, so cutting off power is a comprehensive safety measure.

B. Identifying the Correct Circuit Breaker or Switch:

Locating the correct circuit breaker or switch is essential for a complete power cutoff. Head to your electrical panel and systematically identify the breaker associated with the Hunter ceiling fan. If your fan is connected to a switch, turn it off as well. Try turning on the fan and lights to make sure the power is switched off. Taking these precautionary steps ensures a secure working environment and sets the stage for a successful and incident-free fan blade removal process.

Accessing the Fan

As you move forward with the fan blade removal from your Hunter ceiling fan, accessing the fan safely is a pivotal aspect of the entire process. Ensuring that you have a stable working platform and a clear environment not only facilitates the task but also contributes significantly to your overall safety.

A. Using a Stable Ladder or Platform:

Begin by selecting a ladder or platform that is stable and appropriate for the height required to reach the fan. To avoid instability or swaying, make sure the ladder is placed on a level, level surface. If the ceiling is exceptionally high, consider using a stable platform or an extension ladder designed for such tasks. Climbing cautiously and securing the ladder or platform in place guarantees a safe and confident approach to the fan.

B. Ensuring a Clear and Safe Working Environment:

Before ascending the ladder or platform, take a moment to survey the working environment around the Hunter ceiling fan. Remove any tripping risks or impediments from the area. Ensure that the space directly beneath the fan is free of furniture or any items that could impede your movement. By taking this precaution, you not only lower the chance of an accident but also improve your mobility while concentrating on removing the fan blades.

By conscientiously using a stable ladder or platform and establishing a clutter-free working environment, you lay the groundwork for a secure and efficient process. This attention to detail enhances not only your safety but also the overall effectiveness of how to remove fan blades from Hunter ceiling fan.

Unscrewing the Blades

How to Remove Fan Blades from Hunter Ceiling Fan

Now that you have securely accessed the Hunter ceiling fan, the next critical step in the fan blade removal process involves unscrewing the blades. This step demands precision and the right tools to ensure a smooth and efficient removal without causing damage to any components.

A. Identifying the Screws Holding the Blades:

Begin by closely inspecting each fan blade and locating the screws that secure them to the fan motor. In most Hunter ceiling fans, you’ll find screws positioned at the mounting brackets where the blades attach to the motor. A blade may have more than one screw, depending on the model. Take your time to identify and mentally note the location of each screw before proceeding, as this will streamline the removal process.

B. Using the Appropriate Screwdriver for Removal:

Equipped with the knowledge of screw locations, select the appropriate screwdriver for the task. The size and type of screws may vary, so having a versatile screwdriver with interchangeable heads ensures you have the right fit for each screw. Apply consistent but gentle pressure to avoid stripping the screws. Turning counterclockwise, carefully unscrew each one, keeping a firm grip on the blade to prevent it from falling once fully detached.

By meticulously identifying and unscrewing the blades with the right tool, you not only safeguard the integrity of the components but also pave the way for a hassle-free removal process. This attention to detail ensures that the fan blades are released smoothly, setting the stage for potential replacements or maintenance with confidence.

Labeling for Reassembly

The reassembly step is something you should always consider when you start to remove the fan blades from your Hunter ceiling fan. Properly labeling each blade is not just a convenience; it’s a crucial step in ensuring a seamless and error-free reconstruction of your fan.

A. Importance of Labeling Each Blade for Proper Reassembly:

Labeling each fan blade serves as a roadmap for the reassembly process, particularly if the blades are not identical or if they have specific orientations. By assigning a label or number to each blade, you create a clear reference point for alignment with the corresponding bracket on the fan motor. This meticulous approach eliminates guesswork and reduces the likelihood of errors during reinstallation, ultimately saving time and ensuring the fan operates optimally.

Tips for Organizing and Marking Blades:

  • Use Removable Labels: Employ removable labels or masking tape on each blade, allowing for easy removal without leaving residue.
  • Number or Alphabetize: Assign a unique number or alphabet to each blade and its corresponding bracket. This simple system streamlines the reassembly process.
  • Document Blade Orientation: If your blades have specific orientations or patterns, consider drawing a quick diagram or taking a photo to document their arrangement.
  • Keep Screws Together: Place screws from each blade in a labeled bag or container, ensuring that you can match the right screws with the correct blade during reassembly.

Taking the time to label and organize the fan blades not only enhances the efficiency of the removal process but also ensures that the reassembly is a stress-free and accurate endeavor. The foundation for a properly restored Hunter ceiling fan is laid by this careful preparation.

Removing Additional Attachments

How to Remove Fan Blades from Hunter Ceiling Fan

As you delve into the fan blade removal process from your Hunter ceiling fan, it’s essential to pay attention to any additional features or accessories that may be integrated into the fan assembly. Addressing these components ensures a comprehensive removal and allows for flexibility in making replacements or upgrades.

A. Addressing Any Additional Features Like Light Fixtures or Accessories:

Some Hunter ceiling fans come equipped with additional features such as light fixtures, decorative elements, or other accessories. Before proceeding with blade removal, take a moment to identify and address these supplementary components. If your fan includes a light fixture, consider disconnecting it or removing any shades or bulbs to streamline the blade removal process. This step ensures that each element is individually addressed and can be reinstalled or replaced according to your preferences.

B. Detaching Components for a Thorough Removal Process:

To guarantee a thorough removal process, carefully detach any additional components that may interfere with accessing the fan blades. This might include taking out ornamental covers, unplugging wires, or unscrewing fasteners. By taking a systematic approach to each attachment, you not only ensure the integrity of these components but also create a clean slate for the fan blade removal. This meticulous method sets the stage for an organized and efficient reassembly once the blades have been successfully removed.

By proactively addressing any extra features or accessories, you enhance the overall removal process and create room for potential upgrades or modifications to suit your preferences. This comprehensive approach ensures that every aspect of your Hunter ceiling fan is considered and attended to with care.

Documenting Wiring Configuration

How to Remove Fan Blades from Hunter Ceiling Fan

As you progress through how to remove fan blades from Hunter ceiling fan, a critical step is documenting the wiring configuration. Safely disconnecting the wires and recording their arrangement ensures a smooth reassembly process and serves as a valuable reference for future maintenance or adjustments.

A. Safely Disconnecting Wires:

Before delving into the wiring, it’s paramount to turn off the power to the Hunter ceiling fan. By adding this extra safety precaution, the possibility of electrical shocks occurring while disconnecting is reduced. Before continuing, make sure the power is indeed off with a trustworthy voltage tester. After it’s verified, gently unplug the cables that link the fan to the wiring in the ceiling. Depending on the fan’s features, you may encounter wires for the fan motor, light fixture, or any additional components. To guarantee a safe and secure separation of the wires, proceed with caution and accuracy throughout this stage.

B. Recording the Configuration for Future Reference:

With the wires safely disconnected, take the time to record the configuration. This involves noting the color-coded wires and their corresponding locations. Use labels or a diagram to clearly indicate which wire connects to specific components such as the motor, light fixture, or any supplementary features. This meticulous documentation becomes a valuable resource for future reference, especially when reassembling the fan or troubleshooting any electrical issues. Whether you plan to reinstall the same fan blades or make upgrades, having a clear record of the wiring configuration simplifies the entire process.

Finalizing the Removal

As you approach the conclusion of the fan blade removal process from your Hunter ceiling fan, the final steps are crucial to ensure a smooth and successful outcome. Lowering the fan safely and confirming that all components are detached properly will conclude the removal process on a confident note.

A. Lowering the Fan Safely:

With the fan blades detached and all wiring properly documented, the next step is to safely lower the fan from its mounting bracket. Exercise caution and enlist assistance if needed, especially if the fan is large or heavy. Be careful not to lose balance or stability when you slowly lower the fan. If your Hunter ceiling fan has additional features like a light fixture, be mindful of any remaining components that might require careful handling. Lower the fan steadily to the ground or a suitable surface, taking care to avoid any damage to the blades or other elements.

B. Ensuring All Components Are Detached Properly:

Before considering the removal process complete, perform a thorough check to confirm that all components are detached properly. Verify that the fan blades, any additional features, and the mounting bracket are all separated from the ceiling. Ensure that no loose screws, wires, or other elements remain connected. This meticulous inspection guarantees that the fan is entirely disassembled and ready for any maintenance, replacements, or upgrades you may have planned.

By prioritizing the safe lowering of the fan and confirming the proper detachment of all components, you conclude the removal process with a sense of accomplishment and readiness for the next steps. Whether you’re aiming for fan blade replacements or conducting maintenance, this comprehensive approach ensures that your Hunter ceiling fan is primed for future enhancements.

Conclusion

In conclusion, successfully removing fan blades from your Hunter ceiling fan involves a systematic approach focused on safety, organization, and attention to detail. By following the step-by-step guide, including labeling for reassembly and documenting wiring configurations, you ensure a seamless process. Safely lowering the fan and confirming proper detachment of all components marks the completion of a task that sets the stage for maintenance, upgrades, or replacements with confidence and ease. Whether you’re enhancing your fan’s aesthetic or addressing wear and tear, this guide equips you for a smooth and successful fan blade removal experience.

Frequently Asked Questions

Q1. How to remove fan blades from hunter ceiling fan perfectly?

Answer: For a perfect removal of Hunter ceiling fan blades: turn off power, climb ladder, unscrew blades, label for reassembly, detach extras like light fixtures, document wiring, lower fan carefully. This systematic approach ensures a flawless process, ideal for maintenance or upgrading fan blades.

Q2. Can I remove Hunter fan blades without turning off the power?

Answer: Before trying to take out the fan blades from your Hunter ceiling fan, make sure the power is off at the circuit breaker. This guarantees security and lowers the possibility of electrical mishaps while working.

Q3. Do I need any special tools to remove Hunter fan blades?

Answer: Particular needs might differ, even if fundamental equipment like a screwdriver could be required. Refer to the Hunter ceiling fan manual for your model or check our guide for a comprehensive list of tools needed for a smooth blade removal.

Q4. How do I label the fan blades for reassembly?

Answer: Labeling fan blades is essential for proper reassembly. Use removable labels or masking tape to mark each blade, ensuring they are correctly matched during the reinstallation process. Numbering or alphabetic labeling is a common and effective method.