Why Does My Vizio TV Keep Turning Off | Easy 5 Tips & full Guide

Why Does My Vizio TV Keep Turning Off | Easy 5 Tips & full Guide

Are you wondering, “Why does my Vizio TV keep turning off?” Experiencing frequent shutdowns can disrupt your viewing experience, but understanding the reasons behind it is the first step to finding a solution. In this guide, we’ll delve into common factors that may cause your Vizio TV to turn off unexpectedly. By identifying potential issues and troubleshooting methods, you can resolve the problem and enjoy uninterrupted entertainment. Let’s explore the reasons why does my vizio tv keep turning off and how to address them effectively.

Common Causes of Why Does My Vizio TV Keep Turning Off

Before diving into solutions, it’s essential to examine the potential causes of your Vizio TV’s repeated shutdowns. The following are some typical explanations for why your TV can be abruptly shutting off:

Power Outage: 

The most common and obvious reason for a TV to suddenly turn off could be due to an actual power outage in your vicinity. Before you start troubleshooting or worrying about potential damage to your TV, it’s wise to first check if other devices in your home, especially those that rely solely on electrical power, are also not functioning. This simple step can help you determine whether the issue is isolated to your TV or a broader electrical problem.

Overheating: 

Like any sophisticated electronic device, a Vizio TV is susceptible to overheating, particularly if it’s situated in an enclosed space with inadequate ventilation or if it has been operating continuously for long stretches of time. Overheating can prompt the TV’s built-in safety mechanisms to initiate automatic shutdowns. These are designed to protect the device from overheating-related damage, ensuring its longevity.

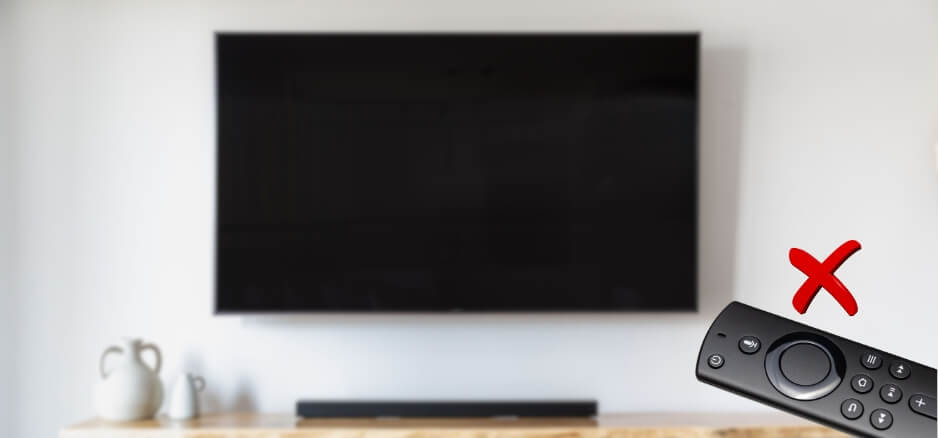
Remote Control Issues: 

On occasion, the issue causing your Vizio TV to turn off unexpectedly might not originate from the TV itself but from the remote control. Problems such as weak signal transmission or depleted batteries in the remote can interfere with normal operation, leading the TV to switch off as if the power button was pressed. Checking and resolving any remote control issues can often restore normal function.

Software Updates: 

For optimal performance, Vizio TVs periodically prompt users to install software updates. These updates are intended to enhance the television’s functionality or address known bugs. If you are actively using your TV and it detects a pending software update, it may automatically initiate a shutdown process in order to apply the update. For the gadget to remain secure and function properly, even though it could be temporarily annoying, this must be done.

Faulty Hardware: 

Although less common, persistent issues with your Vizio TV shutting down could be attributed to faulty hardware components. This might include a damaged power supply, loose or corroded internal connections, or other critical failures within the TV’s hardware. Such problems usually require professional assessment and repair to prevent recurrent shutdowns and ensure the TV’s reliable operation.

Troubleshooting Tips for Vizio TV Turning Off

Having pinpointed potential causes for your Vizio TV’s issues, we can now delve into detailed troubleshooting steps to address these problems and restore your television to its optimal functioning state:

  1. Check for Power Outages: As a preliminary step, it’s imperative to ascertain whether a power outage could be at fault. Before jumping to conclusions about your TV’s functionality, verify if there’s a current power outage affecting your area. This can be done by checking other electrical devices in your home. If they too lack power, the issue most likely lies with the external electricity supply, exonerating your TV from blame.
  2. Check for Overheating: Overheating can impair your TV’s performance or even cause it to shut down unexpectedly. To prevent this, ensure that your Vizio TV is positioned in a well-ventilated area, with ample space around it to facilitate proper air circulation. If you think the TV may be overheating, turn it off and give it at least ten to fifteen minutes to cool. This pause can significantly reduce the internal temperature and potentially rectify any performance issues related to overheating.
  3. Check the Remote Control: A malfunctioning remote control can often be mistaken for a problem with the TV itself. Make sure the fresh batteries are placed correctly and replace the old ones to rule out the remote as the cause of the problem. If the problem persists, attempt to use an alternative remote compatible with your Vizio TV. This step can help determine whether the remote control or the TV is at fault.
  4. Update Software: Maintaining optimal performance and functionality of your TV requires keeping its software updated. In order to improve the overall user experience, manufacturers often offer updates that add new features or address bugs. To check whether there are any updates available, navigate to the settings menu on your Vizio TV and select the software update option. When the update procedure is finished, you can sometimes add new features to your TV in addition to fixing any faults that may have arisen previously.
  5. Contact Customer Support: If you’ve exhaustively tried the aforementioned troubleshooting steps without success, it may be time to seek professional assistance. Contacting Vizio’s customer support team can offer further guidance. They can precisely identify the problem’s underlying source and offer workable remedies thanks to their knowledge. In cases where remote troubleshooting proves insufficient, they can also arrange for a service appointment or guide you through the process of scheduling a repair.

By methodically following these steps, you increase the likelihood of identifying and resolving any issues with your Vizio TV, ensuring its swift return to full operational status.

Advanced Solutions for Vizio TV Turning Off

If the initial suggestions don’t seem to rectify the issue, consider delving into these more intricate solutions:

  • Factory Reset: Employing a factory reset should be considered a measure of last resort. However, should you find yourself at a dead end with other approaches, initiating a factory reset might just do the trick. It can effectively address any software glitches by wiping the slate clean and restoring your TV to its original factory settings. Keep in mind that all customized settings and data will be deleted during this procedure, therefore it’s advisable to backup any crucial data before starting.
  • Update Firmware: Beyond the routine software updates, ensuring your TV’s firmware remains current is critically important. Updates to the firmware frequently include new features as well as speed improvements and patches for known bugs. To find the most recent firmware version, visit Vizio’s official website. Your TV’s performance and functionality can be significantly improved with this simple technique.
  • Check Hardware Connections: Occasionally, the root of the problem lies not within the software but with the physical connections themselves. A thorough examination of all cables and connections is in order. Make sure that every cable is firmly connected and in the correct port. Loose or damaged cables can lead to a host of issues, so if you discover any wear and tear, replacing the faulty cable might resolve the problem.
  • Seek Professional Repair: If, after trying all the aforementioned solutions, the issue stubbornly persists, it might be time to call in the experts. Making the decision to choose a professional repair service—ideally one approved by the manufacturer—is advised. With the right equipment and expertise, these experts can identify and fix any underlying hardware issues your TV may be experiencing.  While this option might incur a cost, it’s often worth it to ensure your TV is in capable hands and can be restored to proper working order.

Additional Tips and Precautions for Vizio TV Turning Off

  • To ensure your TV operates at an optimal temperature and avoids the risk of overheating, it’s crucial to avoid placing it in enclosed spaces where air circulation is limited, or near heat sources like radiators or windows with direct sunlight.
  • Power fluctuations can be detrimental to the delicate electronics within your TV. Investing in a high-quality surge protector can shield your device from unexpected spikes in electricity, thereby extending its lifespan.
  • Dust and other debris can accumulate on and around your TV, blocking ventilation holes and perhaps leading to overheating. Regular cleaning with a soft, dry cloth to remove dust, and gentle wiping of the screen with an appropriate cleaner, can prevent these issues and keep your TV functioning smoothly.
  • Electronics troubleshooting can be difficult and dangerous if done improperly. Therefore, if you’re ever unsure about how to address an issue with your TV, it’s always safer to reach out to customer support for professional guidance. Getting assistance from professionals is advised because trying to solve problems on your own without the necessary understanding can make them worse.

Conclusion

In conclusion, understanding the reasons behind why your Vizio TV keeps turning off is crucial for resolving the issue. By identifying common factors such as power settings, software updates, or hardware issues, you can take appropriate steps to address the problem. Whether it’s adjusting settings, updating firmware, or seeking professional assistance, troubleshooting the issue can help restore uninterrupted viewing. Now, armed with this knowledge, you’re better equipped to keep your Vizio TV running smoothly and enjoy your favorite shows without interruptions.

Frequently Asked Questions

Q1: why does my vizio tv keep turning off?

Answer: There could be various reasons for your Vizio TV turning off unexpectedly, including power outages, overheating, remote control issues, software updates, and faulty hardware.

Q2: How can I troubleshoot my Vizio TV constantly shutting down?

Answer: Some troubleshooting tips include checking for power outages, ensuring proper ventilation for the TV, replacing batteries in the remote control, updating software and firmware, and seeking professional repair if needed.

Q3: Can I prevent my Vizio TV from turning off unexpectedly?

Answer: While some causes of unexpected shutdowns may be out of your control, taking precautions such as keeping the TV well-ventilated and up-to-date with software and firmware updates can help prevent these issues. Moreover, purchasing a surge protector helps shield your TV from variations in power.

Q4: Is it safe to perform troubleshooting steps on my own?

Answer: It is generally safe to perform basic troubleshooting steps such as checking for power outages and remote control functionality. Seek professional assistance if utilizing any advanced therapies makes you feel uncertain or uneasy. Additionally, always follow safety precautions and unplug the TV before performing any troubleshooting steps.

Q5: What should I do if none of the troubleshooting tips work?

Answer: If all else fails, it’s best to contact Vizio’s customer support team for further assistance or seek professional repair services. They will possess the requisite knowledge to identify and fix any problems with your Vizio TV.  Remember to have your model number and warranty information on hand when contacting customer support for efficient assistance.

Disclaimer: The data presented is based on troubleshooting manuals and general experience. Each Vizio TV and its issues are unique, and results may vary. Always abide by the instructions provided by the manufacturer; if in doubt, get advice from an expert or the Vizio support staff.

Personal Experience: I once encountered the issue of my Vizio TV turning off, and after a thorough investigation, it turned out to be a simple power cord issue. A slight wiggle of the cord was causing it to intermittently disconnect. Securing the cord properly resolved the issue, and the TV returned to its reliable state.

Why Trust Us?

Our troubleshooting recommendations and insights stem from a deep understanding of consumer electronics and home entertainment systems. We aim to provide practical, accurate, and up-to-date information to assist our readers in maintaining a hassle-free technological lifestyle. Our dedication to producing high-quality content guarantees that you will receive insightful advice written with passionate competence.

How to Turn On a Roku TV Without the Remote: Easy 4 Methods for Quick Solutions

How to Turn On a Roku TV Without the Remote: Easy 4 Methods for Quick Solutions

In the event that you lose the Roku TV remote, be aware of how to turn on a roku tv without the remote. There are other ways to turn on your Roku TV and begin watching your favorite content, even if the remote is missing or broken. We’ll show you how to easily turn on a Roku TV without a remote in this article, so you can keep streaming without any problems. Let’s explore how to turn on a Roku TV without the remote and get you back to your entertainment in no time!

Purpose of the Guide

Understanding how to turn on your Roku TV without a remote is more than just a temporary fix; it empowers you with the know-how to take control of your home theater system in diverse ways. Being ready with backup techniques is crucial because of the growing amount of technology that we use on a daily basis.

Method 1: Using the Roku Mobile App

How to Turn On a Roku TV Without the Remote

When your physical remote is not available, the Roku mobile app is an invaluable resource. Follow these simple steps to get your TV up and running.

Pairing Your Phone with the TV

Start by downloading the Roku app from your app store and ensure that both your smartphone and the TV are connected to the same Wi-Fi network. The application will walk you through the pairing procedure after you launch it. Generally, this entails selecting “Settings,” then “Remote,” and finally “Pair New Device.”

Steps to Turn On the TV Using the App

  1. Click the ‘Remote’ tab located in the bottom center of the screen when the Roku app is open.
  2. Tap the ‘Power’ icon in the app to turn on your TV.
  3. Should your TV be linked to an external gadget, you might need to select the appropriate input source when prompted.

Method 2: Using HDMI-CEC (Consumer Electronics Control)

HDMI-CEC is a feature that enables control of multiple compatible devices with one remote. It’s a neat way to power on your TV when the Roku remote is out of reach.

Enabling HDMI-CEC on Your TV

To set up HDMI-CEC, you need to access your TV’s settings menu. Look for options related to CEC, such as Anynet+ (Samsung), Bravia Sync (Sony), or Simplink (LG), and ensure that it is turned on. According to the TV model, the precise steps could change, therefore if in doubt, refer to the user manual.

Using Another Device’s Remote to Turn On the TV

Almost any remote can serve as a proxy for your Roku remote when HDMI-CEC is set up. Just press the power button and watch as your TV comes to life. It’s one remote to rule them all, quite literally.

Method 3: Using a Universal Remote

In this case, a universal remote can literally save your life if you have one sitting around. Here’s how to set it up to work with your Roku TV.

Programming the Universal Remote to Control the Roku TV

It’s crucial to confirm compatibility beforehand because not all universal remotes work with Roku TV. After you’ve made sure your remote is compatible, programming is usually rather simple. You’ll need to:

  1. Locate the code for Roku in your universal remote manual or online.
  2. Using the universal remote, enter the device code.

Steps to Turn On the TV Using the Universal Remote

After programming, using the universal remote is as simple as pressing the power button marked with the universal power symbol. If the code was entered correctly during programming, your TV should switch on immediately.

Method 4: Powering On via Power Butto

Turning on your Roku TV without a remote is quite simple, and the most straightforward method involves using the power button located directly on the television itself. This approach ensures that you can still enjoy your TV even if the remote is misplaced or out of batteries.

  • Locating the Power Button on the TV: The specific location of the power button can vary significantly depending on the model of the TV. While many manufacturers place the button on the side or bottom of the device for easy access, others may opt for less conspicuous placements. If you’re having difficulty locating the power button, it’s advisable to consult the user manual for your specific model, which typically includes a diagram showing where to find the button.
  • Turning On the TV Manually: To manually power on your TV, gently press the power button located on your television. You may need to hold the button down for a couple of seconds. Once you do this, wait for the screen to illuminate. It’s important to note that older or larger TVs might take a bit longer to start up, so a little patience can go a long way. Once the TV powers on, you’ll be greeted with the familiar Roku interface, ready for you to navigate using any compatible input device or even a mobile app designed to replace the physical remote.

This manual method of turning on your Roku TV ensures that a lost or non-functional remote doesn’t keep you from accessing your favorite content. Additionally, becoming familiar with the various functions of your TV, including manual operation, can enhance your overall viewing experience.

Troubleshooting Tips for How to Turn On a Roku TV Without the Remote.

  • If none of the troubleshooting methods detailed previously prove successful, the first step is to check if your TV is properly plugged in. Check to see that the TV and the electrical socket are both properly attached to the power cord. It’s also wise to verify that the outlet itself is working by plugging in another device to see if it powers on.
  • Another effective strategy is to restart your TV. You can accomplish this by fully unplugging it from the power source. Wait for a few seconds – ideally around 10 to 20 seconds – to let any residual power drain from the TV. Re-plug the TV’s power supply after that. Often, a little fix like this will fix small issues and get things working again.
  • If, after trying the above suggestions, you find that your TV still isn’t working as expected, it may be time to seek professional help. Roku customer support is available to provide further assistance. They can offer you advice on choices for repairs or replacements, as well as walk you through further troubleshooting processes. When it comes to fixing more complicated problems that go beyond simple troubleshooting, their knowledge can be quite helpful.

Final Thoughts

In conclusion, we’ve covered various methods of how to turn on a roku TV without the remote. Whether it’s using the Roku mobile app, the physical power button on the TV, or a universal remote, there are solutions to keep you connected to your favorite shows and movies. By following these simple steps, you can easily power up your Roku TV and enjoy uninterrupted streaming. You can now resume your entertainment without any interruptions.

Frequently Asked Questions

Q1: how to turn on a roku tv without the remote?

Answer: There are multiple ways to turn on a Roku TV without the remote, including using the Roku mobile app, enabling HDMI-CEC, programming a universal remote, and manually pressing the power button on the TV itself.

Q2: What is HDMI-CEC?

Answer: The function known as HDMI-CEC (Consumer Electronics Control) enables one remote control to operate several HDMI-connected devices. It is often used to turn on and off devices, change inputs, and adjust volume.

Q3: Can I use any universal remote with my Roku TV?

Answer: It’s worth noting that not every universal remote on the market is designed to work seamlessly with Roku TV. This means that before you invest time and effort into trying to program your universal remote to control your Roku device, it’s crucial to first verify whether the remote is actually compatible with Roku TV. Failing to do so could lead to unnecessary frustration and wasted effort, so a quick compatibility check can save a lot of hassle.

Q4: Will using the physical power button on the TV affect my Roku settings?

Answer: No, none of your Roku settings will change if you use the TV’s physical power button. It will simply turn the TV on or off like a regular television.  So, you can use this method without worrying about changing any of your Roku preferences.

Q5: What should I do if none of these methods work?

Answer: If none of the troubleshooting tips outlined in this guide work, it is recommended to contact Roku customer support for further assistance. If necessary, they can offer options for repairs or replacements in addition to advice.  So, don’t hesitate to reach out if you encounter any issues with your Roku TV.

Disclaimer: The methods outlined in this guide follow general principles that should be applicable to most situations; however, it’s important to recognize that the exact procedures may differ based on the specific model of your Roku TV, as well as any other devices you may have connected to it. Variations can arise due to the unique features and software updates of each model. To ensure you’re following the most accurate and detailed instructions tailored to your setup, always consult the user manual provided with your TV and any compatible accessories. These manuals are designed to offer guidance that’s specific to your devices, offering detailed steps and troubleshooting advice to enhance your user experience.

Personal Experience: Recently, I encountered a frustrating situation where the remote for my Roku TV suddenly stopped working. To make matters worse, I couldn’t remember where I had last placed my universal remote, which added to my dilemma. I suddenly got the bright idea to utilize my phone as a makeshift remote. Discovering that my smartphone could double as a remote through the Roku app was nothing short of a revelation. Since that day, I’ve made it a point to always keep my phone fully charged and the Roku app readily accessible. This newfound convenience has been such a game-changer that I often find myself wondering how I ever managed without it. The ability to control my TV with my phone has not only solved my initial problem but has also introduced a level of ease and flexibility into my viewing experience that I truly value.

Why Trust Us?

Our team of tech and home entertainment aficionados has meticulously researched and tested these solutions to ensure they’re not only viable but simple to execute. We value your time and strive to provide practical information that solves real-life problems.

In this technologically advanced era, adaptability and a bit of savvy can go a long way. With the methods outlined above, you can power on your Roku TV confidently, whether the remote is within arm’s reach or not. Always keep in mind that the secret to mastering any technology is to comprehend all of its uses and to be receptive to new ideas. With a little practice, these techniques will become second nature, and you’ll be back to enjoying your favorite content without a second thought, remote or not.

How to Connect Vizio TV to WiFi Without Remote: Easy 4 Method

How to Connect Vizio TV to WiFi Without Remote: Easy 4 Method

Knowing how to connect Vizio TV to WiFi without remote can be incredibly useful in situations where the remote is lost or not working. In this guide, we’ll walk you through the steps to get your Vizio TV connected to Wi-Fi even without a remote, ensuring you can enjoy all the streaming and connectivity features your TV has to offer. Without a remote, let’s explore how to connect Vizio TV to WiFi without remote so you can quickly resume streaming!

Why Connect Your Vizio TV to WiFi?

Before we venture into the art of connecting Vizio to WiFi without a remote, it’s vital to understand the significance of this task. A WiFi-connected Vizio TV can:

  • Provide access to streaming services like Netflix, Hulu, or Amazon Prime Video.
  • Provide over-the-air updates to guarantee that the apps and software on your smart TV are current..
  • Facilitate screen casting and sharing from compatible devices without the need for HDMI cables or other physical connections.

Without further ado, let’s explore the various methods to establish a wireless connection between your Vizio TV and your home network—sans remote.

Method 1: Using the Vizio SmartCast Mobile App

The Vizio SmartCast app is your essential tool for linking your Vizio TV to your WiFi network without a traditional remote.

1. Download and Install the App

The first step is to ensure you have the Vizio SmartCast mobile app installed on your compatible smartphone or tablet. Downloads for it are available from the App Store and the Google Play Store.

2. Connect Your Phone to the Same WiFi Network

Make sure your smartphone is linked to the same WiFi network that you intend to link your Vizio TV to.

3. Pair Your Phone with the TV

  • Launch the SmartCast app.
  • Tap on the Control Center icon in the upper right corner of the app to begin the pairing process.
  • On your TV, you’ll see a Pairing Request. Use your remote (or the TV buttons if a remote is unavailable) to accept the pairing request.

4. Steps to Connect the TV to WiFi Using the App

  • After pairing, pick your TV from the app’s list of compatible devices..
  • Navigate to the Device settings or Quick Settings menu and select Network.
  • When asked for your WiFi network password, select the ‘Connect to Network’ option.
  • Your Vizio TV should then connect to the selected WiFi network.

This is an easy-to-follow and practical strategy, especially for owners of Vizio TVs who would rather have a mobile option. It’s dynamic and keeps your device within arm’s reach as an alternative remote.

Method 2: Using a Universal Remote

If you have a universal remote at your disposal, this method can be quite handy for connecting your Vizio TV to WiFi. Here’s how to do it:

1. Compatibility Check for Universal Remotes

Make sure the universal remote control you have works with Vizio TVs.. You can find this information in the remote’s manual or by searching the remote’s model number online.

2. Programming the Universal Remote

  • Turn on your Vizio TV manually.
  • Once the LED light on your universal remote turns green, press the ‘Setup’ button.
  • Enter the TV programming code for Vizio that you found in your remote’s manual or online. If the initial code doesn’t work, try the other codes listed until your TV turns off.
  • To store the programming code, press the ‘Power’ button on the remote control after the TV has turned off.

3. Steps to Connect the TV to WiFi Using the Universal Remote

  • To access the ‘Menu’ option on your Vizio TV, use the remote..
  • Go to the WiFi configuration options or network settings. The precise route may change according to the TV type you own.
  • After confirming the connection, enter the password for your WiFi network.

This method is contingent upon having both a compatible universal remote and the corresponding Vizio TV programming code. While it adds an additional step of the code search, it’s a reliable way to regain WiFi connectivity.

Method 3: Using a Wired Connection

Sometimes the good old wired connection is the most dependable way to get your Vizio TV online, especially if you’re struggling without a remote. Here’s how to do it:

1. Checking Available Ports on Your TV

Identify the Ethernet port on your Vizio TV. The port’s location will vary depending on your TV model, but it is usually found on the back of the TV along with other input/output jacks.

2. Connecting the TV to the Router Using an Ethernet Cable

  • Power off your TV and your router.
  • The other end of the Ethernet wire should be connected to the router and the Vizio TV’s Ethernet port.
  • Power on your router and wait for the connection to be established.
  • Power on your TV. It may automatically recognize the wired connection and configure network settings.

3. Configuring the Network Settings on the TV

If your TV doesn’t automatically configure the network settings, you’ll need to do it manually:

  • Navigate to the TV’s menu using the onboard buttons or a compatible device.
  • Select the Network/Wired setup option.
  • Input the IP address, DNS servers, default gateway, and subnet mask based on how your network is set up. Often, these settings are dynamically assigned by the router when you connect via Ethernet.
  • Once configured, test the connection by accessing a built-in app or service that requires internet, like YouTube or Netflix.

While this method trades wireless convenience for the solidity of a wired network, it’s a surefire way to establish an internet connection without the need for a remote.

Method 4: Accessing the TV Menu

For the purists who believe in navigating the old-fashioned way, this method involves accessing your Vizio TV’s menu system and making selections entirely without the use of a remote. Here’s how to do it:

1. Locating the Menu Button on the TV

Your Vizio TV will have a menu button on the device itself. This may be a physical button on the body of the TV, or it could be a touchscreen or capacitive button depending on the model.

2. Navigating Through the Menu Options Without a Remote

  • Power on the TV using its power button if it’s currently off.
  • To view the on-screen menu on the TV, press the Menu button.
  • Use the navigation buttons around the Menu button (or elsewhere on the TV) to move the cursor and make selections.

3. Accessing the Network Settings

  • Continue to navigate the menu until you find the System or Network settings.
  • Within the settings, look for the WiFi setup or Network options.

4. Inputting WiFi Credentials

  • Select the network you want to connect to from the list of ones that is available.
  • If there is an on-screen keyboard, use it to enter the WiFi network password.
  • Wait for the TV to establish a network connection after verifying the password.

This method may be the most time-consuming and requires careful navigation without direct input methods typical of a remote control. Still, it’s a last-ditch tactic that works when all else fails.

Troubleshooting Tips for How to Connect Vizio TV to WiFi Without Remote

Even the most foolproof methods can encounter hiccups. Here are some common issues and handy solutions:

Common Issues and Solutions

  • Pairing Errors with the SmartCast App: Ensure your phone and TV firmware are up-to-date, force quit and restart the SmartCast app, and check that no interference is blocking the connection.
  • Unresponsive Universal Remote: Change the batteries, ensure line-of-sight with the TV, and reprogram the remote if necessary.
  • Wired Connection Not Recognized: Try a different Ethernet cable, use a different port on your router or TV, and ensure the router settings permit wired connections.

Resetting the TV to Factory Settings

If you’ve tried all methods and troubleshooting to no avail, you may need to reset your Vizio TV to its default factory settings.

  • Navigate to the TV’s System settings and select Reset and Admin; choose Factory Reset.
  • Verify that you really do wish to carry out the factory reset.

Although this extreme approach will delete all user accounts and customized settings, it frequently fixes lingering software or network problems.

Contacting Vizio Customer Support

Please contact Vizio’s customer service if anything else fails. They are well-equipped to provide assistance with a comprehensive range of issues, including remote connectivity options for your specific TV model.

Conclusion

As we conclude our guide on how to connect Vizio TV to WiFi without remote, you now have the knowledge to get your TV connected and ready for streaming, even if the remote is unavailable. You can guarantee that your favorite shows and content will always be available to you by following these easy steps. Remember, whether it’s using the Vizio SmartCast app or accessing the TV’s menu directly, there are always alternative methods to connect your Vizio TV to Wi-Fi. Enjoy your streaming experience, hassle-free!

Frequently Asked Questions

Q1: how to connect vizio tv to wifi without remote?

Answer: There are several methods you can use to connect your Vizio TV to Wi-Fi without a remote, including using the Vizio SmartCast app, utilizing a universal remote with voice control, connecting via an Ethernet cable, or accessing the TV menu directly. Follow this article’s recommendations to select the approach that best suits your needs.

Q2: What if my Vizio TV doesn't have a built-in Wi-Fi?

Answer: Some older Vizio TV models may not have built-in Wi-Fi capabilities. In this case, you can use an Ethernet cable to connect your TV to the router or purchase an external Wi-Fi adapter that is compatible with your TV model.

Q3: How do I reset my Vizio TV to factory settings?

Answer: To reset your Vizio TV to factory settings, navigate to the TV’s System settings and select Reset and Admin, then choose Factory Reset. Verify that you really do want to go ahead and reset. Remember that doing this will remove all user accounts and customized settings from the TV.

Q4: Is there a way to replace a lost Vizio remote for free?

Answer: Vizio often includes the cost of a new remote in their warranty or service coverage. Contacting Vizio customer support can provide you with options for replacement, and in some cases, a new remote may be sent to you free of charge.

Q5: I have a Vizio TV but not a smartphone. How can I connect my TV to WiFi?

Answer: In this case, a universal remote or navigating the TV menu directly are your best options. If neither of those is available, using a wired connection with an Ethernet cable is another alternative method.

Disclaimer: The methods described in this guide are based on the general functionality and connectivity options of Vizio smart TVs. Depending on the make and model of your TV, there may be differences in the precise processes and available options. Always refer to your TV’s user manual or seek manufacturer assistance if you encounter difficulties.

Personal Experience: Navigating the intricacies of connecting home electronics can be a real adventure, and the absence of a remote can add an unexpected plot twist. In my experience, a combination of the SmartCast mobile app and the savvy use of a wired connection has come to my rescue when I least expected it. With persistence and a bit of tech know-how, I’ve found that there’s always a way to keep my Vizio TV at the heart of my home entertainment network.

Why Trust Our Content?

This content is a comprehensive product of meticulous research and practical application. Our team of experts has leveraged years of technical knowledge to curate and craft this guide, ensuring that it resonates with those who seek an in-depth understanding of Vizio TV connectivity. The insights provided attest to our commitment to user empowerment, enabling you to enjoy the full potential of your Vizio TV, even in the absence of a trusty remote.

How to Connect Firestick Remote to Turn Off TV: 5 Easy Steps

How to Connect Firestick Remote to Turn Off TV: 5 Easy Steps

Knowing how to connect Firestick remote to turn off TV can be incredibly convenient. With just a few simple steps, you can sync your Firestick remote to control both your Firestick device and your TV’s power, eliminating the need for multiple remotes cluttering your living space. In this guide, we’ll show you how to connect your Firestick remote to turn off your TV, making it easier than ever to enjoy your favorite shows and movies with minimal hassle. Let’s get started on how to connect Firestick remote to turn off TV and simplify your entertainment setup!

Step-by-Step Guide to How to Connect Firestick Remote to Turn Off TV

Below, we’ve broken down the process of connecting your Firestick remote to turn off your TV into actionable steps. Before you start, familiarize yourself with the stages; after that, carry out each step precisely.

Step 1: Power on your TV and Firestick

Ensuring that your Firestick gadget and television are powered on is essential first. While this might seem like a basic, almost too simple step, it’s absolutely essential and serves as the cornerstone for any further actions you plan to undertake. Without ensuring that both devices are on, proceeding with any additional setup or troubleshooting steps is impossible. If you’ve already checked and confirmed that your TV and Firestick are operational, you’re perfectly positioned to advance to the subsequent phase of the setup process. This foundational step is key to a smooth and successful setup, ensuring everything else flows more seamlessly.

Step 2: Pair Firestick Remote with Your TV

To initiate the process of pairing your Firestick remote with your television, please follow the detailed instructions provided below:

  1. Press and Hold the Home Button on the Firestick Remote: The home button, which is easily identifiable by its house icon, is centrally located on your Firestick remote. To begin the pairing process, you should firmly hold this button down for approximately 10 seconds. You’ll know to release the button once a message indicating that the pairing is in progress appears on your TV screen.
  2. Navigate to Settings on the Firestick Menu: The next step involves navigating through the Firestick menu to access its settings. This is accomplished using the navigation button on the remote, which features a circular ring design surrounding the select button. Carefully use this button to move and highlight the Settings option on your Firestick’s display menu.
  3. Select Controllers & Bluetooth Devices: Upon accessing the Settings menu, you’ll need to use the select button to navigate further. Look for the option labeled ‘Controllers & Bluetooth Devices’ and select it. This will take you to a submenu dedicated to managing your Firestick’s controllers and any Bluetooth devices you wish to connect.
  4. Add New Remote: Within the ‘Controllers & Bluetooth Devices’ submenu, look specifically for the section titled ‘Amazon Fire TV Remotes.’ There will be a prompt to “Add New Remote” when you select this.’ Select this option to initiate the addition of a new remote to your Firestick.
  5. Follow On-Screen Instructions: After selecting to add a new remote, your TV screen will display specific instructions tailored to complete the pairing process. These instructions may include actions such as holding down certain buttons on the new remote or entering a combination of button presses. It’s crucial to carefully follow these on-screen prompts as they may vary depending on the type and brand of your TV.

By following these detailed steps, you will successfully pair your Firestick remote with your TV, enhancing your viewing experience by facilitating easier control and navigation.

Step 3: Enable HDMI CEC (Consumer Electronics Control)

HDMI CEC is a fantastic feature that enables you to control other devices connected to your TV, such as a Blu-ray player or a soundbar, using the remote that originally came with your TV or another compatible remote. Having a single remote for all of your devices will therefore be less cluttered. To take advantage of this convenient feature, here’s a detailed guide on how to enable it:

  1. Start by navigating to your Firestick’s ‘Settings’ menu. Typically, you may find this by clicking the home button on your remote to view the home screen. 
  2. After accessing the ‘Settings’ menu, choose ‘Display & Sounds’. You can change a number of settings pertaining to your Firestick’s audio and visual output in this area. 
  3. Within the ‘Display & Sounds’ menu, look for the option labeled ‘HDMI CEC Device Control.’ The option that must be chosen in order to activate the feature is called HDMI CEC, or HDMI Consumer Electronics Control.
  4. Last but not least, make sure your TV has HDMI CEC turned on. This usually involves going into your TV’s settings menu and finding the HDMI CEC option, which might be labeled differently depending on the brand of your TV (for example, it might be called Anynet+ on Samsung TVs). Once you locate this setting, make sure it’s turned on.

By enabling HDMI CEC both on your Firestick and TV, you’ll be able to streamline your entertainment system and enjoy a more integrated and hassle-free experience.

Step 4: Test the Connection

Once you’ve paired your remote and enabled HDMI CEC, it’s time to test the connection:

  1. Use the Firestick remote to control basic TV functions like volume and mute. This will confirm that your Firestick remote is functioning correctly with your TV.
  2. Now, simply press the power button on your Firestick remote. If everything is set up properly, your TV should turn off. Voila! You’ve successfully connected your Firestick remote to turn off your TV.

Step 5: Troubleshooting

The following procedures will help you troubleshoot if your TV won’t turn off: 

  1. Common Issues:
  • Weak battery in your remote: The batteries in your remote control might be running low, which can prevent the remote from sending a strong signal to your TV.
  • Faulty power button: The power button on your TV or remote might be malfunctioning, which could stop your TV from turning off when you press the button.
  • Problem with the HDMI CEC setup: HDMI Consumer Electronics Control (CEC) allows your TV and other connected devices to communicate and control each other. If there’s an issue with this setup, it might prevent your TV from turning off properly.
  1. Resetting Firestick Remote:
  • If you suspect the issue is with your remote, a simple reset might fix the problem. To temporarily stop your remote’s power source, start by taking out the batteries.
  • Next, hold down the home button for around 20 seconds. This process can clear any errors that might have occurred within the remote’s firmware.
  • Put the remote’s batteries back in once you’ve waited. This action essentially gives your remote a fresh start, which might resolve any issues it was having.
  • Finally, re-pair the remote with your Firestick. This ensures that any connection issues between your Firestick and remote are resolved, potentially fixing the problem of your TV not turning off.

By following these steps, you can address common issues that may prevent your TV from turning off and ensure your Firestick remote is functioning correctly.

Additional Tips and Considerations

  • If you have multiple HDMI-connected devices, it’s essential to label each one correctly on your TV. You can use this to determine which device the Firestick remote is currently controlling.
  • Don’t forget to regularly replace the batteries in your remote to ensure proper functioning.
  • Remember that not all TVs and gadgets might support HDMI CEC.In these situations, you might have to spend money on a universal remote control that works with every device.
  • If you encounter any other issues with your Firestick or remote, it’s always best to refer to the official Amazon Firestick support page for troubleshooting and assistance. 

By following these steps and tips, you’ll be able to seamlessly integrate your Firestick into your entertainment system and enjoy the ultimate viewing experience.

Conclusion

As we wrap up our guide on how to connect your Firestick remote to turn off TV, you now have a convenient solution to simplify your entertainment setup. By following these straightforward steps, you can sync your Firestick remote to control both your Firestick device and your TV’s power, reducing clutter and making your viewing experience more streamlined. Now, enjoy the convenience of powering off your TV with just one remote, and spend more time enjoying your favorite shows and movies hassle-free. Happy streaming!

Frequently Asked Questions

Q1: How to connect Firestick remote to turn off tv perfectly?

Answer: You must first pair your Firestick remote with your device in order to use it to turn off your TV. Then, enable HDMI CEC on both your Firestick and TV. Lastly, check the connection and resolve any possible problems.

Q2: What is HDMI CEC?

Answer: The term HDMI CEC refers to HDMI Consumer Electronics Control, which enables control and communication between compatible devices. Enabling this feature on your Firestick and TV is crucial for connecting your remote to turn off your TV.

Q3: What should I do if my TV doesn't turn off after following these steps?

Answer: If your TV doesn’t turn off, you may need to troubleshoot common issues such as a weak remote battery or faulty power button. You may also attempt to reset and re-pairt your Firestick remote control with your device. The best place to go for more help if the problem continues to arise is the official Amazon Firestick support page.

Disclaimer: It’s important to note that the information provided in this guide is applicable to general Firestick and TV models, but there can be variations in the setup process depending on the specific make and model you own. For the most precise instructions customized for your devices, always consult the official user manuals and customer care channels.

Personal Experience: When I first discovered the Firestick’s ability to power on and off my TV with its remote, it felt like a revelation. No more hunting for multiple remotes or getting up from the comfort of my couch to turn off the TV. It’s a small but significant perk of the device that has since become an integral part of my daily TV viewing. The few steps required to set it up were well worth the effort for the convenience it now provides.

Why Trust Us?

At our website, we strive to provide our readers with accurate and helpful information on a variety of tech-related topics. Our team conducts thorough research, fact-checks all information, and incorporates personal experiences when creating guides like this one. To make sure our content is accurate and up to date, we also speak with subject matter experts. Trust us to provide you with valuable insights and practical solutions to make your tech experience more seamless and enjoyable.  With that, we conclude our guide on connecting your Firestick remote to turn off TV. Happy streaming! We really hope this was useful.

How to Pair Firestick Remote to TV: Easy 7 Steps

How to Pair Firestick Remote to TV: Easy 7 Steps

If you’ve recently purchased an Amazon Firestick and are eager to start streaming your favorite shows and movies, you’ll need to know how to pair Firestick remote to TV. The Firestick remote is essential for navigating the interface and controlling playback, so ensuring it’s properly paired is crucial for a seamless viewing experience. In this guide, we’ll walk you through the simple steps to pair your Firestick remote with your TV, allowing you to sit back, relax, and enjoy endless entertainment. So let’s get started on how to pair Firestick remote to TV and make the most of your streaming experience!

Preparing for How to Pair Firestick Remote to TV

Before we delve into the actual pairing process, it’s important to make sure that you have everything ready for a successful connection. This includes:

  • A stable and active internet connection: The Firestick remote relies on Wi-Fi connectivity to operate efficiently. Prior to attempting to pair, confirm that your home network is operational.
  • Fresh batteries in the remote: This may seem like a no-brainer, but it’s worth checking to ensure that the remote has enough power to complete the pairing process.
  • A well-positioned Firestick: The closer your Firestick is to your TV, the better chances of successful pairing. Verify that there are no real impediments or interferences from other electronics.

Pairing Your Firestick Remote

After making the required arrangements, let’s get started with the pairing process and go over each step in detail to make sure everything goes smoothly:

  1. Turn on your TV and Firestick: Before we begin, ensure that both your television and Firestick device are powered on. This is a crucial first step, as attempting to pair without power will be futile.
  2. Wait for the Firestick home screen to load: After turning on your Firestick, give it a few seconds. You should see the home screen appear, indicating the device is ready for pairing. This step is important for verifying that your Firestick is functioning properly before proceeding.
  3. Remove the back cover of your Firestick remote: Gently take off the back cover to expose the battery compartment and the pairing button. This step is necessary to access the internal components required for pairing.
  4. Press and hold the pairing button: Look for the small button located at the bottom of the remote, near the battery slot. Hold down this button for around five seconds. You’ll know it’s working when you see the light on the top of the remote begin to flash, indicating it’s in pairing mode.
  5. Wait for your TV screen to display a pairing prompt: Keep an eye on your television screen. Shortly after the remote starts flashing, a message should appear on your TV, signaling that it has detected the pairing request from the Firestick remote.
  6. Select “OK” on your TV remote: Using your television’s remote control, select the option to confirm the pairing request. This step authorizes the connection between your Firestick and your TV, finalizing the pairing process.
  7. Test your remote: The functionality has to be tested now that everything is configured. Use your newly paired Firestick remote to navigate the home screen and try out various buttons to ensure they are all working as expected. To guarantee a successful connection, don’t be afraid to try pairing again if you run into any problems.

By following these detailed steps, you should be able to pair your Firestick remote with your TV without any issues. Enjoy your enhanced viewing experience with the convenience of a fully functional remote!

Additional Tips and Tricks

  • If you find yourself in the situation where you’ve accidentally unpaired your Firestick remote, there’s no need to worry. Simply follow the instructions provided above to easily reconnect it. This process is straightforward and should have your remote working with your Firestick again in no time.
  • For households that boast multiple Firesticks, it’s crucial to ensure that each remote is correctly paired with its corresponding device. This action is required to avoid any possible interference or miscommunication of commands when using the devices. Carefully pair each remote with its designated Firestick to ensure a smooth viewing experience.
  • In the event that the automatic pairing process fails, the Firestick provides a manual alternative through its “Settings” menu. Navigate to this option on your Firestick to manually initiate the pairing process for your remote. This method serves as a reliable backup to the automatic process, offering a solution to any pairing challenges you might encounter.
  • To extend the battery life of your Firestick remote, making use of the “Sleep” function is highly recommended. Activating this feature when the remote is not in use puts it into a low-power state, significantly conserving battery power. By doing so, you’ll find yourself needing to replace the batteries less frequently, thereby ensuring that your remote is always ready when you need it. This straightforward yet useful advice can significantly impact how long your remote lasts.

Troubleshooting

While no technology is flawless, encountering problems is a part of the digital experience. If you find yourself in a situation where your Firestick remote fails to pair successfully, don’t fret—there are several troubleshooting steps you can take to resolve the issue. Here’s what you can do:

  • Begin by restarting your Firestick. To accomplish this, just take the gadget out of the power supply and plug it back in. This step might assist your device in recognizing the remote and often fixes small issues.
  • The next step is to check the batteries in your Firestick remote if restarting doesn’t work. Batteries deplete with time and can lead to problems with connectivity. Replace the old batteries with fresh ones to ensure that your remote has the power it needs to communicate with your Firestick.
  • Should the above methods fail, you might need to pair your Firestick remote manually. This process is slightly different from the automatic pairing process. Instead of holding down the Home button, you’ll need to press it three times consecutively. This can force the device into pairing mode and might be the solution you need.

Remember, patience is key when troubleshooting technology. With these steps, you’re well on your way to resolving your Firestick remote pairing issues.

Here are some common issues and solutions:

Interference from Other Devices

Sometimes, signals from other devices can interfere with your Firestick remote. To fix this, move any potential interfering devices, such as cordless phones or wireless speakers, away from your TV.

Remote Not Responding to Inputs

If your Firestick remote isn’t responding to button presses, it may be due to an insufficient power supply. Ensure the batteries are properly installed and are making good contact, or try a fresh pair.

Firestick Not Recognizing Remote

In the rare instance that your Firestick simply refuses to recognize your remote, a factory reset of the device might be necessary. This is a drastic measure, but it can often resolve more complex pairing issues.

Conclusion

As we conclude our guide on how to pair Firestick remote to TV, you’re now equipped with the knowledge to easily set up your device and enjoy seamless streaming. By following these simple steps, you can ensure that your Firestick remote is properly synced with your TV, allowing you to effortlessly navigate through your favorite content. Now, sit back, relax, and enjoy the endless entertainment options available at your fingertips with your newly paired Firestick remote and TV. Happy streaming!

Frequently Asked Questions

Q1: how to pair firestick remote to tv without remote?

Answer: The Firestick device can only be set up and controlled with a remote. If you have lost your remote, you will need to purchase a new one or use the Amazon Fire TV app as a temporary substitute.

Q2: Will I need to pair my Firestick remote every time I use it?

Answer: No, once your Firestick remote is paired with your TV, it will remain connected unless you unpair it or encounter any connectivity issues.

Q3: Can I pair multiple Firestick remotes to one TV?

Answer: Yes, you can pair up to seven Firestick remotes with one device. However, make sure each remote is designated to a specific Firestick to avoid any interference or confusion in commands.

Q4: Can I use my Firestick remote to control other devices?

Answer: No, the Firestick remote can only be used with the Firestick device and is not compatible with controlling other devices.  However, some TV models may allow you to use its remote to control certain functions of the Firestick. Check your TV’s manual for more information.

Q5: My Firestick remote is not responding after pairing, what should I do?

Answer: Try restarting your Firestick and replacing the batteries in your remote. Try manually pairing the remote if the problem continues, and as a final resort, think about doing a factory reset on the device.  If none of these solutions work, contact Amazon customer support for further assistance.  Overall, patience and troubleshooting steps are key in resolving any pairing issues with your Firestick remote.  With the right knowledge and resources, you can easily pair your remote to your TV and enjoy endless entertainment options.

Disclaimer: The process of pairing your Firestick remote can vary slightly depending on the model and software version you have. Consult the official manual that came with your particular gadget whenever possible. Remember to be patient and methodical as you go through the steps. Rushing can lead to errors that are harder to diagnose and fix. It’s a simple process overall, but taking your time can make a big difference.

Personal Experience: Pairing my first Firestick remote was an enlightening process. I became aware of how crucial it was to take my time and really read the directions. The satisfaction of seeing my remote work flawlessly with the TV was worth the patience it required. I’ve paired several remotes since then, and each time, I catch myself paying closer attention to details and understanding the value of a well-tuned pairing.

Why Trust Us?

We’re passionate about technology and staying on the pulse of the latest innovations. Our team of professionals is dedicated to disseminating useful and actionable knowledge. We’re here to support you in your tech journeys, whether through troubleshooting guides, product reviews, or insightful blog content.

How Many Amps Does a TV Use: Understanding Power Consumption & Easy 2 Method

How Many Amps Does a TV Use: Understanding Power Consumption & Easy 2 Method

Curious about the electrical consumption of your TV? Understanding how many amps does a TV use is essential for managing energy usage and ensuring your electrical system operates efficiently. Whether you’re concerned about electricity bills or simply want to know more about your devices, this guide will delve into the amp usage of TVs, shedding light on factors that influence consumption. In conclusion, you will know more about how your TV affects your energy usage. Let’s explore how many amps does a TV use and gain insights into managing your electrical usage effectively.

The Basics: Amps and Electricity

To understand how many amps a TV uses, we must first grasp the concept of amperage itself. Electric current measurement is done in amps, or amperage for short. It is expressed in amperes (A), which is the unit of measurement for the speed at which electricity moves across a circuit. In simple terms, amps indicate how much power an electrical device consumes over time. This consumption can be translated into energy costs on your monthly utility bill.

Lets Know How Many Amps Does a TV Use?

The number of amps a TV uses depends on various factors, such as the size and type of the TV, its settings, and usage habits. Generally speaking, larger TVs with higher resolution screens tend to use more power than smaller ones. For example, a 50-inch LED TV may consume around 100 watts or 0.83 amps while a  65-inch OLED TV could use up to 300 watts or 2.5 amps.

Calculating Amps for Your Specific TV

If you want a more precise calculation of how many amps your TV uses, you can follow these steps:

  1. Look for the power consumption information on your TV’s label or manual.
  2. Use the following formula to convert the power rating from watts to amps: amps = watts/volts.
  3. Determine the voltage of your household by checking your outlet or referring to your local utility provider’s information.
  4. To calculate the amount of amps your TV uses, divide its power rating in watts by its voltage.

Understanding Energy Efficiency Ratings

While knowing how many amps a TV uses is essential, it’s also crucial to understand energy efficiency ratings. These ratings show how much energy a TV uses in comparison to its size and features. The most widely used rating system is the Energy Star badge, which rates TV efficiency on a scale from 1 to 100. The TV is more energy-efficient and uses less power when its number is higher.

Determining TV Amperage

There are two primary methods to determine the amperage of your TV. The first involves checking the TV’s specifications, and the other is a simple calculation using wattage and voltage.

Method 1: Checking the TV’s Specifications

Most electronic devices, ranging from your everyday smartphone to larger household appliances, are accompanied by a label or an in-depth user manual that meticulously provides the amperage rating. This crucial piece of information, indicative of the device’s electrical consumption, is typically located near the power input area or is meticulously detailed within the technical data section of the manual. This ensures that users can easily find and understand the electrical requirements of their devices, promoting safe and efficient use.

Method 2: Calculating Amperage Using Wattage and Voltage

If you can’t find the amperage rating, you can calculate it using the wattage. Watts to amps can be easily calculated using this formula:

 Amps = Watts ÷ Volts.

For example, if you have a 500-watt TV running at 120 volts:

   500 ÷ 120 = 4.17 amps

Average Amps for Different Types of TVs

The average amperage of a TV can vary greatly depending on the type, model, and size, which is a crucial factor for those looking to reduce their energy consumption or accommodate their home’s electrical capacity. Fans of LED, LCD, and Plasma TVs will find the following details particularly illuminating and helpful in making an informed decision.

  • LED TVs: Among the various types of televisions, LED TVs stand out as the most energy-efficient. The main reason for this is that they use light-emitting diodes, which use less power to provide sharp and colorful images. On average, LED TVs draw between 1.4 to 2.8 amps. Environmentally aware consumers appreciate them because of their efficiency, which does not degrade their performance.
  • LCD TVs: LCD TVs, which utilize liquid crystal displays to project images, use a bit more power than their LED counterparts. The average amperage for LCD TVs ranges from 1.5 to 3.0 amps. While they consume slightly more energy, they remain a popular choice due to their balance between cost, performance, and power efficiency.
  • Plasma TVs: Plasma TVs offer excellent picture quality, with deep blacks and high contrast ratios that make them ideal for cinephiles and those who prioritize image quality above all else. Nevertheless, increased power consumption is a price for this better quality. Plasma TVs are at the top end of the power consumption spectrum, with an average amperage of 3.5 to 4.5 amps. They nonetheless have a devoted fan base that appreciates their unique visual advantages while using more energy.

Understanding the amperage and energy consumption of these TV types is essential for anyone looking to purchase a new television. By considering these factors, consumers can make choices that align with their energy efficiency goals, budget constraints, and viewing preferences, ensuring a satisfying entertainment experience.

Tips for Reducing TV’s Amp Usage

If you’re on a mission to lower your TV’s amp usage and, as a result, save on energy costs, there are several practical steps you can take to achieve this. Here are some detailed tips to consider:

  1. Adjust the brightness and contrast settings: TVs often come with factory settings that are brighter than necessary for most homes. Reducing these settings not only decreases your TV’s power consumption but can also enhance your viewing experience by making it easier on the eyes, especially in dimly lit rooms.
  2. Enable energy-saving mode: Almost all modern smart TVs are equipped with an energy-saving or eco mode. This feature intelligently adjusts the screen’s brightness in response to the ambient light present in the room, minimizing energy usage without sacrificing picture quality. You can save a lot of money on your electricity bills over time by using this option.
  3. Unplug when not in use: Few people are aware that even when a TV is switched off, a lot of them still use a tiny bit of electricity. This standby power usage, while minimal for a single device, can add up across all the electronics in your home. To completely eliminate this energy drain, it’s a good habit to unplug your TV whenever it’s not in use. To make things easier, think about utilizing a power strip with a switch so you can turn off several devices at once.

You may help the environment and your pocketbook by putting these tips into practice to cut down on the energy your TV uses.

Conclusion

As we conclude our discussion on how many amps a TV uses, it’s important to understand that the amp usage of a TV can vary based on factors like size, model, and usage habits. Generally, most modern TVs consume around 1 to 2 amps per hour. To obtain a precise approximation, it’s advisable to examine the precise specifications of your television. By being aware of your TV’s amp usage, you can better manage your energy consumption and ensure your electrical system is operating efficiently.​​​​​

Frequently Asked Questions

Q1: how many amps does a tv use on standby?

Answer: Most modern televisions are designed to be energy efficient, particularly in standby mode where they consume minimal power. On average, a TV in standby mode uses about 1 watt or less. This low power consumption translates to approximately 0.01 amps per hour, which is a testament to the advancements in energy-saving technology in consumer electronics. This means that even when your TV is not actively being used, it’s designed to ensure that its impact on your electricity bill and the environment is as minimal as possible.

Q2: Can I save energy by turning off my TV completely instead of just putting it on standby?

Answer: Yes, turning off your TV completely will save more energy compared to leaving it in standby mode. The best approach to stop the TV from using standby power is to unplug it when not in use.

Q3: Do all types of TVs have the same amp usage?

Answer: No, different types of TVs (such as LED, LCD, and Plasma) have varying levels of power consumption. Generally, LED TVs are the most energy-efficient while Plasma TVs consume the most amount of power. For a precise estimate, it’s crucial to review your TV’s exact characteristics.

Q4: How can I reduce my TV's amp usage?

Answer: By adjusting brightness and contrast settings, enabling energy-saving mode, and unplugging the TV when not in use, you can effectively lower your TV’s energy consumption. It’s also helpful to invest in a more energy-efficient TV model, such as an LED TV.  Overall, being mindful of your usage habits and making small changes can have a significant impact on reducing amp usage and saving energy.

Q5: Is it worth investing in a more energy-efficient TV?

Answer: Yes, you can lower your carbon footprint and ultimately save money on power costs by making the investment in a more energy-efficient TV. It’s a financially and environmentally responsible decision.

Disclaimer: This post contains information that is solely intended for educational purposes; it is not intended to be used as professional advice. We strongly recommend consulting your TV’s specific specifications and the user manual to obtain accurate and detailed information regarding its power consumption and electrical ratings. It’s important to rely on these documents to ensure the correct and safe use of your television.

Personal Experience: I discovered that by making a small but effective adjustment to the brightness and contrast settings on my television, I was able to create a much more comfortable viewing experience. Not only did this simple tweak make the screen easier on my eyes, especially during long movie marathons, but it also led to a noticeable reduction in my electricity bill. This minor change, which took just a few moments to implement, proved to be both economically and environmentally beneficial, allowing me to enjoy my favorite shows and movies without the worry of excessive energy costs.

Why Trust Us?

At our core, we are dedicated to providing not just content, but accurate and actionable insights. Through comprehensive research and leveraging our deep expertise in the field, we’re here to ensure that the information you receive, especially regarding TV power usage, is not only reliable but also grounded in real-world applications. Trust us to be your go-to source for all matters related to understanding the intricacies of how your television consumes power, enabling you to make informed decisions.