As an Amazon Associate I earn from qualifying purchases.
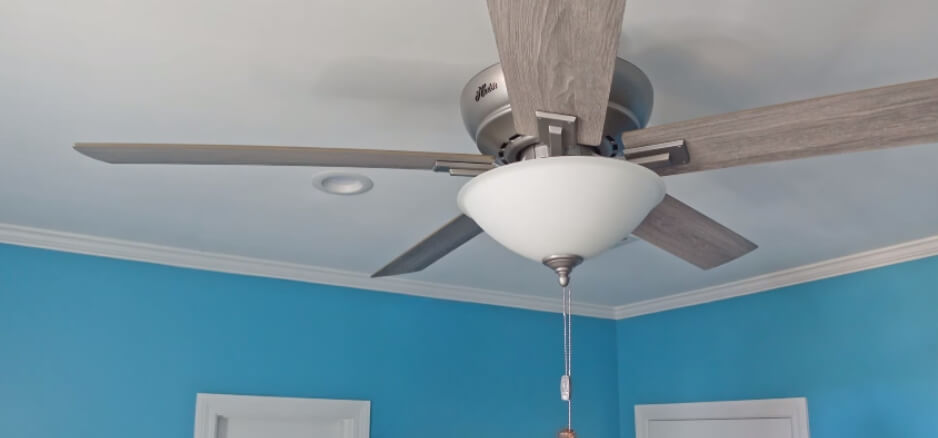
Welcome to our guide on “How to Remove Hunter Ceiling Fan.” Whether you’re upgrading your fan, performing maintenance, or rearranging your space, knowing the proper steps for removing your Hunter ceiling fan is crucial. We’ll take you step-by-step through the procedure in our extensive guide, making sure you have a hassle-free experience. By the end, you’ll be equipped with the knowledge to confidently handle the removal of your Hunter ceiling fan, making any future changes a breeze. Together, we will take immediate action to enable you to take charge of your house.
Preparing for Removal
Before you begin the process of how to remove Hunter ceiling fan, it’s essential to take some preparatory steps to ensure a safe and efficient experience. What you should do is as follows:
A. Turn off the power:
The ceiling fan’s power source must be turned off as the first and most important step. Find and turn off the circuit breaker or fuse box that regulates the fan’s electrical supply.This preventive step reduces the possibility of electrical mishaps while the removal is being done. For the sake of safety, make sure the power is off during the whole removal process.
B. Gather necessary tools and equipment:
Next, assemble every piece of machinery and tool required for the removal procedure. This typically includes a screwdriver or power drill with appropriate attachments, such as screwdriver bits or nut drivers. Additionally, have a sturdy ladder or step stool on hand to safely access the fan, especially if it’s installed at a height. Depending on your specific ceiling fan model and any additional features it may have, you may require other tools or accessories, so it’s wise to check the Hunter ceiling fan manual for any specific recommendations.
C. Review the Hunter ceiling fan manual for specific instructions:
While you may feel confident in your ability to remove the ceiling fan, it’s always a good idea to review the manufacturer’s instructions beforehand. The Hunter ceiling fan manual provides detailed guidelines and specific instructions tailored to your fan model, ensuring a smoother removal process. Pay attention to any model-specific nuances or recommendations that may affect the removal procedure. By familiarizing yourself with the manual, you’ll be better prepared to tackle the task at hand and avoid potential pitfalls or complications.
Step-By-Step Guide for How to Remove Hunter Ceiling Fan
After being ready for the removal procedure, let’s get started with the detailed steps for taking down your Hunter ceiling fan. To guarantee a seamless and effective removal, adhere to following specific instructions:
Step 1. Uninstalling the fan blades:

As we embark on the journey of how to remove Hunter ceiling fan, the first crucial step involves the careful uninstallation of the fan blades. This step ensures a systematic approach to the removal process, allowing you to navigate each phase with confidence.
Use a screwdriver to remove the screws:
Find the screws holding the fan blades to the brackets to start. Depending on your Hunter ceiling fan model, these screws are typically located at the base of each blade where it attaches to the bracket.Whether your fan is using flathead or Phillips head screws, use a screwdriver made specifically for that kind of screw. To loosen and extract the screws, carefully place the screwdriver into the screw heads and spin anticlockwise. These screws need to be kept track of since you may need them for reinstallation at a later time.
Carefully detach the blades from the brackets:
With the screws removed, gently detach each fan blade from its bracket. Throughout this operation, hold the blade firmly to keep it from dropping. Depending on the design of your Hunter ceiling fan, you may need to slide the blades off the brackets or lift them away from the brackets. When removing the blades, take careful not to bend them or use too much effort. Repeat this step for each fan blade until all blades are detached from the brackets.
Step 2. Detaching the Light Fixture (if applicable)

Moving on to the next pivotal step in how to remove Hunter ceiling fan, let’s focus on detaching the light fixture, if your fan is equipped with one. This part of the process is crucial, especially if you’re looking to replace the light kit, perform maintenance, or simply streamline the fan’s appearance. Here’s a detailed walkthrough:
Turn off power to the light:
Prioritize safety above all else and switch off the electrical supply to the light fitting in particular. Locate the switch or breaker corresponding to the fan’s lighting element and ensure it is switched off. This preventive step reduces the possibility of electrical mishaps while the removal is being done. Confirm that the power remains off throughout this step to guarantee a secure working environment.
Remove the light kit by unscrewing it:
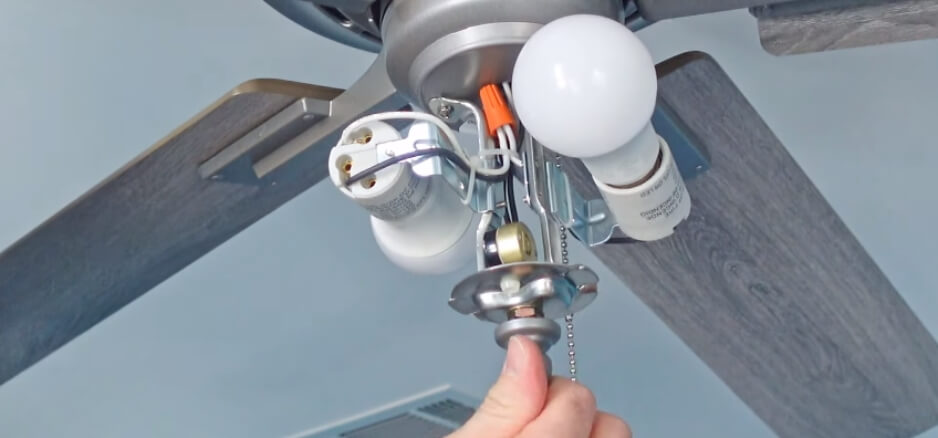
Once the power is safely turned off, proceed to remove the light kit from the Hunter ceiling fan. Identify the screws or fasteners securing the light kit to the fan body. Typically, these screws are located on the side or underside of the light kit. Using an appropriate screwdriver or tool, carefully unscrew and remove the fasteners. Keep a firm grip on the light kit as you release the final screws to prevent it from falling. Once detached, set the light kit aside for future use or replacement.
Step 3. Disconnecting the Wiring

Now that we’re progressing through the removal process of your Hunter ceiling fan, the focus turns to disconnecting the wiring. In order to guarantee safety and a seamless reinstallation procedure, this step is essential. Observe these comprehensive guidelines to manage the wiring efficiently:
Turn off power at the circuit breaker:
It is crucial to switch off the Hunter ceiling fan’s power source at the circuit breaker before tampering with the wiring. Locate and turn the corresponding breaker switch to the off position on your electrical panel. Verifying that the power is completely cut off ensures a secure environment for working with the fan’s wiring.
Identify and disconnect the wiring using wire nuts:
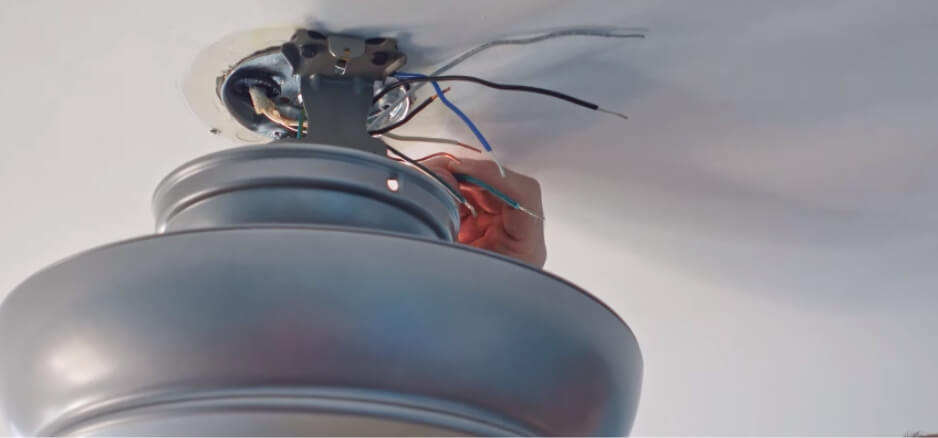
With the power safely turned off, turn your attention to the fan’s wiring. Identify the wires connecting the fan to the electrical supply. Most ceiling fans have three main wires – typically colored black, white, and blue. Apply a voltage tester to make sure that the wires are not carrying any electrical current. Using wire nuts, disconnect the cables when this has been determined. Twist the wire nuts counterclockwise to loosen and separate the wires. If your fan has additional features, such as a remote control or multiple light settings, be attentive to any extra wires connected.
Label wires for easy reinstallation:
As you disconnect the wires, take a proactive step by labeling each one. Use masking tape or adhesive labels to distinguish the wires and note their corresponding functions. This labeling will significantly simplify the reinstallation process, eliminating confusion and ensuring that each wire is correctly reconnected to its respective terminal. Consider using clear and concise labels such as “fan,” “light,” or “common” to avoid any ambiguity during the later stages of reinstalling the Hunter ceiling fan.
Step 4. Removing the Mounting Bracket

As we approach the final phase of how to remove Hunter ceiling fan, the focus now shifts to the pivotal step of removing the mounting bracket. This component plays a key role in supporting and securing the fan to the ceiling, and its careful removal is essential for a successful fan disassembly. Here’s a step-by-step guide:
Loosen the screws securing the bracket to the ceiling:
To start, locate the screws holding the mounting bracket to the ceiling. Usually, these screws are located on the bracket’s outside edge where it contacts the ceiling. To loosen the screws, use a suitable screwdriver or drill and spin them anticlockwise. Be cautious not to fully remove the screws at this stage; instead, aim to loosen them enough to allow for the subsequent removal of the bracket.
Lower the fan and remove the bracket:
With the screws loosened, gently lower the Hunter ceiling fan from its mounting bracket. To guarantee a safe fall, this step could need an additional pair of hands. Once the fan is safely lowered, proceed to fully remove the loosened screws, detaching the bracket from the ceiling. Throughout this operation, maintain a tight hold on the fan to avoid any unexpected movements or mishaps. Once the bracket is separated, carefully set it aside. Depending on your removal goals, you may choose to keep the bracket for future use or replace it with a new one.
Tips and Safety Precautions
As you navigate through the process of removing your Hunter ceiling fan, it’s crucial to prioritize safety and take proactive measures to ensure a smooth and accident-free experience. Consider the following helpful advice and safety measures:
- Power Off: Turn off the Hunter ceiling fan’s electricity at the circuit breaker before beginning any actions.To lessen the chance of electrical mishaps, make sure the power is turned off the entire while the removal is underway.
- Secure the Area: To provide a safe working environment, tidy the surrounding area. Remove any obstacles or furniture that may hinder your movement and ensure a spacious area to maneuver during the removal.
- Use a Stable Ladder: Use a sturdy, proportionally-sized ladder while working at heights to remove fan components. Ensure the ladder is on a flat surface, and if necessary, have a second person assist in stabilizing it for added safety.
- Protect the Ceiling: Place a soft, non-abrasive material, such as a blanket or cardboard, on the floor beneath the Hunter ceiling fan. This provides a cushioned surface to catch any falling components and prevents damage to both the fan and the floor.
- Secure Fan Blades: As you remove the fan blades, carefully secure them to prevent any accidental drops or damage. Consider using tape or ties to bundle the blades together for added stability.
- Label Wires Clearly: During the wiring disconnection phase, use clear and legible labels to mark each wire. This ensures accurate reconnection during the reinstallation process and minimizes the risk of confusion.
Conclusion
In conclusion, mastering how to remove Hunter ceiling fan is a rewarding skill that empowers you to undertake maintenance, upgrades, or simply switch up your space. Following our comprehensive guide ensures a seamless process, from detaching fan blades to disconnecting wiring and removing the mounting bracket. Prioritize safety, consult the Hunter ceiling fan manual for model-specific details, and use our tips to avoid any hiccups along the way. With these insights, you’re equipped to effortlessly handle the removal, opening the door to future adjustments and enhancements for your home environment.
Frequently Asked Questions
Q1. How to remove hunter ceiling fan without any hassle?
Answer: Turn off the ceiling fan’s power and use a ladder. Uninstall blades by removing screws. If applicable, turn off power, unscrew, and detach the light fixture. Disconnect wiring, label for easy reinstallation. Loosen bracket screws, lower and remove the fan. Prioritize safety, consult the Hunter manual, and use protective measures to avoid damage.
Q2: Is it necessary to turn off the power before removing my Hunter ceiling fan?
Answer: Indeed. Put safety first by shutting off the electricity at the circuit breaker to avoid any electrical mishaps while the parts are being removed.
Q3: Can I use any screwdriver to uninstall the fan blades?
Answer: Determine which kind of screwdriver is best for the screws on your Hunter ceiling fan. Most fans use Phillips or flathead screws for the blade attachment.
Q4: Should I keep the mounting bracket after removing the fan?
Answer: Depending on your goals, you can keep the bracket for future use or replace it with a new one for reinstallation.
Q5: How do I avoid damaging my ceiling or fan components during removal?
Answer: Place a protective material on the floor beneath the fan, secure fan blades to prevent drops, and label wires clearly to avoid confusion during reinstallation.
Disclaimer: Removing a Hunter ceiling fan requires care and adherence to safety guidelines. Even while our guide offers broad guidelines, for precise information, always refer to the handbook for your particular model. Proceed with caution, and if uncertain, seek professional assistance to avoid any mishaps.
Personal Experience: Removing my Hunter ceiling fan was surprisingly straightforward. Following the steps meticulously ensured a hassle-free experience. The manual was a valuable companion, providing model-specific insights that made the process smoother. It’s going to be easier than you think if you just take it step by step.
Why Trust Us?
Our guide on removing Hunter ceiling fans combines practical knowledge with a focus on safety. We emphasize consulting the manufacturer’s manual for precise details. The insights shared are based on experience, ensuring reliability. You can rely on us to provide you with clear and efficient guidance throughout the procedure.
As an Amazon Associate I earn from qualifying purchases.

