How to Clean Poop Off Memory Foam Mattress

How to Clean Poop Off Memory Foam Mattress

Dealing with unexpected accidents like how to clean poop off memory foam mattress can be a challenge. To keep your sleeping space fresh and clean, it’s essential to know the proper procedures for cleaning excrement off a memory foam mattress. Accidents happen, whether it’s from a pet or other mishaps, but acting swiftly and effectively can prevent stubborn stains and unwanted odors from lingering. In this guide, we’ll explore the best methods and practical tips to efficiently how to clean poop off memory foam mattress, ensuring a hygienic and comfortable sleep surface for you and your family.

Preparing for How to Clean Poop Off Memory Foam Mattress

1. Gather necessary cleaning supplies and protective gear:

Before starting how to clean poop off memory foam mattress, it’s essential to gather all the items required for effectively cleaning the soiled memory foam mattress. Among the materials required are:

  • To keep your hands away from the fecal matter, wear disposable gloves.
  • Several layers of paper towels or disposable cloths to blot and remove the excess poop.
  • Cornstarch or baking soda to help absorb moisture and eliminate odors.
  • Mild detergent, vinegar, or enzyme-based cleaner for the actual cleaning process.
  • A cleaning solution-filled spray bottle.
  • To apply the cleaning solution to the afflicted area, use a fresh cloth or sponge.

You may make sure you’re ready to handle the cleaning procedure successfully and efficiently by arming yourself with these items. Additionally, wearing disposable gloves during the cleanup process is crucial to maintain proper hygiene and protect yourself from any potential bacteria or pathogens present in the fecal matter.

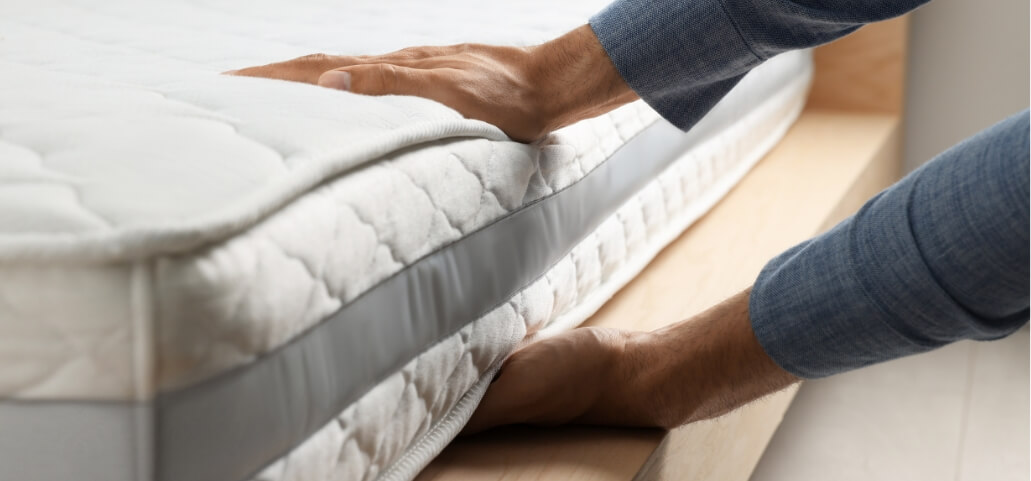
2. Removal of bedding and initial inspection of the affected area:

Once you’ve gathered the necessary cleaning supplies and put on protective gloves, the next step is to remove any bedding or covers from the soiled area of the memory foam mattress. Carefully strip away the sheets, blankets, or mattress protectors, making sure not to spread the fecal matter further.

After removing the bedding, conduct an initial inspection of the affected area. Use disposable paper towels or cloths to blot and remove as much of the excess poop as possible. Avoid applying excessive pressure or rubbing force on the mattress as this might lead to the stain seeping deeper.

Initial Steps for Cleaning

How to Clean Poop Off Memory Foam Mattress

A. Use disposable gloves and paper towels:

It’s important to wear disposable gloves to safeguard your hands before starting how to clean poop off memory foam mattress procedure. Carefully blot the affected area of the memory foam mattress with layers of paper towels or disposable cloths. Gently press down on the poop to absorb as much of it as possible without spreading it further.

B. Apply baking soda or cornstarch:

Once you’ve removed the majority of the fecal matter, take baking soda or cornstarch and sprinkle it generously over the affected area. These powders work wonders in absorbing moisture and neutralizing unpleasant odors. To help the baking soda or cornstarch absorb any leftover moisture and get rid of any smells, let it stay on the stain for a while.

C. Vacuuming:

Use a vacuum with a brush attachment to carefully remove the cornstarch or baking soda powder from the mattress surface after letting it set for at least 15 to 30 minutes. Gently run the vacuum over the area to remove the baking soda or cornstarch completely. This step helps in eliminating any remaining residue and leaves the mattress surface cleaner and fresher.

These initial cleaning steps, involving the use of gloves, blotting with paper towels, and employing baking soda or cornstarch, set the stage for further cleaning processes to effectively remove stains and odors from the memory foam mattress.

Cleaning Process

How to Clean Poop Off Memory Foam Mattress

A. Creating a cleaning solution:

Prepare a cleaning solution by mixing a mild detergent with water or combining equal parts of vinegar and water in a spray bottle. This solution will serve as an effective cleaner to tackle how to clean poop off memory foam mattress.

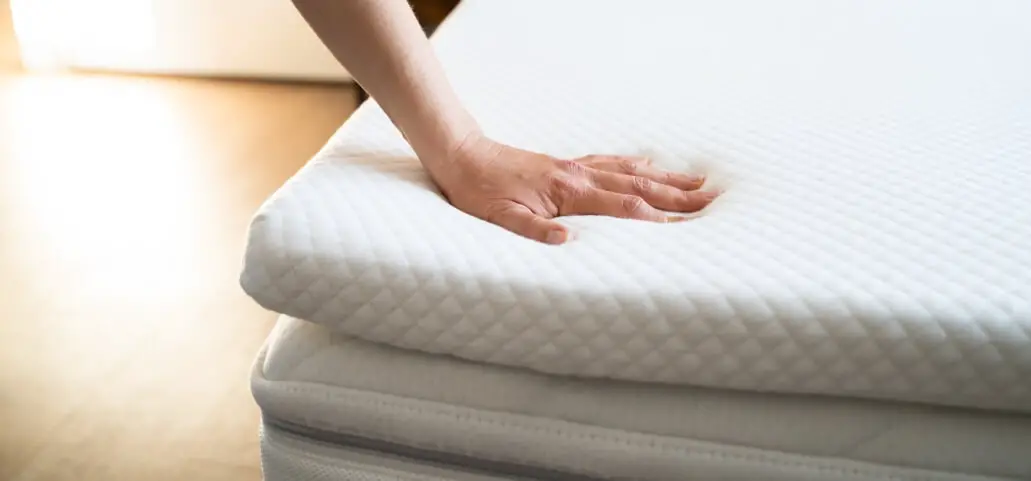
B. Using a clean cloth or sponge:

Apply the prepared cleaning solution on a clean cloth or sponge. Gentle dab the filthy mattress with the sponge or damp towel. Refrain from rubbing too hard as this might encourage the stain to spread or seep farther into the memory foam. Instead, apply gentle pressure and blot the stain, allowing the cleaning solution to work its way into the affected area.

C. Avoiding excessive moisture:

It’s crucial to avoid oversaturating the memory foam with the cleaning solution or water. Excessive moisture can lead to the foam’s saturation, making it challenging to dry and potentially causing damage. Use a minimal amount of the cleaning solution, ensuring that it penetrates the stain without soaking the mattress excessively.

These cleaning steps, involving the use of a prepared cleaning solution and gentle blotting, aim to effectively treat how to clean poop off memory foam mattress without causing saturation or damage to the foam material.

Deodorizing and Sanitizing

How to Clean Poop Off Memory Foam Mattress

A. Using an enzymatic cleaner:

For additional stain removal and to address lingering odors, consider using an enzymatic cleaner or a hydrogen peroxide solution. Enzymatic cleaners are effective in breaking down organic stains, like those from bodily fluids, while hydrogen peroxide can help lift stubborn stains and neutralize odors. Apply the chosen solution according to the product instructions, ensuring it covers the affected area adequately. Allow the cleaner or hydrogen peroxide solution to sit for some time to effectively work on the stain and odor.

B. Allowing the mattress to air dry completely:

After treating the mattress with the enzymatic cleaner or hydrogen peroxide solution, it’s crucial to let the mattress air dry thoroughly. Proper ventilation helps in drying out the mattress completely and ensures that any remaining moisture evaporates. Place the mattress in a location with sufficient air circulation and ventilation to speed up the drying process. In order to avoid any possible mold or mildew growth, it is imperative that bedding not be replaced until the mattress is completely dry.

These steps for deodorizing and sanitizing help in further eliminating stains and odors from how to clean poop off memory foam mattress, leaving it fresh and sanitized for future use.

VI. Additional Tips and Precautions

A. Avoiding harsh chemicals:

When cleaning a memory foam mattress, it’s essential to steer clear of harsh chemicals or cleaners that could potentially harm the material. Abrasive cleaners or those containing bleach, ammonia, or strong solvents can degrade the memory foam and affect its structural integrity. To keep the mattress in excellent shape, use only light and gentle cleaning methods.

B. Use of mattress protectors for future prevention:

Use a mattress protector to keep how to clean poop off memory foam mattress and safe from potential mishaps. Mattress guards prevent spills, stains, and other mishaps, extending its lifespan. Additionally, practice regular maintenance by regularly vacuuming and airing out the mattress to keep it fresh and hygienic.

C. Seeking professional cleaning assistance:

In cases where stains persist or if there’s extensive damage to the memory foam mattress, it might be prudent to seek professional cleaning assistance. Professional cleaners can successfully remove tough stains or strong smells because they have the right equipment and knowledge. They can thoroughly clean the mattress without running the danger of causing harm.

By adhering to these additional tips and precautions, such as avoiding harsh chemicals, using mattress protectors, and considering professional cleaning for persistent stains, you’ll help maintain the cleanliness and longevity of your memory foam mattress.

Conclusion

In summary, cleaning poop off a memory foam mattress requires swift action and gentle yet effective cleaning methods. Using protective gear, blotting with paper towels, and employing absorbent agents like baking soda are initial steps. Cleaning solutions should be mild to prevent damage. Additionally, air-drying and preventive measures like mattress protectors are crucial. Getting expert assistance is advised for stains that are difficult to remove. By following these steps and precautions, you can effectively restore your memory foam mattress’s cleanliness, ensuring a hygienic and fresh sleeping surface.

Frequently Asked Questions

Q1. How to Clean Poop Off Memory Foam Mattress effectively?

Answer: To clean poop off a memory foam mattress effectively:

  • Wear disposable gloves and blot excess fecal matter with paper towels.
  • To soak up any excess moisture and get rid of any unpleasant smell, just sprinkle some baking soda on the spot.
  • Use a mild cleaning solution (detergent and water or vinegar and water) to gently blot the stain.
  • Air dry the mattress thoroughly, and consider using enzymatic cleaners or hydrogen peroxide for stubborn stains and odors.
  • Avoid harsh chemicals, ensure minimal moisture, and seek professional help for persistent stains.

Q2: Can I use bleach or harsh chemicals to clean poop stains on a memory foam mattress?

Answer: It’s not recommended. Harsh chemicals, including bleach, can damage the memory foam. Stick to mild cleaners to avoid potential harm.

Q3: How long should I let the baking soda or cleaning solution sit on the mattress?

Answer: Aim for around 15-30 minutes to allow the baking soda or cleaning solution to absorb and neutralize odors effectively.

Q4: Can I speed up the drying process by using a hairdryer or heater?

Answer: It’s not advisable as excessive heat can damage the memory foam. Instead, use natural air drying in a well-ventilated area.

Q5: What should I do if the stain or odor persists after cleaning?

Answer: Consider repeating the cleaning process or using specialized enzymatic cleaners. If the issue persists, professional cleaning assistance might be necessary.

Q6: Are there any preventive measures to avoid future accidents on my memory foam mattress?

Answer: Using a mattress protector is a good preventive measure. It prolongs the cleanliness of the mattress by acting as a barrier against spills and stains.

Best Bed Mattress for Osteoporosis

Best Bed Mattress for Osteoporosis

Discover the Ultimate Guide to Finding the Best Bed Mattress for Osteoporosis Relief! If you or a loved one suffers from osteoporosis, choosing the right mattress is crucial for ensuring comfort and support during sleep. In this comprehensive guide, we’ll delve into the essential factors and top recommendations for mattresses designed to alleviate discomfort, promote better sleep, and provide the necessary support for those battling osteoporosis. Say goodbye to restless nights and hello to rejuvenating sleep with our expert tips and reviews tailored specifically for osteoporosis patients.

Reviews of 5 Best Bed Mattresses for Osteoporosis

01. Linenspa 8 Inch Memory Foam Mattresses

The LINENSPA Memory Foam and Innerspring Hybrid Mattress is a welcome to the realm of excellent sleep. The support and contouring qualities of memory foam are combined with the classic innerspring coils for a unique mattress that offers the best of both worlds. Carefully crafted, this mattress promises to deliver a refreshing and comfortable sleep, leaving you feeling revived and prepared to face the day.

Features:

EASY SETUP AND RAPID EXPANSION: The mattress is compressed and packed in a box for easy delivery. Unbox promptly and give it 24 to 72 hours for complete expansion. Warmer room temperatures may speed up memory foam expansion.

RESPONSIVE COMBINATION DESIGN: Experience the best of both worlds as the embracing comfort of memory foam merges seamlessly with the enduring support of springs in our most sought-after mattress.

INCREDIBLE VALUE: Unmatched comfort meets affordability with this hybrid memory foam mattress. Available in three diverse profiles and sensations, catering to all sleeping styles and body sizes without breaking the bank.

MEDIUM FIRM SUPPORT: With multiple support and comfort layers, revel in responsive comfort and a medium-firm feel perfect for back and stomach sleepers. It’s an ideal fit for children’s rooms, guest beds, bunk beds, trundles, or as an RV mattress.

PEACE-OF-MIND WARRANTY: Linenspa mattresses offer a dependable 10-year limited warranty. This hybrid mattress, blending innerspring and memory foam, isn’t just a mattress in a box—it’s a comprehensive sleep solution.

Pros

  • Fusion of memory foam comfort and spring support.
  • Affordable pricing provides exceptional value.
  • Versatile medium-firm feel suitable.
  • Quick and straightforward setup.
  • Backed by a reliable 10-year warranty.

Cons

  • Potential initial odor upon unboxing.
  • Limited options for extremely firm or plush mattresses.

02. ZINUS 6 Inch Green Gel Memory Foam Mattress

Discover the optimal support and comfort needed for individuals dealing with osteoporosis with this exceptional mattress. Engineered with specific features to address the needs of those with this condition, this mattress aims to provide a restful night’s sleep, supporting delicate bones and minimizing discomfort associated with osteoporosis.

Features

AS REFRESHING AS IT GETS: Sink into a bed crafted with our most innovative cooling formula yet, ensuring nights of perfectly regulated temperatures and a consistently fresh sensation. Our enveloping memory foam is infused with cooling gel and green tea, delivering an indulgent sleep experience.

PRESSURE-RELIEVING FOAM LAYERS: Experience the luxury of ultra-cooling gel and green tea-infused memory foam, along with soft comfort foam and sturdy, high-density base foam, all designed to provide a soothing and supportive sleep surface.

AFFORDABLE LUXURY, CERTIFIED QUALITY: Delight in the opulence of CertiPUR-certified foams without straining your budget. This fiberglass-free mattress offers exceptional value, emphasizing quality, endurance, and unparalleled comfort.

EXPERTLY COMPACTED: This mattress may be conveniently compacted using our cutting-edge technology into a single box for transportation and simple bedroom assembly. The mattress will grow to its original shape in just 72 hours when you just unpack and unfold it.

WORRY-FREE WARRANTY: A 10-year limited guarantee will ease your mind. The weight limit for a twin mattress is 250 pounds, while the weight limit for all additional sizes is 500 pounds. It’s an investment in better sleep quality, not simply a purchase, with this mattress.

Pros

  • Pressure-relieving design.
  • CertiPUR-US certification.
  • Multi-layer construction.
  • Breathable fabric cover promotes airflow.
  • Universal compatibility with different bed frames.

Cons

  • Potential initial odor upon unboxing.
  • Limited firmness options for soft mattresses.

03. Kescas 8 Inch Hybrid Mattress

Looking for the best bed mattress to ease your osteoporosis discomfort? Presenting the Kescas Mattress. This mattress is like a supportive buddy, specially designed to offer comfort and relief for those dealing with osteoporosis.

Features:

Optimal Support: Engineered with heavy-gauge steel independent pocket springs providing stability and a medium-firm feel, ideal for supporting osteoporosis-related discomfort.

Certified Quality: CertiPUR-US certified foam layers for durability and safety, ensuring a supportive yet safe sleep surface.

Pressure Relief: Four foam layers work together to cushion and alleviate painful pressure points, a boon for those with osteoporosis.

Breathability: Dual-layered knitted fabric cover and airy mesh panels promote airflow, keeping you cool and comfortable while you rest.

Trial Period & Warranty: Comes with a 100 hassle-free night trial and a worry-free 10-year limited warranty, offering peace of mind.

Pros

  • Provides excellent support for osteoporosis-related discomfort.
  • Certified quality foam ensures safety and durability.
  • Alleviates pressure points, easing discomfort during sleep.
  • Breathable design maintains a cool sleeping environment.
  • Hassle-free trial period and a solid 10-year warranty.

Cons

  • Could have a slight initial odor but dissipates quickly.

04. ZINUS 12 Inch Memory Foam Mattress

If you’re on the hunt for the best bed mattress to help ease the discomfort of osteoporosis, let me introduce you to this fantastic find – the mattress with a patented design geared towards providing optimal support and comfort for those dealing with osteoporosis.

Features:

Patented Contour Design: This mattress boasts a unique contour design, specially crafted to offer excellent support and alleviate pressure points, providing relief for osteoporosis-related discomfort.

CertiPUR-US Certified: Quality is assured with CertiPUR-US certified foam, ensuring durability, performance, and safety for a restful and worry-free sleep.

Responsive Memory Foam: Layers of responsive memory foam offer customized support, adapting to your body’s shape to alleviate discomfort in sensitive areas.

Breathable Construction: In order to keep you cool and comfortable during the night, the mattress is developed with breathability in mind.

Trial Period & Warranty: Comes with a trial period for you to experience its benefits risk-free and a warranty to guarantee peace of mind.

Pros

  • Tailored patented contour design.
  • CertiPUR-US certified foam.
  • Responsive memory foam.
  • Breathable construction.
  • Trial period and warranty.

Cons

  • Might be firmer than expected.
  • Could have a slight initial odor.
  • Might not cater to side sleepers.

05. Molblly12 Inch Hybrid Foam Mattress(Queen Size)

If you’re on the lookout for the best bed mattress to make life a little easier with osteoporosis, I’ve got something you might just love – the Molblly Mattress. Let me tell you, this mattress is all about providing top-notch support and comfort, especially for those dealing with osteoporosis-related discomfort.

Features:

Individually Wrapped Coils: The Molblly mattress boasts individually wrapped innerspring coils, offering targeted support and relieving pressure points, which can be a game-changer for folks with osteoporosis.

Pressure-Relieving Foam: It’s designed with layers of pressure-relieving foam to cushion and comfort, perfect for those looking for relief from discomfort during sleep.

Breathable and Hypoallergenic: This mattress is built to be breathable and hypoallergenic, ensuring a cool and clean sleep environment, which is great for sensitive sleepers.

Motion Isolation Technology: With its motion isolation feature, it minimizes disturbances from tossing and turning, ensuring a more peaceful sleep for you.

Certified Quality: This mattress meets CertiPUR-US standards, assuring you of its durability, performance, and safety.

Pros

  • Individually wrapped coils.
  • Pressure-relieving foam.
  • Breathable and hypoallergenic design.
  • Motion isolation technology.
  • CertiPUR-US certification.

Cons

  • Might feel firmer than a softer mattress.
  • Some users might notice an initial odor.
  • Might not suit side sleepers

Understanding the Ideal Mattress for Osteoporosis

Let’s dive into understanding the ideal mattress for individuals dealing with osteoporosis, considering supportive features, suitable materials, and the significance of temperature regulation and breathability.

A. Supportive Features Necessary for Osteoporosis Patients:

  • Firmness Levels and their Impact:

Finding the right firmness level in a mattress is crucial for those with osteoporosis. Overly soft mattresses may not offer enough support, which might cause the spine to become misaligned and put more strain on delicate spots. On the flip side, an excessively firm mattress might exacerbate discomfort. Optimal firmness, typically in the medium-firm range, is often recommended. It helps in providing the necessary support without causing discomfort to pressure points.

  • Proper Spinal Alignment and Pressure Relief:

A mattress suitable for osteoporosis patients should prioritize maintaining proper spinal alignment. This means the mattress should support the natural curvature of the spine while also offering sufficient pressure relief to alleviate discomfort in areas prone to pain due to osteoporosis. Features like memory foam or targeted support systems, such as individually wrapped coils or zoning, can assist in achieving this balance, ensuring better comfort and support during sleep.

B. Materials Suitable for Osteoporosis:

  • Memory Foam, Latex, Innerspring, Hybrid Mattresses:

Different mattress materials cater to different needs. Adapting to the shape of the body, memory foam provides customized support and alleviation of pressure. Latex is responsive and offers a balance of support and bounce. Individualized coil innerspring mattresses provide targeted support. Hybrid mattresses provide comfort and support from many materials. For osteoporosis, choosing a mattress that aligns with personal preferences while providing ample support and pressure relief is crucial.

  • Considerations for Allergies and Sensitivities:

For individuals with allergies or sensitivities, choosing hypoallergenic materials is vital. Mattresses made with hypoallergenic fabrics or treated to resist allergens can reduce potential triggers and promote a healthier sleep environment. Additionally, CertiPUR-US certified foam or other certifications can ensure the absence of harmful substances, making it a safer choice for those with sensitivities.

C. Temperature Regulation and Breathability:

Proper temperature regulation and breathability are essential aspects of a mattress for individuals with osteoporosis. Mattresses with breathable materials, such as open-cell foam or designs promoting airflow, can help dissipate body heat, preventing discomfort caused by overheating during sleep. Maintaining a cooler sleep environment can enhance overall comfort and quality of sleep for individuals with osteoporosis.

Factors to Consider Before Purchasing a Mattress for Osteoporosis

Let’s explore the crucial factors to consider before purchasing a mattress tailored for individuals dealing with osteoporosis, taking into account personal preferences, budget, support features, customer policies, and more.

A. Personal Preferences and Sleep Positions:

Choosing the correct mattress requires knowing the sleeping position you prefer, whether it’s the back, side, or stomach. To relieve strain on their shoulders and hips, side sleepers, for example, might choose a somewhat softer mattress. A medium-firm mattress may assist back sleepers retain spinal alignment. Finding the best mattress for your requirements can be aided by taking into account your unique comfort preferences.

B. Budget Considerations:

Setting a budget is essential when purchasing a mattress. The materials, brand, and features can cause a large variation in price. While it’s crucial to find a mattress that meets your needs, setting a realistic budget helps narrow down options without overspending. It’s worth exploring financing options or sales periods to find quality mattresses within your price range.

C. Return Policies and Customer Support:

Consult the retailer’s return and customer care policies before buying. Understanding the return process, including any associated fees or time limitations, ensures peace of mind if the mattress doesn’t meet your expectations. Reliable customer support can provide valuable assistance throughout your buying journey and after-sales service.

D. Contouring and Body Adaptability:

A mattress that contours to your body’s shape can alleviate pressure points, providing relief for osteoporosis-related discomfort. Materials like memory foam or latex often excel in conforming to body contours, ensuring better support and comfort tailored to your unique needs.

E. Motion Isolation for Undisturbed Sleep:

For individuals sharing a bed, motion isolation is essential.  A well-isolated mattress minimizes movement disruptions, guaranteeing restful sleep. This feature can be particularly beneficial for osteoporosis patients, as it minimizes disruptions during the night.

F. Durability and Longevity:

Investing in a durable mattress ensures it maintains its supportive qualities over time. Consider materials known for their longevity and resilience. You may make an informed selection by reading reviews and product information about the lifetime and quality of mattresses.

G. Trial Periods and Warranties:

A lot of mattress manufacturers provide warranties and trial periods. You may try the mattress at home during the trial time and return it if it doesn’t fit, usually in full. Warranties provide coverage against manufacturing defects, ensuring your investment is protected for an extended period.

Conclusion

Choosing the right mattress for osteoporosis boils down to considering what feels best for your body and sleep habits. Your preferred sleeping position, budget, and the mattress’s ability to support your spine and relieve pressure points are key. Don’t forget to check return policies, warranties, and trial periods – they’re lifesavers if the mattress doesn’t suit you.  If you share a bed, look for durability and motion isolation. Ultimately, finding the perfect mattress is about personal comfort and ensuring a restful, supportive night’s sleep.

Frequently Asked Questions

Q1. What is the best bed mattress for osteoporosis firmness?

Answer:  The best firmness for a mattress if you have osteoporosis is typically in the medium-firm range. It offers adequate support for your spine without causing discomfort or adding pressure to sensitive areas affected by osteoporosis.

Q2. Which sleeping position is recommended for osteoporosis?

Answer: It depends on personal preference, but back or side sleeping often helps maintain better spinal alignment.

Q3. How do I choose a mattress if I have allergies or sensitivities?

Answer:  To make sure the mattress is devoid of dangerous components, look for hypoallergenic materials and certifications like CertiPUR-US.

Q4. Do trial periods and warranties matter when buying a mattress?

Answer:  Absolutely! Trial periods allow you to test the mattress at home, while warranties safeguard your investment against defects.

Q5. What features should I prioritize for undisturbed sleep with a partner?

Answer:  To reduce the amount of disturbance your partner’s movements cause while you sleep, think about investing in a mattress with strong motion isolation.

How to Get Coffee Stain out of Mattress

How to Get Coffee Stain out of Mattress

Are pesky coffee stains ruining the pristine look of your mattress? Find out the best methods for how to get coffee stain out of mattress. These stains may be difficult to remove, but you can get your mattress back to its original, immaculate state with the correct techniques and a little knowledge. Dive into powerful stain removal strategies to banish coffee marks and reclaim a fresh, inviting sleep surface. Let’s explore step-by-step solutions to bid farewell to these unwelcome how to get coffee stain out of mattress effortlessly.

Assessing How to Get Coffee Stain Out of Mattress

Immediate Steps After Spillage

When a coffee spill occurs on your mattress, swift action is key. First, gently dab the affected area with paper towels or a clean, absorbent cloth. Steer clear of excessive rubbing since this might exacerbate the stain’s penetration into the cloth. As much liquid as possible should be absorbed without spreading the discoloration.

Next, consider using a small amount of cold water and a mild detergent to lightly dab the stained area. Ensure the detergent is color-safe and doesn’t contain bleach, as this could exacerbate the stain. Pat the area gently to lift the coffee residue.

Analyzing Stain Severity

Choose the best cleaning method by assessing the coffee stain’s extent. Take note of the size, depth, and duration of the stain. In general, it is simpler to remove recent stains than older, embedded stains. Consider whether the spillage penetrated only the surface or seeped deeper into the mattress layers.

Examining the severity aids in choosing the right stain removal techniques. Light stains might respond well to simple cleaning methods, while deeper or older stains might require more intensive treatment. By analyzing the stain’s depth and age, you can tailor your cleaning strategy for optimal stain removal results.

Remember, acting swiftly and assessing the stain’s severity play pivotal roles in effectively tackling coffee stains on your mattress, ensuring successful removal without compromising the mattress’s integrity.

Preparing for Stain Removal

How to Get Coffee Stain Out of Mattress

Necessary Supplies and Tools

Gathering the essential supplies and tools is the initial step in preparing for effective coffee stain removal from your mattress. You’ll require items such as:

  • White Vinegar or Baking Soda: These natural cleaners are effective in combating stains and neutralizing odors.
  • Liquid Dish Soap: Choose a mild dish soap to help break down the coffee residue without damaging the mattress fabric.
  • Hydrogen Peroxide: An excellent stain remover, hydrogen peroxide can lift stubborn coffee stains from the mattress surface.
  • Clean Cloths or Towels: Use clean, white clothes or towels to blot and apply cleaning solutions. Avoid colored fabrics to prevent potential dye transfer.
  • Spray Bottle: Fill a spray bottle with a cleaning solution for convenient application.
  • Vacuum Cleaner: After cleaning, residue may be removed with the use of a vacuum attachment designed for upholstery.

Safety Measures to Consider

Before diving into stain removal, prioritize safety measures to protect yourself and your mattress:

  • Spot Test: To make sure the cleaning solution doesn’t affect the mattress’s color or cause any harm, always run a spot test on a discrete region.
  • Ventilation: Ensure proper ventilation in the room when using cleaning agents to avoid inhaling fumes. Consider opening windows or using a fan.
  • Protective Gear: Clean using gloves to avoid skin irritants.
  • Read Instructions: Read and follow product instructions for cleaning agents and solutions to ensure safe and effective usage.

Preparing with the necessary supplies and considering safety measures are crucial steps before initiating the coffee stain removal process. By equipping yourself with the right tools and prioritizing safety, you’re set to tackle the stain effectively without compromising your mattress or well-being.

Effective Stain Removal Techniques

Using Natural Cleaning Solutions

Natural cleaning solutions can be remarkably effective in tackling coffee stains on a mattress. Consider the following:

Vinegar Solution: Mix white vinegar and water in the same proportions. Use a cloth or sponge to apply liquid to the stain. Because vinegar is acidic, it neutralizes odors and aids in the breakdown of coffee stains.

Baking Soda Paste: Apply a little coating of baking soda and water to the discolored region. Wait a while before cleaning it. Baking soda’s absorbent nature aids in lifting the stain and deodorizing the mattress.

Application of Stain Removers or Cleaners

For tougher coffee stains, specialized stain removers or cleaners designed for mattresses can be highly effective:

Enzyme-based Cleaners: Opt for enzyme-based cleaners specifically formulated for removing organic stains like coffee. These cleansers work well in removing coffee residue from mattresses because they contain enzymes that decompose organic materials.

Mild Detergent Solution: Mixing a little detergent with cold water makes a mild solution. Using a clean cloth, gently dab the soiled spot with this solution, being careful not to oversaturate the mattress.

Employing DIY Methods for Stubborn Stains

Stubborn coffee stains may require a more targeted approach:

Hydrogen Peroxide Solution: Dilute hydrogen peroxide with water and apply it to the stained area using a cloth. Start with a tiny area to check for discoloration.

Salt and Lemon Juice: Create a paste using salt and lemon juice, applying it to the stain. Once you’ve waited a little, gently wipe it off. Salt abrades, while lemon acidity eliminates stains.

Experiment with these stain removal techniques, starting with milder options and progressing to stronger solutions if necessary. Always remember to blot rather than rub the stain to prevent spreading or damaging the mattress fabric.

Step-by-Step Stain Removal Process

How to Get Coffee Stain Out of Mattress

Pre-treating the Stain

Blotting Excess Moisture: Gently remove the coffee stain with a clean, absorbent cloth or paper towel. To get the most liquid out of the stain, push down on it. Removing the coffee from the mattress fibers by not rubbing is advised.

Pre-treatment with Cleaning Solution: Apply a pre-treatment solution, such as a mild detergent or a specialized stain remover, onto the stained area. Use a soft-bristled brush or sponge to work the solution into the stain gently. Allow it to sit for a few minutes to penetrate the stain.

Application and Blotting Techniques

Dabbing Technique: With a clean cloth, gently blot the treated area. Press down and lift the cloth without rubbing. This technique helps lift the coffee residue without spreading it further.

Rinsing with Cold Water: Use a clean cloth dampened with cold water to rinse the area, removing any remaining cleaning solution or coffee residue. Continue blotting until the stain is no longer visible on the cloth.

Rinse and Drying Methods

Rinsing the Mattress: Dampen a clean cloth with cold water and gently blot the treated area again to ensure all cleaning solution and coffee residue are removed. To avoid any residue that may draw dirt or result in discoloration, this step is essential.

Drying the Mattress: Once the mattress has been thoroughly cleaned, let it air dry entirely. To speed up the drying process, make sure the space has enough ventilation by opening the windows or utilizing fans. The fabric of the mattress may get damaged if heat sources like hair dryers or direct sunlight are used.

Follow these step-by-step stain removal procedures diligently, employing gentle techniques to ensure effective removal without compromising the mattress’s integrity.

Precautions and Tips for Mattress Care

How to Get Coffee Stain Out of Mattress

Avoiding Excessive Moisture

Control Moisture Levels: When treating stains, ensure the mattress doesn’t become overly wet. Too much moisture may permeate the layers of the mattress, which might result in the formation of mold or mildew. Employ minimal water during the cleaning process and aim for thorough drying afterward.

Using Dry Cleaning Methods: Opt for dry cleaning methods or techniques that minimize moisture penetration into the mattress fabric. This helps in preventing moisture-related issues that could compromise the mattress’s integrity.

Preventive Measures for Future Spills

Mattress Protectors: An expensive mattress cover may prevent spills and stains. Waterproof or water-resistant protectors act as a barrier against liquid penetration, safeguarding your mattress from accidental spills like coffee.

Immediate Spot Cleaning: Spills should be cleaned to avoid stains. Blot the spilled liquid gently with a clean cloth as soon as it occurs, reducing the chances of it seeping into the mattress fabric.

Regular Maintenance and Cleaning: Implement a routine cleaning schedule for your mattress. Regularly vacuuming or airing out the mattress can help prevent dust, dirt, and debris buildup, reducing the risk of stains and maintaining overall cleanliness.

Avoiding Food and Beverages in Bed: While enjoying a morning coffee in bed might seem tempting, restrict food and beverages from the mattress area. This method keeps your mattress looking like new by reducing the possibility of spills and stains.

By implementing these precautionary measures and adopting proactive steps, you can effectively safeguard your mattress against spills, stains, and moisture accumulation. These strategies not only preserve the mattress’s appearance but also contribute to its longevity and hygiene.

Conclusion

Recalling the stain removal journey unveils an array of effective techniques—from natural solutions to specialized cleaners—tailored to bid farewell to stubborn coffee stains on your mattress. Blotting, pre-treating, and gentle application techniques form a powerful arsenal against these unsightly marks. Embrace timely action when faced with coffee stains. Acting swiftly ensures better outcomes, preventing deeper penetration and setting of stains. Your proactive approach ensures a fresh, inviting sleep surface, fostering an environment conducive to restful nights.

Frequently Asked Questions

Q1. How to Get Coffee Stain Out of Mattress effectively?

Answer: Eliminate coffee stains from your mattress effectively by promptly blotting the spill, treating it with a mild detergent or specialized cleaner, and gently blotting until the stain fades. Employ these proven methods promptly for successful and efficient stain removal, restoring your mattress to its spotless state.

Q2. How can a coffee stain on a mattress be removed the best?

Answer: Discover effective techniques and solutions to efficiently eliminate coffee stains from your mattress, ensuring thorough stain removal without damaging the fabric.

Q3. Can I use natural remedies to get rid of coffee stains on my mattress?

Answer: Explore the efficacy of natural cleaning solutions, such as vinegar, baking soda, or lemon, in combating stubborn coffee stains on your mattress without causing harm.

Q4. How quickly should I address a coffee spill on my mattress to prevent stains?

Answer: Learn about the importance of immediate action after a coffee spill to prevent the stain from setting, ensuring easier and more successful removal.

Q5. Are there specific cleaning products or detergents recommended for removing coffee stains from mattresses?

Answer: Explore recommended cleaning products, stain removers, or detergents designed for mattress fabrics, aiding in efficient coffee stain removal.

Q6. What are the preventive measures to avoid coffee stains on a mattress in the future?

Answer: Discover proactive strategies, such as using mattress protectors or immediate spot cleaning, to prevent coffee spills and stains from occurring, preserving your mattress’s cleanliness.

Why Does My Air Mattress Have a Bubble

Why Does My Air Mattress Have a Bubble

Have you ever wondered, “Why does my air mattress have a bubble?” A bubble on an air mattress can be an unwelcome surprise, disrupting your comfort and sleep. These air-filled anomalies create uneven surfaces, prompting discomfort and raising concerns about the mattress’s integrity. In this exploration, we delve into the reasons behind air mattress bubbles, unraveling the potential culprits that result in these unexpected protrusions. Understanding the root causes empowers you to address and conquer this issue, ensuring a seamless sleep experience on your air mattress sanctuary. Discover the secrets behind why does my air mattress have a bubble, enabling you to reclaim comfort, tranquility, and the assurance of a restful night’s sleep.

Causes Why does my Air Mattress Have a Bubble

Overinflation and Uneven Air Distribution

Imagine a scenario where your air mattress is inflated beyond its recommended capacity or with uneven air distribution. Overinflation puts excessive pressure on the mattress, causing certain areas to stretch beyond their limits. This excess air and uneven distribution result in the formation of unwanted bubbles on the mattress surface. These bubbles create an uncomfortable, lumpy texture, hindering your peaceful slumber.

Material Defects or Damage

The integrity of an air mattress can be compromised by material defects or damage. Even the tiniest puncture, tear, or flaw in the fabric or construction can lead to the formation of bubbles. Such imperfections allow air to escape or gather, forming irregular bulges or bubbles on the mattress surface, making it an uncomfortable resting place.

Manufacturing or Quality Issues

Manufacturing defects or issues related to the overall quality of the air mattress can contribute significantly to bubble formation. Inadequate quality control, subpar materials, or construction flaws during the manufacturing process can create weak spots or inconsistencies in the mattress. These issues often manifest as bubbles, disrupting the mattress’s smoothness and compromising its comfort.

Understanding these causes is vital in addressing and rectifying air mattress bubbles. By identifying the root cause, you can take proactive measures to resolve these issues, ensuring a smoother, more comfortable sleeping surface devoid of any unwanted disturbances.

Impact of Bubbles on Sleep Quality and Comfort

Why does My Air Mattress Have a Bubble

Discomfort and Uneven Surface

Air mattress bubbles can significantly disrupt your sleep experience by creating discomfort and an uneven sleeping surface. These irregular bulges or protrusions make it challenging to find a comfortable position, causing pressure points and discomfort throughout the night. As you try to rest, these bubbles become evident, making the surface feel lumpy and far from the ideal, supportive sleep surface you expect.

Potential for Air Leakage or Bursts

Beyond mere discomfort, bubbles on an air mattress pose potential risks of air leakage or bursts. The uneven distribution of air caused by these bubbles puts added stress on the mattress seams and material. This stress can lead to weakened spots, increasing the likelihood of air escaping or, in severe cases, the mattress bursting altogether. Such incidents not only disrupt your sleep but also pose safety concerns and inconvenience.

Effect on Overall Sleep Experience

The presence of bubbles on an air mattress doesn’t merely affect localized comfort; it impacts your entire sleep experience. The inability to find a smooth, supportive surface interferes with your ability to relax and enter deeper sleep stages. This disruption in sleep quality may result in waking up feeling fatigued, less refreshed, and may affect your overall well-being and productivity during the day.

Addressing these bubbles becomes paramount for restoring a restful sleep experience. By eliminating these irregularities, you pave the way for a comfortable and supportive sleeping surface, ensuring uninterrupted and rejuvenating rest each night.

Troubleshooting and Solutions for Air Mattress Bubbles

Why does My Air Mattress Have a Bubble

Inspection Steps for Identifying Bubbles

To address air mattress bubbles, start by inspecting the surface carefully. Run your hands across the mattress, feeling for any irregularities or protrusions. Be very careful around corners, seams, and any potential spots where bubbles might develop. This thorough inspection helps pinpoint the exact locations of the bubbles.

DIY Solutions for Small Bubbles

Adjusting Air Pressure:

If you see little bubbles that are produced by overinflation, you may want to try adjusting the air pressure to the amount advised by the manufacturer. This step often helps redistribute the air within the mattress, minimizing the appearance of bubbles and creating a smoother sleeping surface.

Applying Patch or Sealant:

Small bubbles caused by minor defects or punctures might be resolved with a DIY approach using patch kits or sealants designed for air mattresses. Apply these solutions carefully to the affected area, following the manufacturer’s instructions, to seal the puncture and prevent further bubble formation.

Seeking Professional Help for Larger Bubbles

For larger bubbles or those caused by substantial material defects, seeking professional assistance becomes crucial. These larger bubbles might require expert inspection and repair. Contact the manufacturer, an authorized repair service, or an expert in air mattress repair to assess and address the issue effectively.

Taking proactive steps to troubleshoot and address air mattress bubbles ensures a smoother and more comfortable sleeping surface. By employing DIY solutions for small bubbles and seeking professional help for larger issues, you guarantee a restful and uninterrupted sleep experience on your air mattress sanctuary.

Preventive Measures to Avoid Air Mattress Bubbles

Why does My Air Mattress Have a Bubble

Proper Inflation Techniques

Mastering proper inflation techniques is fundamental in preventing air mattress bubbles. Never deviate from the air pressure recommendations stated by the manufacturer. Avoid overinflation, which can strain the material and lead to uneven distribution of air, causing bubbles to form. Use a pump with pressure gauges to ensure accurate and appropriate inflation levels.

Regular Maintenance and Care Tips

Regular maintenance is key to preserving your air mattress and preventing bubble formation. You should check your mattress for rips, wear, and growing bubbles on a regular basis. To keep the mattress free of dirt and debris that might cause material stress, clean it periodically with a gentle soap and water. Fix minor leaks or punctures right away to save them from becoming major problems.

Storing Guidelines for Longevity

You must ensure that your air mattress is stored correctly while it is not in use in order to avoid any harm or the production of bubbles. For the mattress to remain mold-and mildew-free when stored, make sure it is totally dry. Fold or roll the mattress according to the manufacturer’s instructions and store it in a cool, dry place away from direct sunlight or sharp objects that could cause damage.

Implementing these preventive measures ensures the longevity and durability of your air mattress while safeguarding against the formation of bothersome bubbles. By taking proactive steps in proper inflation, regular maintenance, and correct storage techniques, you guarantee a smooth, comfortable sleep surface, promoting restful and rejuvenating sleep nights after nights.

Conclusion

We’ve uncovered the sources of air mattress bubbles, explored their disruptive nature, and offered solutions for a smoother sleep surface. Addressing air mattress bubbles isn’t merely about comfort—it’s about reclaiming quality sleep. These bubbles cause discomfort and potential damage, affecting your sleep and mattress durability. Empower yourself with proactive care to ensure a serene sleep haven. Regular maintenance prevents bubbles, preserving a comfortable and durable sleep surface. Commit to proactive care for a bubble-free sleep oasis, ensuring uninterrupted, rejuvenating nights. Prioritize maintenance for undisturbed, blissful sleep.

​​

Frequently Asked Questions

Q1. What causes bubbles to form on my air mattress?

Answer: Learn the several causes of air mattress bubbles. Explore factors such as overinflation, material defects, or manufacturing inconsistencies that might contribute to these bubbles.

Q2. Are bubbles on my air mattress a common issue?

Answer: Understand the prevalence of bubbles on air mattresses and whether their occurrence is a widespread concern. Learn when these bubbles might indicate a problem that needs addressing.

Q3. How do I troubleshoot bubbles on my air mattress?

Answer: Delve into effective troubleshooting steps to identify, assess, and address bubbles on your air mattress. Discover inspection techniques and DIY solutions to combat these unwelcome anomalies.

Q4. Can bubbles on my air mattress affect my sleep quality?

Answer: Explore the impact of bubbles on your sleep experience. Understand how these irregularities may disrupt comfort and potentially impact your sleep quality.

Q5. What DIY methods can I use to fix bubbles on my air mattress?

Answer: Discover practical do-it-yourself solutions to rectify bubbles on your air mattress. Learn about adjusting air pressure, applying patches, or sealants to alleviate minor bubble issues.

Q6. When should I seek professional help for bubbles on my air mattress?

Answer: Understand the circumstances that warrant professional assistance in dealing with air mattress bubbles. Explore when larger or complex bubble issues might require expert intervention.

Q7. How can I prevent bubbles from forming on my air mattress?

Answer: Explore preventive measures to avoid the formation of bubbles on your air mattress. Discover proper inflation techniques, maintenance practices, and storage guidelines for bubble prevention.

Q8. Are bubbles on my air mattress covered under warranty?

Answer: Understand the coverage provided by warranties regarding bubbles on air mattresses. Explore the warranty terms and conditions related to addressing these issues.

Q9. How long can I expect my air mattress to last without developing bubbles?

Answer: Gain insights into the durability of air mattresses concerning bubble formation. Understand the factors influencing the longevity of an air mattress before bubbles might appear.

Q10. Should I consider replacing my air mattress if bubbles appear?

Answer: Explore considerations for replacing an air mattress affected by bubbles. Learn about assessing the severity of bubbles, warranty coverage, and factors influencing replacement decisions.

Why is my Air Mattress Making Popping Noise: Immediate Solution

Why is my Air Mattress Making Popping Noise: Immediate Solution

If you’re pondering over the question, “Why is my air mattress making popping noise?”It’s frustrating, right? —you’re not alone in this sleep-depriving dilemma. Discover the mystery of those annoying pops with the help of this tutorial. This article serves as your definitive guide, shedding light on the why and how of air mattress noises. Empower yourself with knowledge to banish these disturbances, restoring peace to your sleep sanctuary. It’s time to seize control and bid farewell to those pesky air mattress pops once and for all.

Understanding Why is My Air Mattress Making Popping Noise

Here’s a detailed, human-written explanation with an introduction for understanding air mattress noises:

Common Types of Air Mattress Noises

When it comes to your peaceful slumber, unexpected noises from your air mattress can quickly turn tranquility into disturbance. Let’s decipher the common auditory disruptions you might encounter:

Popping Sounds

Imagine preparing to drift off into dreamland when suddenly, your serenity is shattered by popping sounds emanating from your air mattress. These abrupt noises can startle and puzzle, disrupting the calm of your sleep haven.

Squeaking or Creaking

As you settle in for the night, the tranquility is marred by annoying squeaks or creaks from your air mattress. These discomforting sounds, reminiscent of old floorboards, can be a source of frustration and hinder your much-needed rest.

Hissing or Whistling

Then there’s the persistent hissing or subtle whistling, almost like air escaping through an invisible crack. These subtle yet persistent sounds, resembling a quiet whistle, can leave you questioning the integrity of your mattress.

Factors Contributing to Noises

Understanding the origins of these disruptive sounds involves considering various factors that influence an air mattress’s auditory performance:

Material Quality

The materials used in crafting an air mattress hold significant sway over its performance. Inferior quality materials are prone to wear and tear, often resulting in unexpected noises that intrude upon your peace during restful moments.

Air Leakage

Ah, the infamous air leakage—the nemesis of inflatable mattresses. Tiny punctures or faulty valves pave the way for unwelcome sounds, disrupting your sleep haven and leaving you with a mattress slowly losing its inflation.

Internal Structural Issues

Sometimes, the root of the problem lies within. Structural flaws within the air mattress, such as faulty seams or misaligned components, can create internal disruptions, manifesting as unwelcome noises during your cherished moments of repose.

Understanding these contributing factors behind air mattress noises is pivotal. Identifying and addressing these issues not only restore peace to your sleep sanctuary but also ensure you can fully relax and rejuvenate each night.

Focus on Popping Noises

Why is my Air Mattress Making Popping Noise

Description of Popping Noises

Imagine settling into your cozy bed, ready to embrace a night of uninterrupted sleep, when suddenly, your tranquility is disrupted by unexpected popping noises emanating from your air mattress. These sounds can be quite startling, varying from subtle pops to more pronounced cracks, interrupting the peaceful ambiance of your bedtime.

Possible Causes

Overinflation

One of the primary reasons behind popping noises in air mattresses is overinflation. When we fill these mattresses beyond their recommended capacity, it’s like pushing the limits. The increased pressure stretches the materials beyond their intended capacity, leading to sudden pops or cracks as the materials strain against the excess air.

Temperature Changes

Surprisingly, temperature fluctuations can also play a part in creating these unwelcome noises. The air inside the mattress expands and shrinks in response to changes in temperature. This expansion and contraction can strain the material, causing unexpected popping sounds as the mattress reacts to these changes.

Material Stress

Another significant contributor to popping noises is the stress placed on the mattress materials. With time and usage, especially in lower-quality or aged mattresses, the materials endure wear and tear. This stress weakens the material integrity, leading to moments where the material gives way, resulting in sudden popping sounds.

Impact on Sleep Quality and Comfort

The consequences of these popping noises on sleep quality and comfort are more than just a mere nuisance. The interruptions they cause can fragment your sleep, disrupting the natural sleep cycle and leaving you feeling fatigued and unrested in the morning. Besides, the discomfort created by these noises can prevent you from slipping into the deep, restorative stages of sleep, impacting your overall well-being and daily productivity.

Addressing the root causes behind these popping noises isn’t just about silencing disruptions; it’s about reclaiming your much-needed rest. By understanding and resolving these issues, you pave the way for a peaceful and rejuvenating sleep environment, ensuring you wake up refreshed and ready to embrace each day.

Troubleshooting and Solutions

Why is my Air Mattress Making Popping Noise

Inspection Steps for Identifying the Issue

Checking for Air Leaks

Begin your troubleshooting process by meticulously inspecting your air mattress for possible air leaks. Run your hands along the surface, feeling for any subtle bursts of air or listening closely for faint hissing sounds that might signal a leak. Seams, corners, and valves are typical places for leaks to happen, so be careful there.

Examining Seams and Valves

Thoroughly examine the seams and valves of your air mattress. Check for obvious damage, including holes, cracks or rips, that might be the source of the popping sounds. Ensure that the valves are tightly sealed and undamaged, as faulty valves can contribute to air leaks and disruptive noises.

Repairing Popping Noises

Adjusting Air Pressure:

If overinflation is the culprit behind the popping noises, consider adjusting the air pressure to the manufacturer’s recommended level. Sometimes, reducing the air pressure slightly can alleviate the strain on the materials and mitigate the popping sounds.

Applying Lubrication or Sealants:

Applying lubrication to valves or sealants to small leaks can help address the issue. Lubricants can ensure smooth valve operation, while sealants can temporarily fix minor leaks, preventing air from escaping and minimizing popping noises.

Patching or Repairing Leaks:

For more significant leaks or tears, consider patching or repairing the affected areas. Utilize appropriate patching kits or sealants recommended for air mattresses to effectively seal leaks and eliminate the source of popping noises.

Preventive Measures

Proper Inflation Techniques:

To prevent overinflation and subsequent popping noises, ensure you inflate the mattress according to the manufacturer’s instructions. Avoid exceeding the recommended air pressure to maintain the integrity of the materials.

Maintenance Tips for Longevity:

Regular maintenance is key to ensuring your air mattress stays in top condition. Clean the mattress regularly, store it in a dry and clean environment, and handle it gently to prevent unnecessary stress on the materials.

Storing and Handling Guidelines:

Properly store your air mattress when not in use. Lay it flat or wrap it up as directed by the maker, then put it somewhere cold and dry to keep it fresh. Put the mattress somewhere it won’t be damaged, away from sharp items and rough surfaces.

By diligently following these inspection steps, employing repair solutions, and adopting preventive measures, you can effectively troubleshoot and resolve the issue of popping noises in your air mattress.

Seeking Professional Help

Why is my Air Mattress Making Popping Noise

When DIY Solutions Fail

Despite our best efforts, there are times when DIY solutions might fall short in resolving issues with air mattresses, especially persistent popping noises. When your attempts to fix the problem on your own prove ineffective or if the issue seems beyond your expertise, it might be time to explore other avenues for resolution.

Contacting Customer Support or Manufacturers

One of the initial steps towards seeking professional help involves reaching out to customer support or the manufacturer of your air mattress. They often have dedicated customer service teams equipped to assist with troubleshooting and providing guidance on resolving issues. Explain the problem you’re facing, detailing the steps you’ve taken to address it, and seek their expertise and advice. They might offer specific solutions, warranty assistance, or further instructions tailored to your situation.

Hiring Repair Services or Experts

In cases where the issue persists or if there’s visible damage that requires professional attention, consider hiring repair services or experts specializing in air mattress repairs. Experts in this field have the background, training, and equipment to identify and resolve even the most perplexing problems. They can perform thorough inspections, identify hidden leaks, and implement effective repairs using specialized equipment and techniques. While there might be associated costs, seeking assistance from experts can provide peace of mind and ensure a comprehensive resolution to the problem.

Seeking professional help for persistent issues with your air mattress not only saves you from ongoing frustration but also ensures that the problem is addressed efficiently and effectively. Whether through manufacturer support, customer service guidance, or specialized repair services, the goal is to restore your mattress to optimal functionality, enabling you to enjoy uninterrupted, peaceful sleep once again.

Conclusion

Understanding the cause behind “why is my air mattress making popping noise” is vital for restoring peaceful sleep. Identifying factors like overinflation, material stress, and temperature changes is key to quieting these disruptive sounds. By troubleshooting and maintaining your mattress, you reclaim a serene sleep haven. Bid farewell to popping noises and welcome undisturbed, restful nights on your air mattress.

Frequently Asked Questions

Q1. What Causes Popping Noises in Air Mattresses?

Answer: Discover the reasons behind popping noises in air mattresses. Learn about factors like overinflation, material stress, and temperature changes that contribute to these disruptive sounds.

Q2. How Can I Stop My Air Mattress from Making Popping Noises?

Answer: Explore effective solutions to silence those bothersome popping noises. Find tips on adjusting air pressure, addressing material stress, and troubleshooting techniques to restore peace to your sleep sanctuary.

Q3. Are Popping Noises in Air Mattresses Normal?

Answer: Understand whether popping noises in air mattresses are a common occurrence or if they indicate underlying issues. Uncover insights on when these sounds might signify a problem that needs attention.

Q4. Can I Fix Popping Noises in My Air Mattress Myself?

Answer: Learn about DIY methods to resolve popping noises. Get guidance on steps to check for leaks, examine seams, and perform repairs to eliminate these disruptive sounds.

Q5. How Important is Proper Maintenance in Preventing Air Mattress Noises?

Answer: Explore the significance of regular maintenance in preventing popping noises. Discover tips on proper inflation techniques, maintenance practices, and storage guidelines to ensure a quieter sleep experience.

How to Move a Tempurpedic Mattress

How to Move a Tempurpedic Mattress

Moving a tempurpedic mattress? It’s a delicate task that demands attention to detail. Welcome to your go-to guide on “How to Move a tempurpedic Mattress” hassle-free! tempurpedic mattresses, famed for their comfort and quality, need special care during relocation. This guide provides step-by-step insights, ensuring your mattress arrives safe and sound. From prep to transport, we’ve got you covered, ensuring your prized mattress remains in top shape throughout the move. Let’s dive into the secrets of how to move a tempurpedic mattress hassle-free and ensuring it arrives snug at its new spot!

Understanding the Basics of How to Move a Tempurpedic Mattress

The special memory foam used to make tempurpedic mattresses conforms to the curves of your body as well as your weight and temperature, providing a very customized level of support and relaxation. This memory foam, originally developed by NASA, is viscoelastic and conforms to the contours of your body, providing pressure relief and reducing motion transfer, making it an excellent choice for couples. tempurpedic mattresses are available in a range of designs and degrees of firmness to accommodate different types of sleepers. Their advanced technology aims to alleviate discomfort and promote better sleep by adapting to the sleeper’s body, resulting in a more restful and rejuvenating night’s sleep.

Pre-Move Preparations

How to Move a Tempurpedic Mattress

A tempurpedic mattress needs special care and the correct packing materials to be ready for relocation. Acquiring all the required materials to guarantee secure shipment should be your first order of business. These materials include mattress bags designed for protection, moving straps to securely handle and lift the mattress, and either cardboard or plywood to provide extra support and rigidity during the move. Additionally, it’s advisable to measure doorways, hallways, and staircases beforehand to ensure that the mattress can smoothly pass through without any issues.

Moving a Tempurpedic mattress effectively relies on thorough preparation. Here’s a step-by-step guide:

Cleaning the Mattress: Before moving day, start by vacuuming the mattress to remove any dust or dirt particles. For any stains, use a mild detergent for spot-cleaning, ensuring the mattress is clean and ready for transportation.

Dismantling the Bed Frame: Take special care while removing the mattress from the bed frame to avoid damaging it in the process of moving it. This step helps in easier handling and packing of the mattress.

Obtaining the Right Tools: Essential tools include moving straps for proper gripping and lifting of the mattress. Also, secure a mattress bag and a sturdy mattress box to protect against dirt, damage, and moisture during the move. These tools are crucial for maintaining the mattress’s condition during transportation.

How to Move a Tempurpedic Mattress the Right Way

How to Move a Tempurpedic Mattress

Moving a tempurpedic mattress requires a methodical approach to ensure it stays safe and undamaged throughout the process. To get it correctly, follow this comprehensive guide:

Step 1: Remove Bedding

To begin, clear your tempurpedic mattress of any and all bedding, including blankets, pillows, mattress protectors, and sheets. This step ensures that the mattress surface is clear and ready for the moving process.

Step 2: Place the Mattress in a Protective Bag

Slide the tempurpedic mattress into a protective bag designed explicitly for moving purposes. These bags are typically made of durable material and protect the mattress from dirt, moisture, or accidental damage during the move.

Step 3: Secure with Straps

Use fastening straps or ties to secure the protective bag around the mattress. Fasten these straps tightly to ensure the bag stays in place and the mattress remains snugly enclosed. This step helps prevent any shifting or sliding of the mattress within the bag during transportation.

Step 4: Consider Using Cardboard or Plywood

For added support and protection against potential bending or sagging, place a layer of sturdy cardboard or plywood beneath the mattress. This additional layer helps distribute the weight more evenly and offers a flat, stable surface for the mattress when it’s lifted or placed on uneven ground.

Step 5: Ensure Readiness for Transport

Before moving the mattress, double-check that all straps are securely fastened and that the protective bag is properly sealed. Confirm that the cardboard or plywood, if used, is positioned adequately to support the mattress.

Step 6: Secure the Mattress in Your Vehicle

Carefully lift and place the prepared how to move a tempurpedic mattress into your chosen mode of transportation, whether it’s a moving truck, van, or car. Place the mattress flat against a stable surface within the vehicle to prevent any tilting, sliding, or potential damage during the journey. To keep the mattress from shifting around while you’re on the road, fasten it with straps or tie-downs.

Step 7: Reinstall the Mattress

Carefully take the mattress out of the car when you get there. Take caution and handle it gently while bringing it back into your new home or designated room. Remove the protective bag and any additional support materials used during transportation. Position the mattress in its intended place, making sure it’s properly aligned and settled.

Tips for Different Types of Moves

How to Move a Tempurpedic Mattress

Local Moves within a House or Apartment:

  • Plan and Prepare: Begin by removing all bedding from the tempurpedic mattress. Use a protective bag designed for moving to shield the mattress from dirt and damage.
  • Secure with Straps: Fasten moving straps around the mattress to ensure it stays stable and maintains its shape during the short move.
  • Extra Support: Consider using cardboard or plywood beneath the mattress when maneuvering it. This additional support prevents any potential bending or damage while relocating within the same space.
  • Careful Maneuvering: While moving within a house or apartment, be cautious around corners, doorways, and tight spaces to avoid any accidental damage to the mattress.

Moving to a New Residence within the Same City:

  • Coordinate Logistics: Plan the logistics of transporting the tempurpedic mattress to your new residence within the same city. Encase it in a sturdy bag and tie it with straps to ensure its safety during traveling.
  • Utilize Proper Tools: Use dollies or furniture sliders to move the mattress efficiently. Be mindful of the route and any obstacles along the way.
  • Consider Transportation: If using a vehicle, ensure the mattress is secured inside to prevent shifting during the short move. Never put a heavy object directly on a mattress.

Long-Distance Moves and Transportation Considerations:

  • Thorough Protection: For a long-distance move, it’s crucial to pack the tempurpedic mattress securely. Use a durable, snug-fitting mattress bag, and reinforce it with moving straps for stability.
  • Professional Assistance: Consider hiring professional movers experienced in long-distance moves. Ensure they handle the mattress with care and secure it properly in the moving truck to prevent damage during transit.
  • Climate Consideration: Protect the mattress from extreme temperatures or moisture during a long-distance move, especially if it’s transported in a truck or container for an extended period.

Additional Advice for Safe Transport

How to Move a Tempurpedic Mattress

Loading the Mattress into a Vehicle:

  • Prepare the Vehicle: Ensure the vehicle is clean and spacious enough to accommodate the mattress without causing it to fold or bend. Before packing the mattress, make sure there is no debris or impediments that might hurt it.
  • Utilize Proper Lifting Techniques: Lift the mattress carefully and avoid bending or folding it excessively. Get someone else to hold the mattress while you carry it into the car.
  • Positioning: Place the mattress flat in the vehicle, avoiding any sharp or protruding objects that could puncture or damage it. To keep the mattress from shifting while being transported in a bigger vehicle, such as a moving truck, fasten it to the walls.

Securing the Mattress during Transit:

  • Stabilize the Mattress: Use moving straps or ropes to secure the mattress firmly in place. Ensure the straps are tightened enough to prevent movement but not excessively so that they damage the mattress.
  • Protect from External Elements: If transporting the mattress in an open truck or exposed to the elements, cover it with a tarp or additional protective layer to shield it from dirt, dust, or rain.

Unloading and Placing the Mattress in the New Location:

  • Handle with Care: When unloading the mattress, maintain caution and proper lifting techniques to avoid any sudden movements or dropping.
  • Prepare the New Location: The area that will be used to put the mattress must be cleared. Clean, dry, and devoid of anything that may do harm to the mattress—that is, until you check it.
  • Positioning the Mattress: Carefully lift the mattress and place it in the desired location. You may get your mattress back to its natural form by removing the bag and straps. 
  • Allow Time to Settle: tempurpedic mattresses may take a few hours to fully expand and regain their intended firmness after being moved. Allow it some time to settle before using it for sleep.

Conclusion

In summary, how to move a tempurpedic mattress requires careful handling and attention to detail. Preparation involves securing the mattress in a protective bag and loading it into the vehicle with care. During transit, ensure it’s properly secured and shielded from external elements. Upon arrival, unload the mattress cautiously and place it in a clean area. Allow time for it to settle before use. By following these steps diligently, one can successfully transport the mattress and maintain its quality for continued comfort in the new home.

Frequently Asked Questions

Q1. How to Move a tempurpedic Mattress Safely?

Answer: To move a tempurpedic mattress safely, encase it in a protective bag, secure it with straps to prevent shifting, load it carefully into the vehicle, shield it from dirt and moisture, unload cautiously at the new location, and allow time for settling before use.

Q2: Can I fold a tempurpedic mattress during a move?

Answer: It’s best to avoid folding a tempurpedic mattress as it can damage the memory foam. Keep it flat to maintain its integrity.

Q3: What's the importance of a protective bag for moving a tempurpedic mattress?

Answer: To keep the mattress clean and undamaged during the relocation, a protective bag is used to encase it.

Q4: How long should I wait before using a tempurpedic mattress after moving it?

Answer: Allow the tempurpedic mattress some time to settle and regain its original shape before using it for sleep. Typically, a few hours to a day is recommended.

Q5: Do I need special equipment to move a tempurpedic mattress?

Answer: Using moving straps, a protective bag, and ensuring a clean, flat loading surface are crucial for safely moving a tempurpedic mattress without causing damage.