
As an Amazon Associate I earn from qualifying purchases.
Welcome to the quick and hassle-free guide on how to change light bulb in ceiling fan Hampton Bay. We all recognize that proper lighting is essential to creating a pleasant atmosphere in any given location. We’ll guide you through the procedure in this step-by-step guide to make sure you can quickly and easily change the light bulb in your Hampton Bay ceiling fan.Together, we can simplify this chore and quickly make your living area more cheerful..
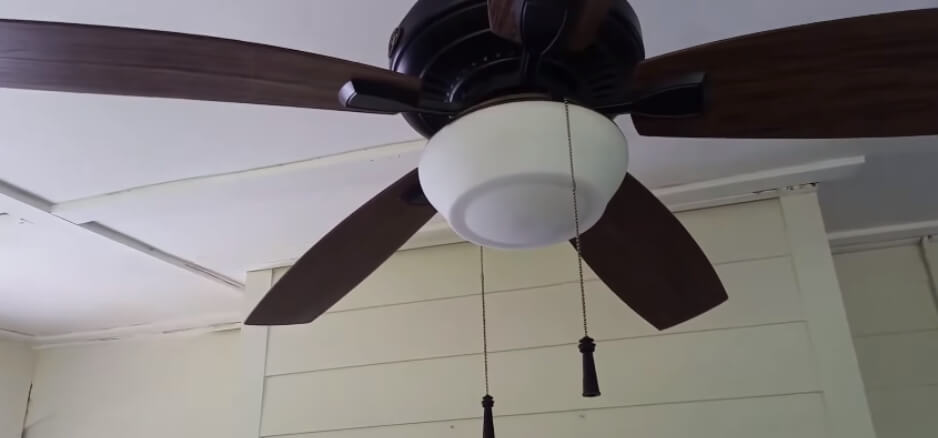
Step-By-Step Guide for How to Change Light Bulb in Ceiling Fan Hampton Bay
Adequate lighting not only makes a space look better, but it also makes your living area more comfortable and useful overall. With a how to change light bulb in ceiling fan Hampton Bay is a routine maintenance task that ensures your room stays bright and inviting. Here are some step-by-step process to make the task straightforward and stress-free:
Step 1: Turn Off Power
Embarking on the journey how to change light bulb in ceiling fan Hampton Bay is not just about brightening your room; it’s also about ensuring your safety. In Step 1, we delve into the crucial process of turning off the power, breaking it down into digestible points for a seamless experience.
A. Locate the Fan’s Power Switch or Circuit Breaker:
First things first, acquaint yourself with the whereabouts of your ceiling fan’s power switch or circuit breaker. Hampton Bay fans often have a dedicated switch on the fan itself or a wall switch nearby. Alternatively, you might need to head to your electrical panel to find the circuit breaker assigned to the fan.
- Why this matters: Knowing the location in advance streamlines the process, preventing unnecessary fumbling in the dark. It’s a small but essential preparatory step.
B. Switch Off the Power to the Ceiling Fan and Lights:
Once you’ve identified the switch or breaker, it’s time to take action. Turn off the power not only to the fan but also to the lights it houses. This extra precautionary measure ensures a safe environment for the upcoming bulb replacement.
- Why this matters: Safety first! Preventing electrical accidents during this task safeguards both you and the longevity of your ceiling fan. It’s a fundamental step in any electrical work.
C. Double-Check for Safety Before Proceeding:
With the power seemingly off, take a moment for an extra layer of assurance. Confirm that the fan has come to a complete stop, and there are no residual signs of electrical activity around the switch or breaker.
- Why this matters: This added check might seem meticulous, but it’s a vital reassurance. It ensures that you’re stepping into the next phase of the process with confidence and a keen eye on safety.
Now, with the power successfully turned off and safety duly confirmed, you’re primed for the next steps in changing the light bulb in your Hampton Bay ceiling fan. Join us in the upcoming step where we’ll guide you through identifying the bulb type and wattage, setting the stage for a well-lit and secure home environment.
Step 2: Identifying Your Illumination Essentials
Welcome back to our journey of transforming your living space with a well-lit and inviting ambiance. In Step 2, we’re diving into the specifics of identifying the bulb type and wattage for your Hampton Bay ceiling fan. Let’s break it down into digestible points to ensure a seamless process.
A. Examine the Existing Light Bulb:
Begin this step by taking a close look at the current light bulb gracing your Hampton Bay ceiling fan. Unscrew it gently and examine its characteristics closely.
- What to look for: Check for any markings or labels on the existing bulb. Note down its shape, size, and any specific features. This close inspection sets the stage for choosing a replacement that seamlessly fits into your fan.
B. Note the Bulb Type and Wattage:
Now that you have the existing bulb in your hands, focus on two key aspects: its type and wattage.
- Bulb type considerations: Identify whether the current bulb is LED, incandescent, or another type. This information guides you in selecting a replacement with similar lighting characteristics.
- Wattage matters: Note the wattage, as it dictates the brightness of the light. Choosing a replacement with the same wattage ensures consistency in lighting without overwhelming the fan’s electrical system.
- Why this matters: Specific lighting requirements are incorporated into the design of Hampton Bay ceiling fans. Matching the type and wattage ensures optimal performance and prevents potential issues caused by incompatible bulbs.
C. Choose a Replacement Bulb with the Same Specifications:
Armed with the details from your examination, it’s time to select the perfect replacement. Head to your local hardware store or browse online for a bulb that mirrors the type and wattage of the original.
- Shopping tips: Bring the old bulb with you to compare or double-check the product specifications online. If in doubt, seek advice from customer service or your Hampton Bay fan handbook.
- Why this matters: Using a replacement bulb with the same specifications guarantees that it seamlessly integrates with your ceiling fan, providing the right illumination without compromising its functionality.
Now that you’ve successfully identified the bulb type and wattage, and armed with this crucial information, you’re ready to move forward in our quest for a brilliantly lit living space. Stay tuned for Step 3, where we’ll guide you through gathering the necessary tools for the upcoming light bulb replacement in your Hampton Bay ceiling fan.
Step 3: Gathering Your Illumination Arsenal
Welcome back to our enlightening journey of changing the light bulb in your Hampton Bay ceiling fan. In Step 3, we’re getting hands-on with the tools needed for this task and offering tips on selecting the perfect replacement bulb. Let’s go into the specifics so you’re prepared for a smooth transfer.
A. List of Tools Needed for the Task:
Before you start, let’s ensure you have the right tools on hand. Here’s a checklist to guide you:
- Step Stool: Ceiling fans are typically mounted at a height, and a step stool ensures you can comfortably reach the light fixture without straining.
- Gloves: Protect your hands from dust, and if the bulb happens to be hot from previous use, gloves offer an added layer of safety.
- Replacement Bulb: Bring the replacement bulb that is the same type and wattage as the original, armed with the knowledge from Step 2.
- Pliers or Bulb Changer (if needed): In case the existing bulb is stuck, having pliers or a bulb changer can make removal a breeze.
- Why this matters: Having the right tools ensures a smooth and efficient process, reducing the chances of interruptions or complications during the light bulb replacement.
B. Tips on Selecting the Right Replacement Bulb:
With the required instruments at your disposal, let’s get started choosing the ideal replacement bulb:
- Match Type and Wattage: Reiterate the importance of matching the bulb type and wattage with the original. Consistency ensures optimal performance and longevity.
- Consider Energy Efficiency: If possible, opt for energy-efficient bulbs like LEDs. They last longer and save money on energy expenses as well.
- Check Color Temperature: Pay attention to the color temperature of the bulb. Hampton Bay fans often have warm-toned lights, so selecting a bulb with a similar color temperature maintains the cozy ambiance.
- Look for Dimmability (if applicable): If your ceiling fan has dimming capabilities, ensure the replacement bulb is compatible with dimmer switches for customizable lighting.
- Why this matters: The right replacement bulb not only ensures a well-lit room but also contributes to the overall efficiency and ambiance of your living space.
Now that you’ve assembled your toolkit and selected the ideal replacement bulb, you’re ready to embark on the next phase of changing the light bulb in your Hampton Bay ceiling fan. Watch out for Step 4, where we’ll walk you through the deft removal of the old light bulb.
Step 4: Removing the Old Light Bulb

Here we are, about to undergo a significant change.We’ll solve the puzzle of how to take out the old lightbulb from your Hampton Bay ceiling fan in Step 4. Let’s navigate through this process with finesse, ensuring a smooth transition to a brighter atmosphere.
A. Turn the Existing Bulb Counterclockwise to Loosen:
Gently grasp the existing bulb and, with a slow and steady hand, turn it counterclockwise. This motion is akin to opening a jar – a gradual twist to loosen the grip. Feel the subtle release as the threads disengage from the socket.
- Why this matters: Turning the bulb counterclockwise is a standard motion, but it’s crucial to approach it gently. This protects against unintentionally damaging the socket or the internal parts of the fan.
B. Be Cautious with Stuck Bulbs and Use Appropriate Tools if Necessary:
Sometimes, despite our best efforts, bulbs can become stubborn. If you encounter resistance, don’t force it. Instead, reach for your toolkit – pliers or a bulb changer can be your allies in such situations.
- Gentle maneuvers: Apply gentle pressure with your tools, aiming to release the stuck bulb without causing any damage. In this delicate dance with the past, patience is essential.
- Why this matters: Forcing a stuck bulb can lead to breakage or damage to the socket, complicating the replacement process. Using the right tools ensures a safe and efficient removal.
C. Dispose of the Old Bulb Properly:
With the old bulb successfully detached, it’s time to bid it farewell responsibly. Handle it with care, considering safety and environmental consciousness.
- Wrap it up: If the bulb is still intact, consider wrapping it in newspaper or placing it in its original packaging for disposal. This prevents accidental breakage and protects anyone handling it later.
- Recycle if possible: For information on appropriate disposal choices, contact your local recycling facilities. Many areas have specific guidelines for recycling light bulbs, especially if they contain materials like mercury.
- Why this matters: Proper disposal ensures that the materials in the old bulb are handled responsibly, contributing to a safer environment for all.
As you gracefully complete Step 4, revel in the small victory of embracing change. You’ve successfully bid adieu to the old, making space for the new. Look forward to Step 5, where we’ll walk you through the thrilling process of changing the lightbulb and bringing in some new light into your living area.
Step 5: Installing the New Bulb
With the old making way for the new, Step 5 ushers in the excitement of illuminating your space with a fresh glow. Let’s dive into the art of installing the new light bulb in your Hampton Bay ceiling fan, ensuring a seamless transition to a brighter ambiance.
A. Insert the New Bulb Into the Socket and Turn it Clockwise to Secure:
Gently place the new bulb into the socket by lining up its threads. Begin the clockwise turn, feeling the threads catch and interlock. Continue this motion until the bulb is snugly secured in place.
- Smooth insertion: Ensure a smooth and steady insertion. To prevent any potential problems, make sure the threads are aligned correctly if you run into resistance.
- Why this matters: A secure clockwise turn ensures a proper connection, preventing flickering or intermittent lighting issues. It’s the foundation for a well-lit and stable environment.
B. Ensure the Bulb is Aligned Correctly and Securely Connected:
With the new bulb in place, take a moment to ensure it’s aligned correctly within the socket. A proper connection is key to optimal performance.
- Check for alignment: Confirm that the bulb sits evenly in the socket without any tilting or misalignment. This ensures an even distribution of light.
- Secure the connection: Gently wiggle the bulb to check for any loose connections. If you feel any play, revisit the clockwise turning motion to tighten it further.
- Why this matters: A well-aligned and securely connected bulb guarantees a stable lighting source. Both the ceiling fan and the lightbulb last longer as a result of this attention to detail.
C. Avoid Over Tightening to Prevent Damage:
As you secure the new bulb, exercise caution to avoid overtightening. Once the bulb is snugly in place, there’s no need for excessive force.
- Gentle touch: Use a gentle touch to tighten the bulb. Overtightening can lead to difficulties during the next replacement and may even risk damaging the socket.
- Why this matters: Being mindful of the tightening process ensures a smooth removal in the future, preventing potential frustrations and preserving the integrity of your Hampton Bay ceiling fan.
With the new bulb now installed, revel in the anticipation of the renewed radiance that awaits your living space. Stay tuned for Step 6, where we’ll guide you through testing the light to ensure everything shines as brightly as it should.
Step 6: Testing the New Light Bulb
The moment of truth has arrived in our journey to refresh the ambiance of your space. In Step 6, we embark on the critical task of testing the newly installed light bulb in your Hampton Bay ceiling fan. Let’s shed some light on this step-by-step process and ensure your room glows with renewed brilliance.
A. Turn the Power Back On:
Now that the replacement light bulb is firmly positioned, it’s time to revitalize your ceiling fan.Restart the fan by going to the circuit breaker or power switch.
- Anticipation: Feel the anticipation build as you prepare to witness the transformative power of the new light bulb. The simple act of turning the power on marks the beginning of a brighter chapter in your living space.
B. Verify that the New Bulb Illuminates Properly:
After the electricity is back on, pause to enjoy the feeling of accomplishment.Make sure the new lightbulb shines as it should.
- Observation: Check for even illumination, ensuring there are no flickers or irregularities. Let the light wash over your room, reveling in the refreshed atmosphere.
- Why this matters: A space with adequate lighting not only looks better, but it also creates a cozier, more inviting atmosphere. This is the moment where your efforts manifest into tangible brightness.
C. Troubleshoot if the Light Does Not Turn On:
In the event that the light fails to illuminate, fear not; troubleshooting is here to save the day.
- Double-check connections: Ensure that the new bulb is securely connected and aligned within the socket. Sometimes, a minor adjustment can resolve the issue.
- Confirm power supply: Revisit the power switch or circuit breaker to verify that the fan’s power is indeed turned on. A simple oversight can occasionally be the culprit.
- Inspect the bulb: If troubleshooting the connections and power supply doesn’t yield results, inspect the bulb itself. Ensure it’s the correct type and wattage, and consider testing with another replacement bulb if available.
- Why this matters: Troubleshooting allows you to pinpoint and resolve issues quickly, ensuring that your Hampton Bay ceiling fan is not only well-lit but also functioning optimally.
As you bask in the glow of your newly illuminated space, congratulations on successfully navigating Step 6. Stay tuned for Step 7, where we’ll wrap up this transformative journey with final checks and considerations to keep your ceiling fan shining brightly for the days to come.
Step 7: Final Checks and Considerations
Congratulations! You’ve journeyed through the steps of changing the light bulb in your Hampton Bay ceiling fan, and now it’s time to wrap up this transformative process with a few essential final checks and considerations. Let’s ensure your fan is not only well-lit but set for optimal performance in the long run.
A. Clean the Ceiling Fan During the Bulb Replacement:
Amidst the glow of your new light bulb, take a moment to show some love to your ceiling fan. Over time, dust and dirt can build up and compromise functionality as well as appearance. While changing the bulb, seize the opportunity to give your fan a thorough clean.
- Gentle cleaning: Wipe down the motor housing and fan blades with a gentle cloth or duster. This simple act not only enhances the fan’s appearance but also contributes to smoother operation.
- Attention to detail: Pay special attention to any nooks and crannies where dust may hide. A clean fan not only looks better but also runs more efficiently.
- Why this matters: Your ceiling fan’s lifetime and best performance are enhanced by routine cleaning, which also maintains its aesthetic appeal.
B. Perform Regular Maintenance for Optimal Performance:
Now that your fan is sparkling clean, make a commitment to regular maintenance. Simple tasks like dusting the fan regularly and checking for any loose screws or wobbles can go a long way in preserving its efficiency.
- Scheduled checks: Set a schedule for fan maintenance, whether it’s monthly or quarterly.The secret to averting problems before they start is consistency.
- Lubrication: If your fan calls for it, think about lubricating the motor in accordance with the guidelines provided by the manufacturer.Your ceiling fan’s lifespan may be considerably increased by doing this.
- Why this matters: Regular maintenance is the key to a fan that not only looks good but operates at its full potential. It’s an investment in the longevity of your Hampton Bay ceiling fan.
C. Seek Professional Assistance if Needed:
Never be afraid to seek professional help if you ever run into difficulties that are outside of your comfort zone. Whether it’s a persistent issue with the light or any other aspect of the fan, professionals are equipped to handle complexities.
- When to call for help: If troubleshooting doesn’t resolve an issue or if you’re unsure about any aspect of the fan’s functionality, it’s prudent to consult a professional.
- Manufacturer support: Reach out to Hampton Bay’s customer support for guidance. They often provide valuable insights and assistance.
- Why this matters: Knowing when to seek professional help ensures that your ceiling fan is maintained and repaired by experts, minimizing the risk of further complications.
As you conclude this lighting transformation journey, revel in the radiant ambiance of your well-lit living space. By incorporating these final checks and considerations, you’ve not only changed a light bulb but also nurtured the health and longevity of your Hampton Bay ceiling fan. May your room stay bright, inviting, and harmonious for years to come!
Conclusion
In conclusion, changing the light bulb in your Hampton Bay ceiling fan is a straightforward yet impactful process. By following our step-by-step guide, you’ve not only brightened your living space but also ensured the optimal performance of your fan. Regular maintenance, including cleaning and scheduled checks, will keep your fan running smoothly. Recall that for a hassle-free experience, seek professional assistance if you encounter issues that are beyond your area of competence. Now, enjoy the enhanced ambiance and efficient lighting your refreshed ceiling fan brings to your home!
Frequently Asked Questions
Q1. How to change light bulb in ceiling fan hampton bay without any hassle?
Answer: Simple instructions for changing the lightbulb in your Hampton Bay ceiling fan.Cut the ceiling fan’s power supply.Reach the light fixture by using a ladder.Turn the outdated lightbulb counterclockwise to get rid of it.Invert the new lightbulb and screw it in clockwise. Restart the electricity and check the light.
Q2: How often should I change the light bulbs in my Hampton Bay ceiling fan?
Answer: The frequency depends on usage and bulb lifespan. Generally, aim for replacements every 6-12 months or when bulbs dim.
Q3: Can I use any type of bulb as a replacement?
Answer: It’s best to match the type and wattage specified in your fan’s manual to ensure compatibility and optimal performance.
Disclaimer: The provided instructions for changing a light bulb in a Hampton Bay ceiling fan are based on general knowledge and personal experience. For further instructions, refer to the product manual and make sure you abide by the safety precautions.
Personal Experience: Changing the light bulb in my Hampton Bay ceiling fan was a breeze. Followed the steps, and it was a quick and hassle-free process. Always prioritize safety and refer to the manual for any specific details.
Why Trust Us?
Trust in our content is built on practical experience and reliable information. We aim to provide clear and concise guidance, combining general knowledge with personal experiences, to assist you effectively in tasks like changing a light bulb in a Hampton Bay ceiling fan.
As an Amazon Associate I earn from qualifying purchases.