
As an Amazon Associate I earn from qualifying purchases.
Welcome to a quick guide on enhancing the illumination of your living space – “how to change light bulb in ceiling fan without screws.” A well-lit ceiling fan not only adds to the ambiance but also ensures a comfortable environment. In this easy-to-follow tutorial, we’ll walk you through the process of replacing a light bulb in your ceiling fan, especially when there are no visible screws complicating the task. Let’s shed some light on this hassle-free journey to a brighter and more inviting home.
Preparing for How to Change Light Bulb in Ceiling Fan Without Screws
Before embarking on the journey of changing the light bulb in your ceiling fan without screws, it’s crucial to make the necessary preparations to ensure a safe and successful process.
A. Turn off the power
Begin by prioritizing safety. Locate the circuit breaker or switch associated with the ceiling fan and turn off the power to avoid any electrical hazards. Confirm that the fan is no longer receiving electricity by attempting to turn it on before proceeding.
B. Gather necessary tools and replacement bulb
After that, collect the instruments needed for the job. Typically, you’ll need a sturdy step stool or ladder to reach the fan, ensuring you can work comfortably and safely. Furthermore, have an extra bulb that fits your ceiling fan’s requirements on hand. Check the fan’s manual or the existing bulb for information on the correct bulb type and wattage.
By doing these preliminary actions, you ensure your safety and the accomplishment of the work at hand by creating the conditions for a seamless and effective light bulb replacement procedure.
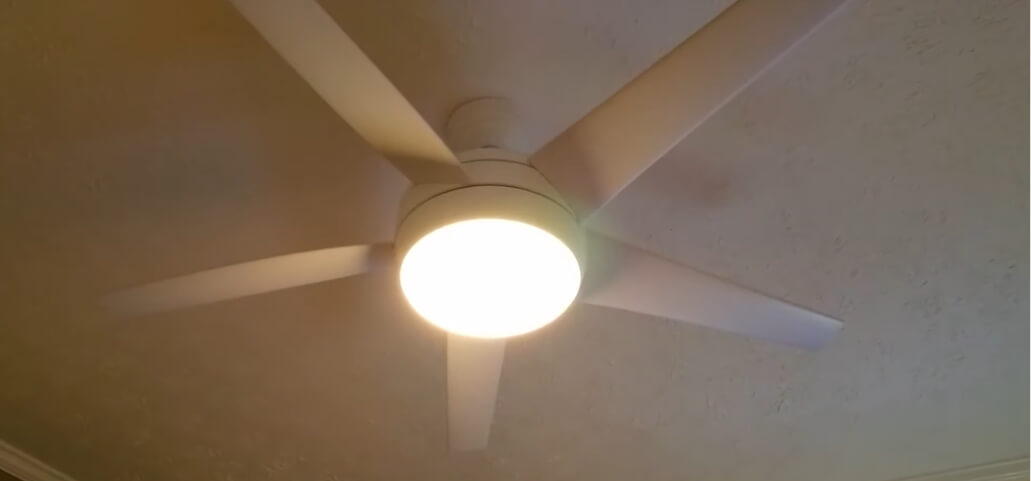
Identifying the Light Bulb Type

Understanding the how to change light bulb in ceiling fan without screws requires is a crucial step in ensuring a seamless replacement process. Here, we explore the several facets of choosing the appropriate light bulb for your fan.
A. Different types of ceiling fan light bulbs
Ceiling fans often accommodate different types of light bulbs, and it’s essential to be aware of these variations. CFL, LED, and incandescent light bulbs are common varieties. Every variety has a unique set of qualities, including longevity, brightness, and energy efficiency.
B. Understanding the specific bulb used in the fan
To determine the specific light bulb used in your ceiling fan, refer to the fan’s manual or documentation that came with the product. If the manual is unavailable, inspect the existing bulb to identify its type, wattage, and any other relevant specifications. Matching the replacement bulb to the original ensures compatibility and optimal performance.
By familiarizing yourself with the different types of ceiling fan light bulbs and identifying the specific bulb your fan requires, you lay the groundwork for a successful and well-informed light bulb replacement process.
Accessing the Bulb Compartment

Once you’ve identified the type of light bulb needed for your ceiling fan, the next step is to access the bulb compartment for replacement. Here, we explore common methods and alternatives for accessing the bulb compartment, especially for fans without visible screws.
A. Exploring common methods
- Removing the Light Cover: Many ceiling fans feature a light cover or globe that encases the bulb. To access the bulb compartment, gently twist or unscrew the light cover counterclockwise to detach it from the fan. To prevent breaking, handle the cover with care.
- Unscrewing the Bulb Holder: In some cases, the bulb is secured in place by a bulb holder or socket. To loosen and remove the screws keeping the bulb holder in place, gently use a screwdriver. Once the holder is free, you can access the bulb for replacement.
- Swinging Down the Fan Housing: Certain ceiling fan models come with a housing that covers the bulb compartment. Look for screws or latches on the housing that allow you to swing it down for easier access to the bulb. To open the housing safely, adhere to the manufacturer’s instructions.
B. Highlighting alternatives for fans without visible screws
For ceiling fans without visible screws or conventional access points to the bulb compartment, there are alternative methods to consider:
- Twist-and-Lock Mechanism: Some ceiling fans feature a twist-and-lock mechanism where the bulb compartment can be accessed by twisting the entire light fixture. Look for any indentations or markings on the fixture that suggest a twisting motion to unlock and remove it.
- Snap-On Covers: In rare cases, the bulb compartment may be concealed by a snap-on cover that can be gently pried open using a flathead screwdriver or similar tool. Use cautious so as not to harm the cover or the surrounding elements.
- Consulting the Manual: If you’re not sure how to open the bulb compartment on your particular type of ceiling fan, look it up in the handbook or get in touch with the manufacturer. They can provide detailed instructions or suggest specialized techniques for accessing the bulb compartment without visible screws.
By exploring these common methods and alternatives for accessing the bulb compartment in your ceiling fan, you can proceed with confidence and successfully replace the light bulb as needed.
Changing the Light Bulb

Ceiling fans are not only functional but also contribute to the aesthetic appeal of our homes. It may seem easy enough to change a lightbulb when it comes to maintaining these lights. However, it’s crucial to adhere to a step-by-step instruction to guarantee a seamless and trouble-free approach. Let’s dive into the details of replacing a light bulb in your ceiling fan.
A. Step-by-step guide to safely replace the bulb
- Ensure Power Is Off: Safety is paramount. First, switch off the ceiling fan’s electricity. Find the wall switch or circuit breaker that is attached to the fan, then flip it off. By taking this preventive measure, electrical shocks during the replacement procedure are completely avoided.
- Remove the Old Bulb: Carefully inspect the old bulb. If it’s intact, unscrew it in a counterclockwise direction. Hold the bulb firmly to avoid breakage. If the bulb is damaged, consider using protective gloves during removal.
- Insert the New Bulb: After purchasing a new bulb, place it in the socket. To make it tight, turn it in a clockwise direction. Steer clear of overtightening, since this may complicate replacements in the future.
- Secure the Bulb Holder: For fans with a bulb holder or socket, ensure it’s securely in place. Tighten any screws that may have been loosened during the removal process. Make sure it fits snugly without using too much effort.
- Reattach the Light Cover or Globe: If your ceiling fan has a light cover or globe, reattach it. Be careful not to overtighten as this might cause damage, and instead twist it clockwise until it is firmly in place.
B. Tips for a smooth and hassle-free process
- Use the Right Bulb: To find the right wattage and kind of bulb, go to your fan handbook or look at the marks on the previous one. Using the wrong bulb might impact both performance and safety.
- Consider LED Bulbs: Upgrade to LED bulbs if compatible with your fan. Since they are durable and energy-efficient, they require less replacements over time.
- Ensure Adequate Lighting: Enhance visibility by using additional lighting, such as a flashlight, to clearly see what you’re doing during the replacement. This minimizes the chances of errors.
- Inspect Fan Components: While the light cover is off, take a moment to inspect other fan components. Keep an eye out for any wear, damage, or loose connections that could need to be fixed.
- Proper Disposal of Old Bulbs: If the old bulb is not reusable, dispose of it according to local regulations. Some bulbs may contain hazardous materials that necessitate special handling.
By following this comprehensive guide and considering the tips provided, you can confidently and safely change the light bulb in your ceiling fan. This ensures continued illumination and functionality, contributing to a comfortable and well-lit living space.
Navigating Common Issues during Ceiling Fan Light Bulb Replacement

Changing a light bulb in your ceiling fan should be a straightforward task, but occasionally, unexpected challenges may arise. In this section, we’ll explore common issues encountered during the replacement process and provide practical solutions to ensure a seamless experience.
A. Common Issues and Solutions During the Bulb Replacement
Issue 1: When dealing with a stubborn old bulb that refuses to budge, the frustration can be overwhelming.
- Solution: To overcome this challenge, consider using a specialized tool like a bulb gripper or wear rubber gloves to enhance your grip. Alternatively, applying a small amount of cooking oil to the base of the bulb can help loosen it, making it easier to remove.
Issue 2: Some fans come with intricate designs that pose difficulties in accessing the bulb compartment.
- Solution: Refer to the fan’s handbook for detailed instructions on removing covers and globes in order to traverse this intricate process. Keep in mind that certain designs may have hidden screws or latches that need to be located and manipulated accordingly.
Issue 3: Despite installing a new bulb, it fails to illuminate.
- Solution: In such cases, it’s crucial to inspect the socket for any loose wires or damaged connections. Tighten any screws that may be loose and ensure that the socket is securely in place to establish a proper electrical connection.
Issue 4: The new bulb doesn’t provide sufficient illumination, even though it’s brand new.
- Solution: To address this concern, double-check the compatibility of the bulb with your fan. Confirm that the wattage and type of bulb align with the specifications recommended for your fan model. If needed, consider upgrading to a higher wattage bulb or switching to an LED bulb for improved brightness and energy efficiency.
B. Ensuring Proper Functioning After the Change
- Switch On the Power: After completing the replacement, switch the power back on. Test the light by toggling the fan’s wall switch or using the remote control.
- Check for Flickering: Observe the light for any flickering, which could indicate a loose connection. Tighten screws on the bulb holder or socket if necessary.
- Evaluate Fan Speed and Light Controls: Confirm that both the fan and light functions are operating correctly. Ensure that any remote control settings are synchronized with the fan.
- Inspect for Unusual Sounds: After turning on the fan, listen for any strange noises. Sounds like grinding or clicking might mean that there are problems with the fan’s mechanical parts.
- Revisit Troubleshooting Steps: If problems persist, revisit the troubleshooting steps outlined earlier. Check for loose connections, inspect wiring, and refer to the manufacturer’s guidelines for specific issues.
By proactively addressing these common challenges and ensuring proper functioning after the bulb replacement, you’ll enhance the longevity and performance of your ceiling fan’s lighting system. Recall that an effective troubleshooting process requires both patience and attention to detail.
Conclusion
In conclusion, how to change light bulb in ceiling fan without screws may seem tricky, but with the right techniques, it becomes a breeze. Utilize a bulb gripper or rubber gloves for added grip, or try a touch of cooking oil to loosen a stubborn bulb. For fans with intricate designs, consult the manual for hidden screws or latches. If your new bulb isn’t illuminating, check for loose wires in the socket. Ensure compatibility and consider upgrading to a higher wattage or LED bulb for optimal brightness. If you follow these suggestions, your ceiling fan will be blazing brightly in no time!
Frequently Asked Questions
Q1. How to Change Light Bulb in Ceiling Fan Without Screws perfectly?
Answer: To change a light bulb in a ceiling fan without screws:
- Turn off the power.
- Identify the bulb type.
- Look for a retaining clip or ring.
- Use a stable ladder.
- Gently twist or push the bulb counterclockwise.
- Wear gloves if needed.
- Check the owner’s manual for guidance.
- If stuck, ask for help.
Be cautious, follow safety guidelines, and choose the right replacement bulb.
Q2. How can I change the light bulb in my ceiling fan without screws?
Answer: Changing a light bulb in a ceiling fan without screws may seem challenging, but it’s quite manageable. One effective method is to use a bulb gripper or wear rubber gloves to enhance your grip on the stubborn bulb. Using a tiny bit of cooking oil to loosen the bulb’s base is an additional option. These techniques offer practical solutions for those dealing with a ceiling fan that doesn’t have easily accessible screws.
Q3. What should I do if my ceiling fan has an intricate design that makes accessing the bulb compartment difficult?
Answer: If your ceiling fan has a complex design, accessing the bulb compartment can be tricky. For precise directions on removing covers or globes in such circumstances, it’s imperative to consult your fan’s handbook. There are concealed screws or locks in many elaborate designs that are not always obvious. You can properly change the lightbulb on your fan and maneuver through the intricate design by following the instructions in the handbook.
Q4. My new light bulb isn't illuminating after installation – what could be the issue?
Answer: If your newly installed light bulb fails to illuminate, it’s crucial to inspect the socket for loose wires or damaged connections. Tighten any screws that may be loose and ensure the socket is securely in place to establish a proper electrical connection. Addressing these issues will likely resolve the problem and ensure your new bulb provides the desired illumination in your ceiling fan.
Q5. How can I ensure the new light bulb provides sufficient brightness in my ceiling fan?
Answer: To ensure your new light bulb provides sufficient brightness, first, verify its compatibility with your ceiling fan. Check the wattage and bulb type to ensure they align with the specifications recommended for your fan model. If needed, consider upgrading to a higher wattage bulb or switching to an LED bulb for improved brightness and energy efficiency. These adjustments will enhance the overall illumination of your ceiling fan.
Q6. Are there any tips for changing a light bulb in a ceiling fan without screws for optimal results?
Answer: Absolutely! When changing a light bulb in a ceiling fan without screws, it’s helpful to use a bulb gripper or rubber gloves for an enhanced grip on the bulb. A hard bulb may also be simpler to release by dabbing the base with a tiny bit of cooking oil. Additionally, consulting the fan’s manual for specific instructions on removing covers or globes, especially for fans with intricate designs, is crucial. These tips ensure a smooth and successful process for changing light bulbs in ceiling fans without screws.
Disclaimer: Before attempting to change a light bulb in your ceiling fan without screws, it’s important to note that individual experiences may vary, and the following suggestions are provided based on general knowledge. Always exercise caution and follow safety guidelines when working with electrical appliances. Consider speaking with a qualified electrician if you have any doubts or feel uneasy about the procedure. Any decisions you take based on the material here are at your own responsibility; it is not intended to be a substitute for expert counsel.
Personal Experience: Changing a light bulb in a ceiling fan without screws can be a task filled with challenges and uncertainties. In my personal experience, I encountered a stubborn old bulb that seemed impossible to remove. Despite initial frustrations, using a bulb gripper provided the extra grip needed to successfully loosen and remove the bulb. The process wasn’t as straightforward as expected, emphasizing the importance of patience and exploring different techniques for a successful outcome. When dealing with an intricately designed fan, referring to the manual proved to be invaluable. It helped uncover hidden screws and latches that were not immediately apparent, demonstrating the significance of understanding your specific fan model. This personal journey highlighted the need for flexibility and adaptability in approaching the task, as each fan may present unique challenges.
Why Trust Our Content?
Our content on changing light bulbs in ceiling fans without screws is crafted with a commitment to providing reliable and helpful information. We strive to combine general knowledge with practical tips derived from real-world experiences, ensuring that our readers receive comprehensive guidance. Our team of writers and experts meticulously researches and verifies the accuracy of the information provided. Trust is earned through transparency and accountability. We acknowledge the diversity of scenarios individuals may encounter and emphasize the importance of caution and adherence to safety guidelines. By incorporating personal experiences and insights, we aim to connect with readers on a relatable level, fostering a sense of trust in the reliability and authenticity of our content.
As an Amazon Associate I earn from qualifying purchases.