
As an Amazon Associate I earn from qualifying purchases.
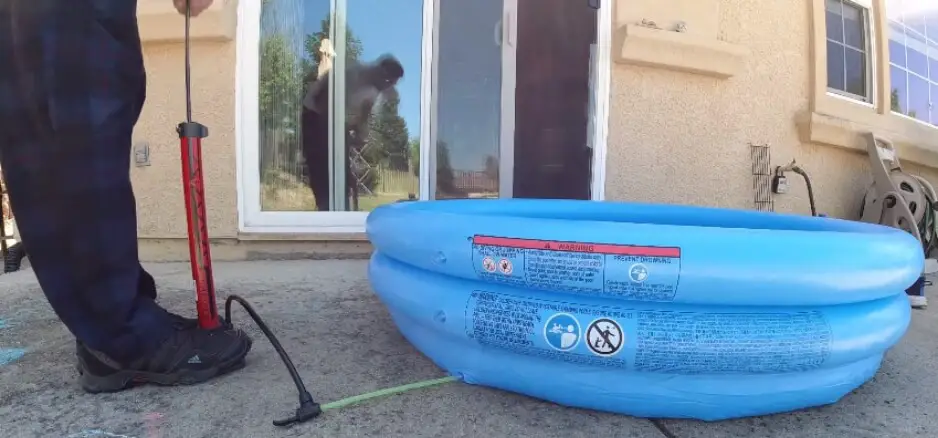
Welcome to the ultimate guide on how to fill air in swimming pool with cycle pump – today, we’ll dive into the hassle-free technique of inflating your pool equipment using a cycle pump. Whether you’re a pool owner or a water enthusiast, maintaining optimal air levels is crucial. Join us as we walk you through the simple steps of how to fill air in a swimming pool with a cycle pump, ensuring a cost-effective and eco-friendly solution for your aquatic haven. Let’s get started on making your pool experience even more enjoyable!
Gathering the Essential Equipment for How to Fill Air in Swimming Pool with Cycle Pump
Before embarking on the task of inflating your swimming pool equipment, it’s crucial to ensure you have all the necessary tools at your disposal. Let’s examine the supplies you’ll need in more detail:
A. List of Required Items
- Cycle Pump: The primary tool for this task, a reliable cycle pump will help you efficiently introduce air into your pool equipment.
- Air Pressure Gauge: An essential component to monitor and regulate the air pressure, ensuring you achieve the optimal levels for your swimming pool.
- Valve Adapter: This key accessory facilitates a secure connection between the cycle pump and the pool’s air valve, enabling a smooth and effective inflation process.
- Teflon Tape (if needed): While optional, Teflon tape can be a handy addition to your toolkit, especially if you encounter any issues with air leakage. It provides an extra layer of security by creating a tight seal.
B. Checking Equipment for Any Damage or Defects
Before commencing the inflation process, take a moment to inspect each piece of equipment for potential damage or defects. Ensuring a seamless and error-free operation requires taking this key step. Look for any visible wear and tear, cracks, or malfunctions in the cycle pump, air pressure gauge, valve adapter, and Teflon tape (if applicable).
Preparing the Pool Area for a Seamless Inflation Process

Now that we’ve gathered the necessary equipment, let’s turn our attention to the pool area itself. Proper preparation is key to ensuring a smooth and efficient process when filling your swimming pool equipment with a cycle pump.
A. Ensure the Pool is Clean and Free of Debris
Check the pool area first for any dirt or debris. Clearing the surroundings of the pool ensures that no foreign particles interfere with the inflation process. Clear away any leaves, twigs, or other material that might contaminate the area’s cleanliness.
A clean pool environment not only contributes to a visually appealing space but also prevents potential damage to your equipment. Debris might prevent the air valve from operating properly and cause issues when inflating.
B. Identify and Locate the Pool’s Air Valve
Next, take a moment to locate and identify the air valve of your swimming pool. The air valve is typically situated near the pool’s inflation point, and it’s essential to know its precise location before proceeding. Familiarize yourself with the valve’s appearance and ensure there are no obstructions or damage around it.
Identifying the air valve in advance saves time during the inflation process, allowing you to connect the cycle pump swiftly and efficiently.
C. Place the Cycle Pump in a Convenient and Stable Position
Positioning the cycle pump properly is crucial for a hassle-free experience. Pick a spot that guarantees stability during the inflation process and offers simple access to the pool’s air valve. To avoid any unintentional tipping or movement, a level, firm surface is best.
Placing the cycle pump conveniently near the pool not only streamlines the task but also contributes to a safer and more controlled inflation process. With the pool area now prepped and ready, we’re set to move on to the next steps in achieving optimal air levels in your swimming pool equipment.
Attaching the Valve Adapter for a Secure Connection
With the pool area prepared, the next critical step in inflating your swimming pool equipment using a cycle pump is to attach the valve adapter. An air valve in the pool and the cycle pump must be securely connected, and this part is essential to that connection.
A. Properly Install the Valve Adapter onto the Cycle Pump
Begin by ensuring that the cycle pump is in optimal working condition. Check for any visible defects or damage, addressing any issues before proceeding. Once confirmed, proceed to install the valve adapter onto the cycle pump. Most valve adapters are designed to easily attach to the pump, typically featuring a user-friendly mechanism for a hassle-free connection.
Take a moment to familiarize yourself with the valve adapter and its alignment on the cycle pump. Follow the manufacturer’s instructions, if available, to guarantee the correct installation. This stage establishes the framework for an effective and successful inflation procedure.
B. Check for a Secure and Airtight Fit
After installing the valve adapter, double-check the connection to ensure it is secure and airtight. A loose or improperly attached valve adapter can result in air leakage, compromising the inflation process and affecting the overall performance of your pool equipment.
Inspect the seal between the valve adapter and the cycle pump, confirming that it is snug and properly aligned. A secure fit is crucial for the successful transfer of air from the pump to the pool’s equipment.
C. Use Teflon Tape if Necessary to Prevent Air Leakage
Use Teflon tape to seal any possible air leaks for an extra degree of security. While not always required, applying Teflon tape to the threads of the valve adapter can create a tighter seal, minimizing the risk of air escaping during inflation.
Wrap the threads of the valve adapter with Teflon tape, taking care not to obstruct any crucial openings or mechanisms. This additional precaution ensures a more reliable and airtight connection, enhancing the effectiveness of the entire inflation process.
Connecting the Pump to Your Pool – Ensuring a Secure and Effective Link

With the valve adapter in place, let’s delve into the crucial steps of connecting the cycle pump to your swimming pool. The manner that air is transferred to your pool equipment is established at this crucial step.
A. Insert the Valve Adapter into the Pool’s Air Valve
Carefully locate the pool’s air valve, which we identified earlier during the pool area preparation. With the valve adapter securely attached to the cycle pump, gently insert it into the pool’s air valve. Ensure that the insertion is precise and that the valve adapter fits comfortably into the air valve opening.
To avoid doing any possible harm to the valve or the surrounding parts, take your time when doing this procedure. Proper alignment at this stage sets the foundation for a seamless and efficient inflation process.
B. Ensure a Snug Connection to Prevent Air Loss
Once the valve adapter is inserted into the pool’s air valve, pay close attention to the connection point. It’s imperative to ensure a snug fit between the valve adapter and the air valve, as any looseness can lead to air loss during the inflation process.
Feel around the connection point, checking for any gaps or play. A tight and secure connection is essential to maintain the integrity of the airflow, ultimately resulting in optimal air levels within your pool equipment.
C. Double-Check All Connections for Security
As a final precautionary measure, take a moment to double-check all connections involved in the setup. Verify the attachment between the cycle pump and the valve adapter, ensuring it remains secure. Additionally, confirm the connection between the valve adapter and the pool’s air valve, guaranteeing that there are no overlooked issues.
This meticulous inspection is crucial to prevent potential disruptions during the inflation process. A thorough assessment of all connections at this stage contributes to a smooth and trouble-free experience, ensuring that the cycle pump effectively transfers air into your swimming pool equipment.
Inflating Your Pool Equipment – A Step-by-Step Guide for Optimal Results
Now that the cycle pump is securely connected to your swimming pool, it’s time to initiate the inflation process. This phase involves a careful and controlled introduction of air into your pool equipment, ensuring that you achieve the ideal air levels without encountering any complications.
A. Begin Pumping Air into the Pool
With the cycle pump connected and the valve adapter inserted into the pool’s air valve, start the inflation process by activating the pump. Most cycle pumps feature user-friendly controls, making it easy to initiate the airflow into the pool equipment.
Check sure air is flowing steadily throughout the early stages of inflation by pausing to watch. This step marks the commencement of the process that will rejuvenate your pool equipment and contribute to an enhanced swimming experience.
B. Monitor the Air Pressure Using the Gauge
As the pump is in operation, keep a close eye on the air pressure gauge. This crucial tool provides real-time feedback on the air levels within your pool equipment. Maintaining optimal air pressure is essential for the efficient performance of your pool, so monitor the gauge regularly throughout the inflation process.
Adjust the pumping speed or pause if necessary, ensuring that the air pressure remains within the recommended range. This vigilant monitoring prevents overpressurization, a potential issue that could lead to equipment damage.
C. Inflate Gradually to Avoid Overpressurizing
While it might be tempting to speed up the inflation process, it’s essential to inflate your pool equipment gradually. Overpressurizing can have adverse effects on the integrity of the equipment, potentially leading to leaks or malfunctions.
Exercise patience during this stage, allowing the cycle pump to introduce air at a controlled pace. This measured approach not only safeguards your pool equipment but also contributes to a more durable and reliable system.
Verifying and Adjusting Your Pool’s Air Levels for Peak Performance
With your pool equipment in the process of inflation, the next crucial phase involves continuous monitoring and adjustment to achieve and maintain optimal air levels. This ensures that your swimming pool operates efficiently and provides a refreshing environment for all users.
A. Regularly Check the Air Pressure Gauge
Throughout the inflation process, make it a habit to regularly check the air pressure gauge. This tool serves as your real-time indicator of the air levels within your pool equipment. By keeping a watchful eye on the gauge, you gain insights into the inflation progress and can detect any irregularities promptly.
Frequent checks allow you to intervene if there are unexpected fluctuations in air pressure. By being proactive, you reduce the chance of possible problems and improve the general health of your pool system.
B. Adjust the Air Levels as Needed
Based on the readings from the air pressure gauge, be prepared to make adjustments to the inflation process. Continue slowly pumping air until you reach the acceptable range if the pressure is lower than what is advised. On the other hand, if the gauge indicates overpressurization, pause the inflation process temporarily and release some air to bring the levels back within the optimal range.
This step requires a responsive and attentive approach to ensure that your pool equipment receives the right amount of air. Fine-tuning the air levels according to the specifications not only enhances the performance of your pool but also extends the lifespan of the equipment.
C. Maintain Optimal Pressure for Efficient Pool Operation
The ultimate goal is to maintain optimal air pressure for efficient pool operation. This sweet spot ensures that your pool equipment functions optimally, providing a seamless and enjoyable swimming experience. By consistently monitoring and adjusting the air levels, you contribute to the overall health and longevity of your pool system.
Maintaining optimal pressure prevents unnecessary strain on the equipment, reduces the risk of malfunctions, and promotes energy efficiency. This proactive approach to air level management sets the foundation for a well-maintained swimming pool, ready to provide hours of enjoyment for you and your family.
Safely Disconnecting the Pump and Ensuring Proper Equipment Storage
As your swimming pool equipment reaches the desired air levels, the final steps involve securely disconnecting the cycle pump and preparing your tools for future use. These concluding actions are crucial for maintaining the longevity of your equipment and ensuring a hassle-free experience the next time you embark on the inflation process.
A. Safely Disconnect the Valve Adapter from the Pool’s Air Valve
Once your pool equipment has reached the optimal air levels, it’s time to disconnect the cycle pump. Start by carefully removing the valve adapter from the pool’s air valve.Make sure you follow this step precisely to prevent damaging the valve or any surrounding parts. Take your time during this process, gently pulling the valve adapter out of the air valve. This careful approach ensures a smooth disconnection, preserving the integrity of both the pool equipment and the cycle pump.
B. Release Any Remaining Air Pressure from the Pump
Before storing the cycle pump, it’s essential to release any remaining air pressure within the pump. Most pumps come equipped with a pressure release mechanism or a dedicated valve for this purpose. Activate this release feature to ensure that the pump is depressurized completely.
Releasing the remaining air pressure not only enhances the safety of handling the pump but also contributes to its longevity. This thoughtful step prepares the pump for storage, preventing unnecessary wear on its internal components.
C. Store Equipment Properly for Future Use
With the pump safely disconnected and depressurized, store all equipment properly for future use. Coil the hose neatly, secure the cycle pump in a dry and cool location, and store the valve adapter in a protective case if available. Proper storage safeguards your tools from damage and ensures that they are ready for the next inflation session.
Take into consideration keeping the equipment in a dedicated area out of direct sunlight and extremely extreme temperatures. This proactive approach to storage enhances the lifespan of your tools, guaranteeing their reliability when needed again.
Final Checks and Tips for a Well-Maintained Swimming Pool

As you conclude the process of inflating your swimming pool equipment with a cycle pump, it’s essential to conduct thorough final checks and consider additional tips for ongoing maintenance. These steps ensure that your pool environment remains pristine and functional, providing long-lasting enjoyment for you and your loved ones.
A. Inspect the Pool Area for Any Signs of Damage or Issues
Before you declare the inflation process complete, take a moment to inspect the pool area for any signs of damage or issues. Walk around the pool perimeter and scrutinize the surroundings for potential concerns such as leaks, cracks, or loose components. By taking immediate action, you may keep these problems from getting worse and prolong the life of your pool’s infrastructure. The vicinity of the inflation point, the air valve, and any adjacent equipment require close attention. A vigilant inspection allows you to detect and resolve issues early on, contributing to the overall health and safety of your swimming pool.
B. Ensure All Connections are Tightly Sealed
Verify that all connections, including the valve adapter to the cycle pump and the valve adapter to the pool’s air valve, are tightly sealed. Confirm the snugness of each connection point, checking for any signs of air leakage or loosening. A secure and airtight seal is crucial for the proper functioning of your pool equipment, preventing potential disruptions in the future.
If any connections appear compromised, take the time to readjust and secure them. This attention to detail ensures that your swimming pool remains a reliable and efficient oasis for relaxation and recreation.
C. Provide Additional Tips for Ongoing Pool Maintenance
As a final touch, consider sharing additional tips for ongoing pool maintenance to keep your aquatic haven in top-notch condition:
- Regularly Clean and Skim: Establish a routine for skimming and cleaning your pool to remove debris and maintain water clarity.
- Check Water Chemistry: Make sure your pool is safe and comfortable to swim in by testing and balancing the chemical levels on a regular basis.
- Inspect Pool Equipment: Periodically check all pool equipment, including filters and pumps, to identify and address any issues promptly.
- Cover Your Pool: Invest in a pool cover to keep the water clean while it’s not in use, limit debris, and lower evaporation.
- Schedule Professional Inspections: For a yearly evaluation of the general state of your pool and equipment, think about arranging expert inspections.
Conclusion
In conclusion, mastering how to fill air in your swimming pool with a cycle pump is a simple yet impactful way to maintain optimal performance. This eco-friendly and cost-effective solution ensures that your pool equipment operates efficiently, providing a refreshing and enjoyable experience. By following these steps, you not only enhance your swimming environment but also contribute to the longevity of your pool system. Dive into hassle-free pool maintenance and enjoy a revitalized aquatic haven with the straightforward process of inflating your pool equipment using a cycle pump. Cheers to a well-maintained and inviting swimming pool!
Frequently Asked Questions
Q1. How to fill air in swimming pool with cycle pump properly?
Answer: Filling your pool with a cycle pump is simple. Gather a pump, air gauge, valve adapter, and Teflon tape if required. Clean the pool area, find the air valve, and position the pump securely. Attach the valve adapter tightly, using Teflon tape for a secure seal. Insert the adapter into the air valve and pump air gradually, adjusting pressure with the gauge. Disconnect the pump, release remaining air, and store the gear. Check for damage, secure connections, and follow maintenance tips for a well-kept pool. Enjoy!
Q2. What equipment do I need to fill air in my swimming pool using a cycle pump?
Answer: To get started, you’ll need a cycle pump, an air pressure gauge, a valve adapter, and optional Teflon tape for added security.
Q3. How do I identify the pool's air valve for the inflation process?
Answer: Before starting, inspect your pool area for the air valve. It’s typically located near the inflation point, and familiarizing yourself with its appearance is key for a smooth process.
As an Amazon Associate I earn from qualifying purchases.