Best Rechargeable Air Pump for Inflatables

Best Rechargeable Air Pump for Inflatables

Welcome to our comprehensive guide on finding the best rechargeable air pump for inflatables. Whether you’re inflating pool toys, air mattresses, or camping gear, having a reliable rechargeable air pump is essential for hassle-free inflation anytime, anywhere. In this guide, we’ll explore the key factors to consider when choosing the perfect pump, review some top picks, and provide expert tips to help you make the right choice. Now let’s get started and choose the best rechargeable air pump for your requirements!

Our Top 5 Picks: Reviews of the Best Rechargeable Air Pump for Inflatables

Product Name

Brand

Color

Material

Price

Dr.meter Electric Air Pump for Inflatables

Dr.meter

Black

Plastic

Check Price


AGPTEK Rechargeable Air Pump

AGPTEK

Black

Plastic

Check Price


Coleman QuickPump Air Pump for Air Beds & Inflatables

Coleman

Multi

Blend

Check Price


Whiriwhiri Portable Air Pump with 5200mAh Battery

whiriwhiri

Black

ABS and PC

Check Price


ETENWOLF AIR 3 Air Pump for Inflatables

ETENWOLF

Vivid Orange

Plastic

Check Price


When it comes to finding the best rechargeable air pump for inflatables, the market offers a plethora of options to choose from. To help narrow down your search, we’ve curated a list of our top-rated picks based on extensive research and customer feedback.

Product 1. Dr.meter Electric Air Pump for Inflatables

Meet the Dr.meter Cordless & Rechargeable Air Pump – your ultimate solution for instant inflation without the hassle of cords. This compact powerhouse is not just an air pump but also a versatile companion with features designed for convenience and efficiency. Let’s delve into what makes this air pump stand out.

Features and Specifications:

  • Cordless & Rechargeable: The Dr.meter air pump is powered by a robust 4000mAh lithium battery, ensuring instant inflation without the need for cords. With a built-in USB port, recharging is a breeze, making it ready for action at home or on the go.
  • 3 Nozzle Sizes: Versatility is key. This air pump comes with three nozzle sizes (S-0.28in, M-0.35in, L-0.57in), ensuring a perfect fit for a variety of inflatables. Whether it’s big, small, tall, or wide, if it has a valve, this pump can handle it.
  • Inflate Quickly:  The compact size and strong motor optimize airflow for quick and easy inflation. When the day is done, the Dr.meter air pump also excels at quick deflation, ensuring efficient packing.
  • Ultra-Compact: Don’t let size limit power. The ultra-compact design allows this air pump to pack a punch without adding bulk. It ensures you’re always prepared to inflate your beach ball, bounce house, airbed, inflatable boat, pool, and more because it fits neatly into a backpack, luggage, or tool box.
  • Doubles as A Portable Charger: Beyond inflation, this air pump doubles as a portable charger. You can quickly charge your laptop, tablet, phone, and other devices with the 5V USB output connector.

Pros

  • Cordless convenience for inflation anywhere.
  • Multiple nozzle sizes cater to various inflatables.
  • Quick inflation and deflation for time-saving convenience.
  • Compact design enhances portability.
  • Dual functionality as an air pump and portable charger adds versatility.

Cons

  • Limited information on durability in long-term usage.
  • When operating, it could make a considerable amount of noise.
  • Some users may find the included nozzles slightly delicate.

Product 2. AGPTEK Rechargeable Air Pump

Introducing the AGPTEK Rechargeable Air Pump – Your Ultimate Inflation Companion!

Are you sick and weary of being dependent on power outlets or battling with manual pumps? There’s nowhere else to look.! The AGPTEK Rechargeable Air Pump is a game-changer in the world of inflatables, offering cutting-edge features to make your inflation experience seamless and convenient.

Features and Specifications:

  • High Capacity Battery: Equipped with a powerful 4000mAh rechargeable battery, this air pump delivers top-notch performance and an extended battery life, allowing for up to 25 minutes of continuous use on a single charge. Take advantage of the integrated indicator light to monitor your electricity.
  • Multiple Charging Modes: Enjoy the flexibility of charging your air pump at home, in the car, or on-the-go with the built-in USB port. The USB car charger adapter adds an extra layer of convenience, making charging hassle-free wherever you are.
  • Three-in-One Nozzle Design: Versatility is key! The air pump comes with three different nozzles (S-0.28in, M-0.35in, L-0.57in), ensuring compatibility with a wide range of inflatables. From inflatable toys to air mattresses, this pump has you covered.
  • Small, Lightweight & Portable: Say goodbye to bulky pumps! This air pump’s lightweight and small form makes it incredibly portable. Toss it into your backpack, suitcase, or tool kit – it’s ready to accompany you on all your indoor and outdoor adventures.
  • Wide Application: With wireless operation and a rechargeable battery, this electric air pump is your go-to solution for various inflatables. From swim tubes and inflatable sofas to airbeds and bounce houses, the AGPTEK pump handles it all with ease.

Pros

  • Portable and lightweight for easy transportation.
  • Versatile nozzle options cater to different inflatable products.
  • Rechargeable battery provides cordless convenience.
  • Indicator light for clear battery status monitoring.
  • Multiple charging modes offer flexibility and convenience.

Cons

  • Some users reported issues with nozzle durability over time.
  • When operating, the pump may make a modest amount of noise.

Product 3. Coleman QuickPump Air Pump for Air Beds & Inflatables

Introducing the Coleman QuickPump Rechargeable Electric Pump – Your Portable Inflation Solution!

Tired of manual pumping and searching for power outlets? With the Coleman QuickPump, inflation tasks will be a breeze. Whether you’re at home, by the pool, or on a camping trip, this rechargeable electric pump offers unmatched convenience and versatility.

Features and Specifications:

  • Battery Powered: The 120-volt charger that is provided with the Coleman QuickPump makes it simple to recharge the built-in battery. Bid farewell to heavy cords and outlets; inflate whenever and wherever you like.
  • Portable: This electric pump is the pinnacle of portability due to its small and light construction. Carry it effortlessly to your favorite camping spot, use it by the poolside, or keep it handy at home for quick and easy inflation.
  • Versatile: The pump includes Boston and pinch valve adapters, catering to a variety of common inflatables. With the appropriate adapters, this multipurpose electric pump may be used to inflate anything from air mattresses to pool floats.
  • One Year Limited Warranty: With the Coleman QuickPump’s one-year limited warranty, you may have peace of mind. It’s evidence of the product’s excellence and the maker’s faith in its dependability and efficiency.

Pros

  • Cordless operation for hassle-free inflation.
  • Compact and lightweight design for effortless transporting.
  • Versatile adapters for inflating various types of inflatables.
  • A rechargeable battery guarantees convenience when traveling.
  • supported by a limited guarantee of one year for extra peace of mind.

Cons

  • The pump may generate moderate noise during operation.
  • Limited battery life may require recharging for extended use.

Product 4. Whiriwhiri Portable Air Pump with 5200mAh Battery

Introducing the Whiriwhiri Rechargeable Air Pump – Your Portable Powerhouse for Effortless Inflation!

Never worry about running out of battery during your outdoor adventures with our high-capacity 5200mAh rechargeable air pump. Designed for ultimate convenience, this wireless mini pump provides hours of continuous operation, making it perfect for extended camping trips or inflating multiple items on the go.

Features and Specifications:

  • 5200mAh High Capacity Battery: Take use of a dependable and long-lasting power source for continuous outdoor activities. The pump works for hours continuously after a single USB cable charge, eliminating the hassle of frequent recharging.
  • 4000-Pa High Air Pressure & Rapid 300L/min Airflow: Inflate quickly, powerfully, and effectively with a high air pressure of 4000Pa and a rapid 300L/min airflow. Ensure quick setup and quick deflation for optimum relaxation time by quickly inflating air beds, pillows, paddle boats, swimming rings, and more in no time.
  • 60mins + Longer Operating Time: With a higher battery capacity, the air pump operates for an extended period without the need for recharging. Ideal for camping trips, vacations, travel, and outdoor activities, providing convenience and uninterrupted use.
  • 13oz Portable and Convenient: Compact and lightweight, our air pump measures just 3″ * 3″ * 4.4″ and weighs only 13oz (0.8lb). It has three different nozzle sizes for small, medium, and big inflatables and is made to be as portable as possible. Enjoy hassle-free inflation and deflation on the go with this portable device.
  • 90 Days Warranty Durable and Reliable: Our air pump is made with premium materials and is long-lasting. Withstand regular use and enjoy reliable performance every time. Invest in a durable and dependable pump that comes with a 90-day manufacturer’s warranty, ensuring peace of mind on all your adventures.

Pros

  • High-capacity battery for extended use.
  • Powerful airflow and air pressure for efficient inflation.
  • Longer operating time for multiple inflations.
  • Lightweight and transportable design for convenience.
  • Durable construction backed by a 90-day warranty.

Cons

  • It may be a little noisy when operating for some people.
  • The compact size may lead to a shorter charging cable.
  • Limited nozzle options for specific inflatables.

​​​​

Product 5. ETENWOLF AIR 3 Air Pump for Inflatables

Introducing the ETENWOLF AIR 3 – Your Ultimate Portable Inflation Companion!

Experience inflation and deflation like never before with the ETENWOLF AIR 3. This ultra-compact, multi-functional air pump is designed to make your outdoor adventures and inflatable experiences more efficient and enjoyable.

Features and Specifications:

  • 2X Faster Inflation & Deflation: Boasting a powerful 0.65PSI air pressure and 13 CFM wind speed, the ETENWOLF AIR 3 achieves rapid inflation and deflation. In just 1 minute, it can inflate an air mattress, and deflate it in a speedy 40 seconds.
  • 2X Larger Battery Capacity: With a robust 2600mAh Lithium Battery, the AIR 3 can inflate up to 16 sleeping pads or 4 inflatable swimming pools (58”*13″) on a full charge. Compatible with any type C quick charger, it ensures a quicker recharge for continuous use.
  • As Tiny As an Egg: The AIR 3 is super mini and lightweight, resembling the size of an egg. It features a convenient hook for easy attachment to your backpack or pocket, making it the perfect on-the-go companion.
  • 600 Lumens Camping Light: Beyond an air pump, the AIR 3 comes equipped with a powerful LED light offering 3 modes – 60 Lumens soft light, 200 Lumens reading light, and an impressive 600 Lumens outdoor light for versatile illumination during your outdoor escapades.
  • 5 Nozzles & Diverse Uses: Featuring 5 nozzles, the AIR 3 is suitable for a wide range of inflatable products, from air mattresses and pool floats to vacuum storage bags, inflatable beds, sleeping pads, swimming rings, inflatable furniture, and more.

Pros

  • Rapid inflation and deflation for quick setup and takedown.
  • Extended battery capacity for multiple inflations on a single charge.
  • Ultra-compact and lightweight design for portability.
  • Versatile LED light with multiple brightness modes.
  • Wide range of nozzle options for diverse inflatable uses.

Cons

  • In some circumstances, some people could perceive the LED light to be excessively bright.
  • The compact size may result in a shorter power cable.
  • Limited information on waterproofing for outdoor use.

Factors to Consider When Choosing the Best Rechargeable Air Pump

When on the hunt for the ideal rechargeable air pump, navigating through the myriad of options can be overwhelming. To ensure you make a well-informed decision, it’s crucial to weigh several factors that directly impact the pump’s performance and your overall satisfaction. Here’s a detailed look at key considerations:

A. Inflatable Type and Size:

One of the foremost considerations when selecting a rechargeable air pump is understanding the variety of inflatables you plan to use it for. Different inflatables, whether it be air mattresses, pool floats, or camping gear, may have varying valve sizes and air capacity requirements. Assess the diversity in your inflatable collection and ensure the chosen air pump is compatible with the sizes and types you frequently use.

B. Pump Power and Pressure:

The effectiveness of a rechargeable air pump is closely tied to its power and pressure capabilities. Consider the pump’s PSI (pounds per square inch) or kPa (kiloPascal) rating, as well as its cubic feet per minute (CFM) air output. Higher values in these metrics often signify faster inflation times and the ability to handle inflatables with greater air volume requirements. Tailor your choice to match the intended use, whether it’s for quick inflation of air mattresses or more substantial items like inflatable boats.

C. Battery Life and Charging Time:

The convenience of a rechargeable air pump hinges on its battery life and charging time. Assess the expected usage duration on a single charge and compare it with your typical inflation needs. In particular, extensive outside activities require a longer battery life. You should also think about how long it takes to charge; if time is of the essence on your trips, a faster recharge may be beneficial.

D. Portability and Weight:

The portability of a rechargeable air pump is paramount, particularly if you plan to carry it for outdoor activities. Opt for a pump with a compact design and a lightweight build. A portable pump should seamlessly fit into your backpack, luggage, or camping gear without adding unnecessary bulk. This ensures that you can have on-the-go inflation whenever and wherever you need it.

E. Noise Level:

Noise can be a factor often overlooked in the excitement of choosing an air pump. Consider the noise level generated during operation, especially if you plan to use the pump in quiet environments or during nighttime camping. Look for pumps with noise reduction features or quieter motor technologies to minimize disturbances.

F. Additional Accessories and Features:

Beyond basic inflation, explore additional accessories and features that enhance the pump’s usability. Some pumps come with a variety of nozzle attachments, ensuring compatibility with different valve sizes. Others may have built-in LED lights for low-light conditions or additional functionality like USB ports for charging devices. Assess these extra features to determine their relevance to your specific needs.

Choosing the best rechargeable air pump for inflatables involves a holistic consideration of inflatable types, power specifications, battery features, portability, noise levels, and any extra accessories that contribute to a seamless and efficient inflation experience. With careful consideration of each factor, you can make an informed decision that fits your specific requirements.

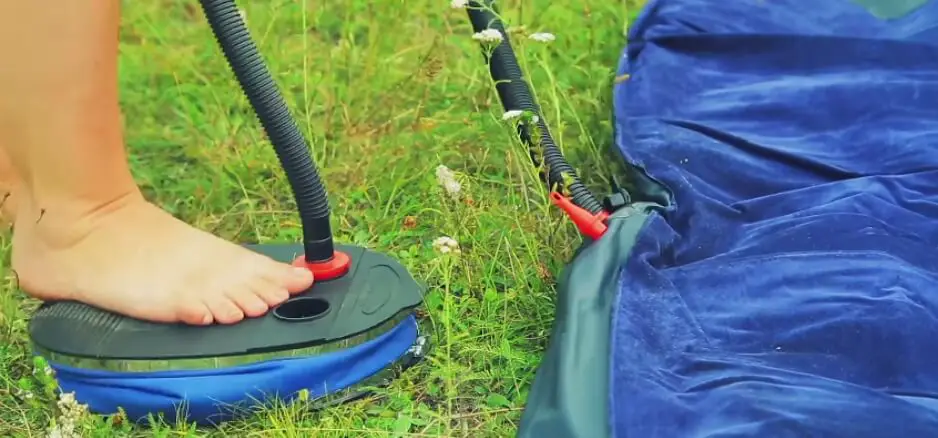
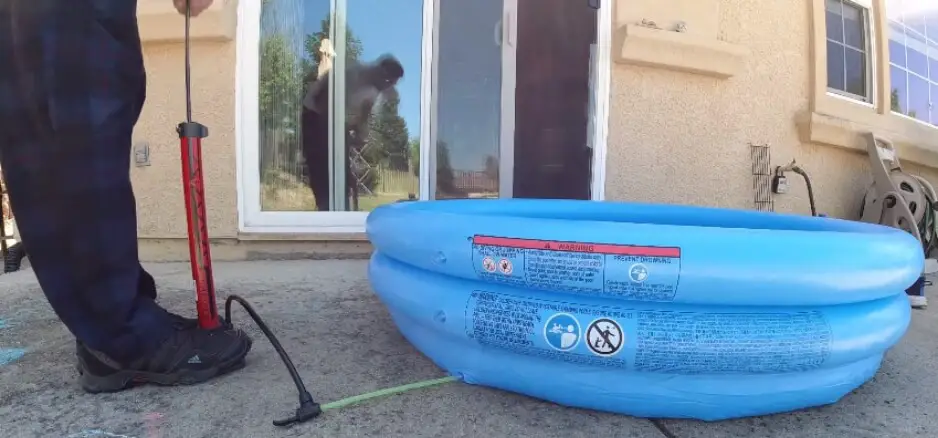
How to Use a Rechargeable Air Pump Effectively

Whether you’re inflating camping gear, pool floats, or air mattresses, mastering the effective use of a rechargeable air pump is key to a hassle-free experience. Here’s a comprehensive guide along with some tips and tricks to ensure you get the most out of your rechargeable air pump:

A. Step-by-Step Guide:

Using a rechargeable air pump effectively involves a straightforward process, ensuring smooth and efficient inflation for various inflatables. To help you get the most out of your rechargeable air pump, follow these steps:

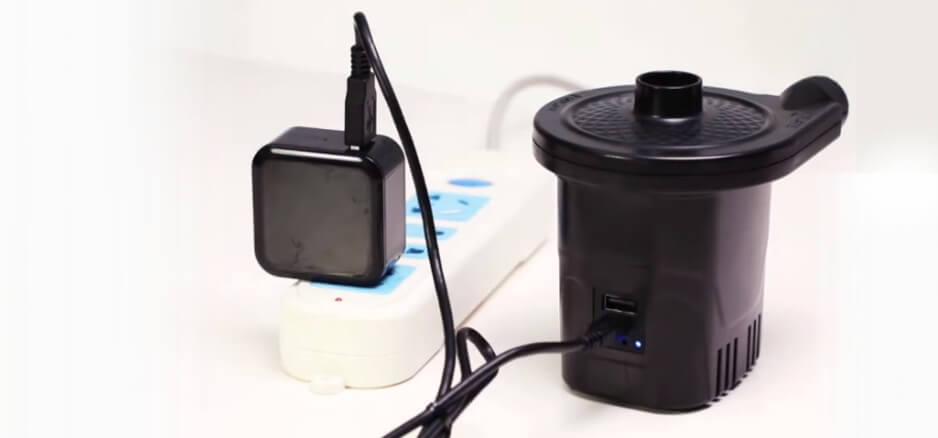
  • Charge the Battery: Before beginning any inflation task, ensure that the pump’s battery is fully charged. Using the included charging cable, connect the pump to a power source and let it charge until the indicator indicates that the charge is complete.
  • Select the Correct Nozzle: Numerous nozzle attachments are included with the majority of rechargeable air pumps to fit varying valve diameters. Choose the appropriate nozzle for the inflatable you are planning to fill to ensure a secure and airtight fit.
  • Attach the Nozzle to the Pump: Carefully connect the selected nozzle to the air pump, ensuring a tight fit. A secure connection is crucial for efficient inflation and prevents air leakage during the process.
  • Place the Nozzle within the Floating Valve: 
  • Insert the nozzle into the inflatable valve. To stop air from escaping during inflating, make sure it fits snugly. Hold the nozzle firmly in place while operating the pump.
  • Power On the Pump: Turn on the rechargeable air pump using the designated power button. Certain pumps can have pressure-adjustable settings; make the necessary adjustments based on the pressure that is suggested for your inflatable.
  • Track the Inflation:  Pay attention to the rate of inflation. Many air pumps have indicator lights or displays that show the current pressure level. Stop the pump once the inflatable reaches the desired firmness.
  • Remove the Nozzle and Secure the Valve: After inflation, disconnect the nozzle from the inflatable valve. Quickly secure the valve to prevent any air from escaping. Ensure a proper seal for optimal performance.
  • Power Off the Pump: Turn off the rechargeable air pump once the inflation is complete. This avoids inadvertent over-inflation and prolongs the life of the battery.
  • Store the Pump and Accessories: Store the pump and any additional accessories in a safe and dry place. Proper storage helps maintain the longevity of the pump and ensures it’s ready for future use.

B. Tips and Tricks for Efficient Inflation:

  • Prep Your Inflatables: Before starting the inflation process, lay out your inflatables and ensure there are no sharp objects or debris that could potentially damage them during inflation.
  • Understand Recommended Pressures: Familiarize yourself with the recommended inflation pressure for each of your inflatables. Under- or over-inflating an object can affect its performance, and both can cause harm.
  • Watch Battery Life:  During use, especially for prolonged inflation jobs, keep a watch on the battery life indicator. Ongoing operation is ensured by being aware of the battery’s remaining capacity.
  • Avoid Overloading the Pump: While rechargeable air pumps are versatile, avoid overloading them with excessively large inflatables. Consider the pump’s capacity to guarantee best performance.
  • Maintain Nozzles and Seals: Periodically check the condition of the nozzles and seals. To guarantee a tight fit and stop air leaks, clean them if needed and replace any broken parts.
  • Keep the Pump Cool: During prolonged use, rechargeable air pumps may generate heat. Between inflations, let the pump cool down to avoid overheating and guarantee reliable operation.
  • Store in a Controlled Environment: Store the rechargeable air pump in a cool and dry environment to maintain its overall condition. Extreme temperatures and humidity can impact the pump’s longevity.

Maintenance Tips for Longevity

To ensure the longevity and consistent performance of your rechargeable air pump, adopting a proactive approach to maintenance is essential. Here are key considerations for maintaining your pump in top-notch condition:

A. Cleaning and Storage:

Keeping your rechargeable air pump clean and properly stored goes a long way in preserving its functionality. usage a moist cloth to wipe the exterior of the pump clean of any dirt or debris after each usage. Pay special attention to the nozzle area, ensuring it remains free of any blockages. If the pump has been exposed to sand or dust, use a soft brush to clean the vents and prevent clogs. The pump should be stored in a cool, dry location to avoid damage from moisture.

A carrying case or bag can provide additional protection, especially during transportation or when not in use for extended periods.

B. Battery Care:

Proper battery care is crucial for maintaining optimal pump performance. To make sure the battery in your rechargeable pump lasts a long time, use these suggestions:

Full Charge Before Storage: Make sure the pump is completely charged before storing it if you want to do so for a long time. This prevents the battery from becoming overly discharged during storage.

Regular Charging: Even if the pump is not in frequent use, aim to charge it regularly. Lithium-ion batteries, common in rechargeable pumps, benefit from periodic charging to maintain their health.

Avoid Complete Discharge: While it’s good to discharge and recharge occasionally for calibration, avoid fully discharging the battery regularly. This may shorten the battery’s lifespan overall.

Temperature Considerations: Lithium-ion batteries are sensitive to extreme temperatures. Avoid subjecting the pump to extremes of heat or cold as this may affect the functioning of the battery. Optimal storage temperature is generally between 20°C (68°F) and 25°C (77°F).

Conclusion

In conclusion, finding the best rechargeable air pump for inflatables is all about considering your specific needs. Whether you’re camping, hitting the beach, or enjoying a day by the pool, the right pump makes a world of difference. When making a decision, consider aspects like mobility, power, and extra features. With the perfect rechargeable air pump in hand, you’ll breeze through inflation tasks effortlessly, ensuring your inflatables stay ready for action. Explore the options, prioritize your preferences, and elevate your inflatable experiences with the ideal rechargeable air pump. Your hassle-free inflation journey starts here!

Frequently Asked Questions

Q1. What makes a rechargeable air pump the best for inflatables?

Answer: The best rechargeable air pump excels in factors like power, portability, and versatility. To accommodate different inflatable kinds, look for pumps with varied nozzle attachments and pressure settings that can be adjusted.

Q2. How long does the battery last on a top-notch rechargeable air pump?

Answer: Although battery life varies, high-quality pumps have longer battery life between charges. Depending on the pump’s specs, you can anticipate a continuous inflating period of anywhere from 20 minutes to more than an hour.

Q3. Are rechargeable air pumps suitable for all inflatables?

Answer: Yes, the majority of rechargeable air pumps include numerous nozzle attachments, which allows them to be used with a variety of inflatables, including camping equipment, mattresses, and pool toys.  Ensure the pump has the right nozzle for your specific needs.

How to Get Air Out of a Pool Pump: 5 Easy Steps

How to Get Air Out of a Pool Pump: 5 Easy Steps

Welcome to our quick guide on resolving a common pool owner’s woe – “How to get air out of a pool pump.” If you’ve noticed reduced water flow, strange noises, or pesky air bubbles in your pool, you’re in the right place. We’ll take you step-by-step through the process in this simple lesson to remove unwanted air and maintain the proper operation of your pool pump. Say goodbye to pool pump issues as we dive into the simple yet effective solutions you need. Let’s make your pool maintenance a breeze!

Signs of Air in Pool Pump

One of the telltale signs that something might be amiss with your pool pump is a noticeable reduction in water flow. If you find that the water circulation isn’t as robust as usual, it’s a clear indicator that there might be air infiltrating the system.

A. Reduced Water Flow:

One unmistakable sign that air may be infiltrating your pool pump is a noticeable reduction in water flow. This can be observed through diminished water pressure in the pool jets or a weakened force in the circulation system. When air infiltrates the pump, it disrupts the normal flow of water, creating inefficiencies in the system’s operation. It’s imperative to address this issue promptly to prevent further complications and to maintain the proper circulation of water throughout the pool.

B. Unusual Noises:

Another telltale sign that air has found its way into the pool pump system is the emergence of unusual noises during its operation. These may include but are not limited to, gurgling sounds, hissing, or even a distinct sucking noise. Such auditory irregularities are indicative of air pockets within the pump or associated plumbing, causing disruptions in the smooth operation of the equipment. Ignoring these sounds may lead to more severe problems down the line, making it essential to investigate and rectify the source of the air intrusion promptly.

C. Air Bubbles in the Pool:

Perhaps one of the most visually apparent signs of air infiltration is the presence of air bubbles in the pool water. When air enters the pump system, it can manifest as bubbles rising to the water’s surface. These bubbles not only detract from the aesthetic appeal of the pool but also signify a potential compromise in the system’s functionality. Regularly inspecting the pool water for the presence of air bubbles can serve as an early warning, prompting timely intervention to identify and resolve the underlying issues causing the air ingress.

Understanding and responding promptly to these signs empower pool owners to maintain optimal pump performance, ensuring clear and properly circulated water for an enjoyable swimming experience. Regular monitoring and proactive measures contribute to the overall health and efficiency of the pool system.

Preliminary Checks for How to Get Air Out of a Pool Pump

It’s vital to carry out a number of preliminary tests to identify potential problems impacting your pool pump before beginning the troubleshooting procedure.

  • Power and Electrical Connections: Begin by ensuring that the pool pump is receiving the necessary power supply. Check the electrical connections, making sure all components are securely plugged in. If you encounter any loose connections or frayed wires, addressing these issues promptly can often resolve power-related complications.
  • Pool Pump Lid and O-ring Inspection: Move on to inspecting the pool pump lid and its accompanying O-ring. A secure and properly sealed lid is paramount in preventing air from infiltrating the system. Examine the O-ring for any signs of wear, damage, or debris that might compromise its effectiveness. A well-maintained lid and O-ring contribute significantly to the overall efficiency of your pool pump.
  • Water Level in the Pool: Sufficient water levels are necessary to ensure that your pool pump runs efficiently. Insufficient water levels can lead to the intake of air, causing disruptions in the pumping process. Verify that the water level is within the advised range and top up the pool with the proper amount if necessary. This simple yet often overlooked check can make a significant difference in preventing air-related issues.

By systematically examining power connections, inspecting the pump lid and O-ring, and confirming proper water levels, you’re laying the groundwork for a successful resolution to any air-related problems in your pool pump. Preliminary inspections are a proactive way to find possible problems early on and fix them before they get worse.

Step-by-Step Guide: How to Get Air Out of a Pool Pump

Now, let’s dive into a comprehensive step-by-step guide to effectively eliminate air from your pool pump and restore it to optimal functioning. Follow these detailed instructions to address the issue systematically:

A. Turn Off the Pool Pump:

Begin the process by turning off your pool pump. This guarantees a regulated and secure environment for the next actions. Locate the power source and switch off the pump to minimize any potential hazards.

B. Identify and Locate Air Leaks:

  • Check Pump Lid and O-ring: Examine the pool pump lid and its associated O-ring for any signs of wear, damage, or misalignment. A secure and intact lid with a properly fitted O-ring is crucial for preventing air from entering the system.
  • Inspect Pool Pump Plumbing: Take a close look at the pool pump plumbing. Check for loose connections, visible cracks, or any damaged components that might be contributing to air leaks. Resolving the issue can be greatly aided by quickly addressing these factors.
  • Examine Valves and Connections: Extend your inspection to the valves and connections in the pool pump system. Look for any potential points where air might be infiltrating. Tighten loose connections and address any valve issues to eliminate these entry points.

C. Prime the Pool Pump:

  • Open Air Relief Valve: Locate the air relief valve on your pool pump and open it. This allows any trapped air within the system to escape, facilitating the priming process.
  • Fill Pump Pot with Water: Fill the pump pot with water to ensure that the pump is adequately primed. This helps create a vacuum, reducing the likelihood of air being drawn into the system during operation.
  • Close Pump Lid Securely: Once the pump pot is filled, securely close the pool pump lid. A tight seal prevents air from re-entering the system, maintaining the primed state.

D. Restart the Pool Pump:

With the necessary preparations in place, restart your pool pump. Observe its operation closely to ensure a smooth and air-free performance.

E. Monitor for Continued Air Issues:

Keep a watchful eye on your pool pump after restarting. Monitor for any signs of continued air issues, such as bubbles in the water or unusual noises. If problems persist, consider revisiting the identified areas of potential air leaks and addressing them more comprehensively.

You may efficiently drain the air from your pool pump and help ensure that it runs smoothly by following these easy to follow steps. Remember, a systematic approach ensures a more thorough resolution of the issue at hand.

Additional Tips for Preventing Future Air in Pool Pump

Maintaining a trouble-free pool pump involves more than just resolving current issues. You should think about adding these extra recommendations to your pool care regimen to guarantee a continually effective and air-free operation:

A. Regular Maintenance Schedule:

Establishing a routine maintenance schedule is paramount to preventing future air infiltration in your pool pump. Inspect and clean the pump, filter, and related parts on a regular basis. Keep an eye on the condition of the pump lid and O-ring, ensuring they remain free of damage. Consistent maintenance not only enhances the longevity of your pool pump but also helps identify potential issues before they escalate.

B. Proper Water Level Maintenance:

Maintaining the proper water level in your pool is more than just a matter of aesthetics – it plays a crucial role in preventing air from entering the pump system. Make sure that the water level stays within the range that is suggested for your particular pool. A consistent water level provides the necessary submersion for the pump to function optimally, minimizing the risk of air infiltration.

C. Addressing Potential Leak Points:

Actively identify and address potential leak points in your pool pump system. Regularly inspect valves, connections, and plumbing for signs of wear, deterioration, or looseness. Tighten any loose fittings promptly and replace any damaged components. Taking a proactive stance in addressing potential leak points significantly reduces the likelihood of air entering the system, contributing to a trouble-free pool pump operation.

Including these extra suggestions in your pool care regimen guarantees the general well-being of your pool system and helps avert future air problems. By adhering to a regular maintenance schedule, maintaining the proper water level, and promptly addressing potential leak points, you can enjoy a consistently smooth and efficient pool pump performance. Remember, proactive care today minimizes the chances of troubleshooting tomorrow.

When to Seek Professional Help

While addressing common pool pump issues can often be handled with DIY troubleshooting, there are specific situations where seeking professional assistance becomes crucial. Knowing when to bring in a professional can save you time, effort, and potential further damage to your pool system. Important signs that it’s time to get professional pool care advice include the following:

A. Persistent Air Issues:

If you’ve diligently followed the steps outlined to remove air from your pool pump, but the issue persists, it’s a clear signal that a more complex problem may be at play. A professional examination and intervention may be necessary for persistent air quality issues. A pool maintenance expert has the experience and tools to diagnose and address these more intricate challenges, ensuring your pool pump operates optimally.

B. Complex Plumbing Problems:

When your pool pump issues extend beyond basic troubleshooting, involving intricate plumbing problems, it’s advisable to enlist professional help. Complex plumbing issues, such as hidden leaks, intricate valve malfunctions, or significant pipe damage, often require specialized knowledge and equipment. Pool maintenance professionals are equipped to navigate and resolve these complex plumbing challenges efficiently.

C. Signs of Equipment Damage:

If you observe visible signs of equipment damage, such as motor issues, pump malfunctions, or deteriorating components, seeking professional assistance is essential. If broken equipment is attempted to be repaired or replaced without the requisite knowledge, more problems might arise. A pool maintenance professional can accurately assess the extent of the damage and recommend appropriate repairs or replacements to ensure the long-term functionality of your pool pump.

If you encounter persistent air issues, complex plumbing problems, or signs of equipment damage, don’t hesitate to reach out to a qualified pool maintenance professional. Their expertise and specialized knowledge are invaluable in addressing more intricate pool pump challenges, safeguarding the health of your pool system and prolonging the life of your equipment. Recall that investing for expert help when required will help you avoid wasting time, money, or aggravation while handling persistent pool pump problems.

Conclusion

In conclusion, mastering the art of getting air out of your pool pump is the key to maintaining a hassle-free and efficient pool system. You can maintain the best possible condition for your pool pump by carefully following our step-by-step instructions, doing routine maintenance, and taking quick action should something goes wrong. Recall that a well-maintained pool pump guarantees worry-free swimming and crystal-clear waters. Dive into proactive care, bid farewell to air-related woes, and let your pool pump work its magic seamlessly. Enjoy your pristine oasis!

Frequently Asked Questions

Q1. How to get air out of a pool pump properly?

Answer: To remove air from your pool pump, first turn it off for safety. Check the pump lid, O-ring, plumbing, valves, and connections for damage or leaks. Open the air relief valve, fill the pump pot with water, and securely close the lid to prime the pump. Restart and monitor for air issues. Regular maintenance and proper water levels prevent future problems. If problems continue, get expert assistance to guarantee smooth pump functioning and pleasurable, clear pool water.

Q2. Why is there air in my pool pump?

Answer: Air in your pool pump can result from issues like a loose lid, damaged O-ring, or plumbing leaks. For optimum pump performance, locating and resolving these issues is essential.

Q3. Can low water levels cause air in the pump?

Answer: Yes, maintaining the proper water level is essential. Low water levels can lead to air infiltration, affecting the pump’s efficiency. Regularly check and maintain the recommended water level in your pool.

Q4. How do I know if my pool pump has air bubbles?

Answer: Look out for reduced water flow, unusual noises, or air bubbles in the pool. These signs indicate air in the pump system. Addressing them promptly with our guide can help resolve the issue.

Q5. What should I do if air issues persist after troubleshooting?

Answer: If problems persist, it’s time to seek professional help. Persistent air issues may signal complex problems that require the expertise of a pool maintenance professional.

Q6. How often should I perform maintenance to prevent air in the pump?

Answer: Regular maintenance is key. Establish a routine to inspect the pump, check the water level, and address potential leaks. This proactive approach helps prevent air issues and ensures a smoothly functioning pool pump.

How to Fold Intex Air Mattress with Built in Pump

How to Fold Intex Air Mattress with Built in Pump

Welcome to the definitive resource for information about how to fold intex air mattress with built in pump. Learning how to fold your Intex air mattress correctly is crucial for hassle-free storage and ensuring it stays in pristine condition. We’ll bring you through the procedure step-by-step in this comprehensive guide, complete with professional advice and insights.  Whether you’re a frequent camper or simply looking to declutter your living space, mastering the art of folding your Intex air mattress with a built-in pump is a game-changer. Let’s dive in and make storing your air mattress a breeze!

Gathering the Essential Materials for How to Fold Intex Air Mattress with Built in Pump

Before delving into the process of folding your Intex air mattress with a built-in pump, it’s crucial to ensure you have all the necessary materials at your disposal. This preliminary step sets the stage for a smooth and effective folding experience, promoting both convenience and longevity for your mattress.

A. List of Required Items

  • Intex Air Mattress with Built-in Pump: Of course, your Intex air mattress with its handy built-in pump is the most important component of this process. This versatile piece of equipment not only provides a comfortable sleeping surface but also streamlines the deflation process, making folding more manageable.
  • Clean and Dry Surface:  Get ready to fold the air mattress on a clean, dry surface. This guarantees that during the folding process, the mattress won’t come into contact with any possible moisture or dirt. A well-maintained surface contributes to the overall cleanliness and preservation of your mattress.

Deflating Your Intex Air Mattress: A Detailed Process

After gathering the required supplies, it’s time to start the vital process of deflating your Intex air mattress with an integrated pump. Proper deflation is essential for efficient folding and long-term storage. Let’s break down this process into two key components:

A. Use the Built-in Pump to Deflate the Mattress

Begin by locating the built-in pump on your Intex air mattress. Typically, it is conveniently integrated into the mattress for user-friendly operation. Turn on the pump and let the mattress gradually lose its air.

The built-in pump streamlines this part of the process, ensuring a quick and efficient reduction of air within the mattress.

Take a moment to observe the deflation progress. As the mattress decreases in size, the built-in pump continues to expel air, making the subsequent folding steps more manageable. The seamless integration of the pump simplifies the deflation process, making it accessible for users of all experience levels.

B. Ensure the Mattress is Fully Deflated Before Proceeding

Once the pump has completed its task, it’s crucial to double-check that the mattress is fully deflated before moving forward. To ensure that no trapped air pockets remain, gently press down on different parts of the mattress.

Ensuring full deflation is paramount for achieving a neat and compact fold later on. Pay attention to any areas that might still feel inflated, and press or massage those spots to release any lingering air. A fully deflated mattress sets the stage for a smooth and effective folding process, maximizing both storage space and the mattress’s lifespan.

Removing Excess Air: Fine-Tuning Your Intex Air Mattress Deflation

How to Fold Intex Air Mattress with Built in Pump

With your Intex air mattress now deflated, the next crucial step in preparing it for storage involves removing any lingering excess air. This methodical procedure guarantees an incredibly small and space-saving fold. Now let’s examine the specific procedures for eliminating extra air:

A. Press Down on the Mattress to Expel Any Remaining Air

To begin, apply gentle but firm pressure across the surface of the deflated mattress. This step helps expel any trapped air pockets that might persist even after using the built-in pump. Starting from one end, press down and gradually work your way to the other, focusing on areas that may feel slightly inflated.

Be attentive to the entire surface, paying special attention to seams or raised sections where air might linger. The goal is to achieve an evenly flattened surface, setting the stage for the subsequent folding process.

B. Fold the Mattress Horizontally to Assist in Air Removal

Once you’ve pressed down on the mattress, the next strategy involves horizontal folding. This technique aids in further expelling residual air and contributes to a more efficient removal process. Begin folding the mattress in half horizontally, aligning the edges carefully.

As you fold, continue applying gentle pressure to encourage any remaining air to escape. This horizontal folding method complements the pressing motion, ensuring a thorough removal of excess air throughout the mattress. The combination of pressing and folding optimizes the deflation process, leaving you with a mattress ready for the final stages of storage preparation.

Folding Your Intex Air Mattress Lengthwise: Crafting a Seamless Fold

How to Fold Intex Air Mattress with Built in Pump

With the excess air removed, the next pivotal step in preparing your Intex air mattress for storage involves a deliberate and careful lengthwise fold. This strategic folding method not only maximizes storage efficiency but also ensures a smooth and hassle-free unfolding when you’re ready to use the mattress again. Let’s delve into the detailed process:

A. Create a Neat and Even Fold Along the Length of the Mattress

Begin by identifying the length of your deflated Intex air mattress. With precision and care, fold one end of the mattress towards the center, creating a neat and even fold along its length. The goal is to maintain uniformity, aligning the edges accurately to achieve a straight and streamlined fold.

As you proceed with the lengthwise fold, be mindful of any seams or raised areas. Smooth out the surface to minimize wrinkles and ensure an even distribution of the mattress material. This meticulous approach contributes to the overall tidiness of your storage solution.

B. Smooth Out Any Wrinkles or Uneven Areas

Once you’ve completed the lengthwise fold, take a moment to assess the mattress’s surface. After folding, smooth down any creases or uneven spots that may have developed. This step is crucial for preventing creases and ensuring a compact and well-maintained fold.

Gently run your hands over the surface of the folded mattress, paying attention to any areas that may require additional attention. By addressing wrinkles and unevenness at this stage, you’re not only optimizing the storage efficiency but also preserving the integrity of the mattress material.

Rolling Your Intex Air Mattress: The Art of Efficient Storage

How to Fold Intex Air Mattress with Built in Pump

Having achieved a neat and even lengthwise fold, the next critical step in optimizing the storage of your Intex air mattress involves rolling it tightly and compactly. This process not only minimizes the footprint of your mattress but also facilitates easy handling and retrieval when needed. Let’s delve into the detailed steps for rolling your Intex air mattress effectively:

A. Start Rolling the Mattress from One End to the Other

Starting at one end of the nicely folded Intex air mattress, roll the mattress. Begin the roll with a firm and controlled motion, ensuring that the edges stay aligned during this pivotal step. The goal is to create a tight and uniform roll that maintains the integrity of the initial lengthwise fold.

As you progress, maintain an even pressure throughout the roll to prevent any unevenness or bulging. Consistency is key in achieving a well-rolled mattress that’s primed for efficient storage.

B. Ensure a Tight and Compact Roll for Efficient Storage

The success of the rolling process hinges on achieving a tight and compact roll. Make sure the mattress material is tightly wound by paying special attention to the tension while rolling. A tight roll not only conserves storage space but also minimizes the risk of wrinkles or creases in the mattress material. To ensure consistency, check the roll frequently for any anomalies and make any necessary adjustments. The end result should be a compact cylinder that reflects the meticulous effort invested in the folding and rolling process.

Securing Your Neatly Folded Intex Air Mattress: A Finishing Touch

With your Intex air mattress expertly rolled, the final step before storage involves securing it to maintain its meticulously folded shape. This gives an extra layer of protection during storage and also stops accidental unfolding. Let’s delve into the detailed process of securing your neatly folded Intex air mattress:

A. Use Included Straps or a Storage Bag If Available

Many Intex air mattresses come equipped with convenient straps or a dedicated storage bag for this purpose. If your mattress includes these accessories, utilize them to streamline the securing process. Straps are designed to wrap around the rolled mattress, holding it in place and preventing any accidental unrolling.

If your Intex air mattress doesn’t come with specific straps or a storage bag, consider using alternative options like bungee cords or durable fabric bands. The key is to secure the rolled mattress tightly to maintain its shape during storage.

B. Securely Fasten to Maintain the Folded Shape

Once you’ve positioned the straps or chosen alternative securing options, securely fasten them around the rolled mattress. Pay attention to the tension applied, ensuring that the mattress remains tightly bound. This step is crucial for preventing any shifting or unwinding during storage, preserving the efficiency of your neatly folded mattress.

If you’re using a storage bag, place the rolled mattress inside and zip it securely. The bag adds another level of defense against potential damage during storage, dust, and moisture.

Properly Storing Your Intex Air Mattress: Ensuring Longevity and Readiness

How to Fold Intex Air Mattress with Built in Pump

As you’ve successfully secured your neatly folded Intex air mattress, the final chapter of this storage journey involves choosing an appropriate storage location and implementing measures to safeguard its pristine condition. Proper storage not only prolongs the lifespan of your mattress but also ensures that it’s ready for use whenever the need arises. Let’s delve into the detailed steps for properly storing your Intex air mattress:

A. Choose a Cool, Dry Storage Location

Setting up the ideal atmosphere is the first step toward optimal storage. Choose a cool and dry location for storing your Intex air mattress. The integrity of the mattress material may be compromised by mold or mildew that grows as a result of excessive heat and humidity. A cool, dry space minimizes the risk of these issues and preserves the mattress’s overall quality.

Think about keeping the mattress in a designated storage space, beneath a bed, or in a closet.

 If you’re utilizing a storage bag, ensure that the bag is made from breathable material to prevent moisture buildup inside.

B. Avoid Placing Heavy Items on Top of the Folded Mattress

Once you’ve identified an appropriate storage spot, exercise caution in the placement of other items in the same area. Keep the folded Intex air mattress neatly folded and don’t place heavy objects on top of it.  While the mattress is designed to withstand normal wear and tear, heavy objects can exert unnecessary pressure, potentially causing deformation or damage.

By keeping the storage area free from heavy items, you ensure that the folded mattress retains its shape and structure. This small but crucial step contributes to the longevity of your Intex air mattress, allowing it to maintain its optimal condition for future use.

Final Checks and Tips: Ensuring Longevity and Readiness

As you conclude the process of folding and securing your Intex air mattress, it’s time for a series of final checks and additional tips to guarantee its optimal condition during storage and longevity for future use. Let’s delve into these crucial steps:

A. Inspect the Folded Mattress for Any Visible Issues

Before finalizing the storage, take a moment to inspect the neatly folded Intex air mattress. Look for any visible issues such as tears, punctures, or signs of wear that may have occurred during the folding and securing process. By taking care of these problems right away, you can make sure that your mattress is ready for use again soon.

Feel the surface with your hands, observing the edges and seams. Smooth out any potential wrinkles or creases that might have formed during the folding and rolling stages. This meticulous inspection contributes to the overall longevity and performance of your air mattress.

B. Provide Additional Tips for Extending the Lifespan of the Air Mattress

In addition to the folding and securing process, consider implementing these additional tips to extend the lifespan of your Intex air mattress:

  • Regular Inspection: Periodically check your stored air mattress for any issues, ensuring it’s ready for use when needed.
  • Ventilation: If storing for an extended period, occasionally expose the mattress to fresh air to prevent mustiness.
  • Steer Clear of Direct Sunlight: The material of the mattress may deteriorate over time if it is left in the sun.
  • Temperature Control: Choose a storage location with consistent and moderate temperatures to prevent extremes that may affect the material.
  • Use a Mattress Protector: Consider using a mattress protector or cover to shield the folded mattress from dust and potential damage.

By incorporating these additional tips into your storage routine, you’re not only preserving the integrity of your Intex air mattress but also ensuring that it remains a reliable and comfortable sleep option for years to come.

Conclusion

In conclusion, mastering the art of folding your Intex air mattress with a built-in pump is a simple yet impactful way to optimize storage space and ensure the longevity of your sleep investment. From deflation to securing and storage, these steps are designed to keep your mattress in top-notch condition. By incorporating these techniques into your routine, you not only enhance the efficiency of your storage but also contribute to the overall durability and performance of your Intex air mattress. Enjoy the convenience of a neatly folded mattress, ready for a comfortable night’s sleep whenever you need it!

Frequently Asked Questions

Q1. How to fold intex air mattress with built in pump efficiently?

Answer:  Efficiently folding your Intex air mattress with a built-in pump involves deflating it with the pump, pressing down to remove excess air, and neatly folding it lengthwise. Store in a dry, cool area after firmly rolling and securing with straps or a bag. Regular inspections maintain longevity.

Q2. How do I fold my Intex air mattress with a built-in pump?

Answer: Learn the step-by-step process from deflation to securing with our guide. It ensures efficient folding for space optimization and mattress longevity.

Q3. Are there specific straps for securing the folded mattress?

Answer: Yes, many Intex mattresses come with included straps. If not, alternatives like bungee cords work well. Ensuring a tight and secure roll is crucial.

Q4. Can I use a regular bag for storage?

Answer: Yes, but it’s advisable to use a storage bag if available. It provides an additional degree of defense from dust and possible harm while being stored.

Q5. How often should I inspect my folded mattress?

Answer: Regularly inspect your stored air mattress for any visible issues, ensuring it’s ready for use. Periodic ventilation helps prevent mustiness.

Q6. What additional tips ensure the longevity of my air mattress?

Answer: Consider using a mattress protector, avoid direct sunlight, and store in a location with consistent temperatures. These tips contribute to prolonged mattress durability.

How to Fill Air in Swimming Pool with Cycle Pump

How to Fill Air in Swimming Pool with Cycle Pump

Welcome to the ultimate guide on how to fill air in swimming pool with cycle pump – today, we’ll dive into the hassle-free technique of inflating your pool equipment using a cycle pump. Whether you’re a pool owner or a water enthusiast, maintaining optimal air levels is crucial. Join us as we walk you through the simple steps of how to fill air in a swimming pool with a cycle pump, ensuring a cost-effective and eco-friendly solution for your aquatic haven. Let’s get started on making your pool experience even more enjoyable!

Gathering the Essential Equipment for How to Fill Air in Swimming Pool with Cycle Pump

Before embarking on the task of inflating your swimming pool equipment, it’s crucial to ensure you have all the necessary tools at your disposal. Let’s examine the supplies you’ll need in more detail:

A. List of Required Items

  • Cycle Pump: The primary tool for this task, a reliable cycle pump will help you efficiently introduce air into your pool equipment.
  • Air Pressure Gauge: An essential component to monitor and regulate the air pressure, ensuring you achieve the optimal levels for your swimming pool.
  • Valve Adapter: This key accessory facilitates a secure connection between the cycle pump and the pool’s air valve, enabling a smooth and effective inflation process.
  • Teflon Tape (if needed): While optional, Teflon tape can be a handy addition to your toolkit, especially if you encounter any issues with air leakage. It provides an extra layer of security by creating a tight seal.

B. Checking Equipment for Any Damage or Defects

Before commencing the inflation process, take a moment to inspect each piece of equipment for potential damage or defects. Ensuring a seamless and error-free operation requires taking this key step. Look for any visible wear and tear, cracks, or malfunctions in the cycle pump, air pressure gauge, valve adapter, and Teflon tape (if applicable).

Preparing the Pool Area for a Seamless Inflation Process

How to Fill Air in Swimming Pool with Cycle Pump

Now that we’ve gathered the necessary equipment, let’s turn our attention to the pool area itself. Proper preparation is key to ensuring a smooth and efficient process when filling your swimming pool equipment with a cycle pump.

A. Ensure the Pool is Clean and Free of Debris

Check the pool area first for any dirt or debris. Clearing the surroundings of the pool ensures that no foreign particles interfere with the inflation process. Clear away any leaves, twigs, or other material that might contaminate the area’s cleanliness.

A clean pool environment not only contributes to a visually appealing space but also prevents potential damage to your equipment. Debris might prevent the air valve from operating properly and cause issues when inflating.

B. Identify and Locate the Pool’s Air Valve

Next, take a moment to locate and identify the air valve of your swimming pool. The air valve is typically situated near the pool’s inflation point, and it’s essential to know its precise location before proceeding. Familiarize yourself with the valve’s appearance and ensure there are no obstructions or damage around it.

Identifying the air valve in advance saves time during the inflation process, allowing you to connect the cycle pump swiftly and efficiently.

C. Place the Cycle Pump in a Convenient and Stable Position

Positioning the cycle pump properly is crucial for a hassle-free experience. Pick a spot that guarantees stability during the inflation process and offers simple access to the pool’s air valve. To avoid any unintentional tipping or movement, a level, firm surface is best.

Placing the cycle pump conveniently near the pool not only streamlines the task but also contributes to a safer and more controlled inflation process. With the pool area now prepped and ready, we’re set to move on to the next steps in achieving optimal air levels in your swimming pool equipment.

Attaching the Valve Adapter for a Secure Connection

With the pool area prepared, the next critical step in inflating your swimming pool equipment using a cycle pump is to attach the valve adapter. An air valve in the pool and the cycle pump must be securely connected, and this part is essential to that connection.

A. Properly Install the Valve Adapter onto the Cycle Pump

Begin by ensuring that the cycle pump is in optimal working condition. Check for any visible defects or damage, addressing any issues before proceeding. Once confirmed, proceed to install the valve adapter onto the cycle pump. Most valve adapters are designed to easily attach to the pump, typically featuring a user-friendly mechanism for a hassle-free connection.

Take a moment to familiarize yourself with the valve adapter and its alignment on the cycle pump. Follow the manufacturer’s instructions, if available, to guarantee the correct installation. This stage establishes the framework for an effective and successful inflation procedure.

B. Check for a Secure and Airtight Fit

After installing the valve adapter, double-check the connection to ensure it is secure and airtight. A loose or improperly attached valve adapter can result in air leakage, compromising the inflation process and affecting the overall performance of your pool equipment.

Inspect the seal between the valve adapter and the cycle pump, confirming that it is snug and properly aligned. A secure fit is crucial for the successful transfer of air from the pump to the pool’s equipment.

C. Use Teflon Tape if Necessary to Prevent Air Leakage

Use Teflon tape to seal any possible air leaks for an extra degree of security. While not always required, applying Teflon tape to the threads of the valve adapter can create a tighter seal, minimizing the risk of air escaping during inflation.

Wrap the threads of the valve adapter with Teflon tape, taking care not to obstruct any crucial openings or mechanisms. This additional precaution ensures a more reliable and airtight connection, enhancing the effectiveness of the entire inflation process.

Connecting the Pump to Your Pool – Ensuring a Secure and Effective Link

How to Fill Air in Swimming Pool with Cycle Pump

With the valve adapter in place, let’s delve into the crucial steps of connecting the cycle pump to your swimming pool. The manner that air is transferred to your pool equipment is established at this crucial step.

A. Insert the Valve Adapter into the Pool’s Air Valve

Carefully locate the pool’s air valve, which we identified earlier during the pool area preparation. With the valve adapter securely attached to the cycle pump, gently insert it into the pool’s air valve. Ensure that the insertion is precise and that the valve adapter fits comfortably into the air valve opening.

To avoid doing any possible harm to the valve or the surrounding parts, take your time when doing this procedure. Proper alignment at this stage sets the foundation for a seamless and efficient inflation process.

B. Ensure a Snug Connection to Prevent Air Loss

Once the valve adapter is inserted into the pool’s air valve, pay close attention to the connection point. It’s imperative to ensure a snug fit between the valve adapter and the air valve, as any looseness can lead to air loss during the inflation process.

Feel around the connection point, checking for any gaps or play. A tight and secure connection is essential to maintain the integrity of the airflow, ultimately resulting in optimal air levels within your pool equipment.

C. Double-Check All Connections for Security

As a final precautionary measure, take a moment to double-check all connections involved in the setup. Verify the attachment between the cycle pump and the valve adapter, ensuring it remains secure. Additionally, confirm the connection between the valve adapter and the pool’s air valve, guaranteeing that there are no overlooked issues.

This meticulous inspection is crucial to prevent potential disruptions during the inflation process. A thorough assessment of all connections at this stage contributes to a smooth and trouble-free experience, ensuring that the cycle pump effectively transfers air into your swimming pool equipment.

Inflating Your Pool Equipment – A Step-by-Step Guide for Optimal Results

Now that the cycle pump is securely connected to your swimming pool, it’s time to initiate the inflation process. This phase involves a careful and controlled introduction of air into your pool equipment, ensuring that you achieve the ideal air levels without encountering any complications.

A. Begin Pumping Air into the Pool

With the cycle pump connected and the valve adapter inserted into the pool’s air valve, start the inflation process by activating the pump. Most cycle pumps feature user-friendly controls, making it easy to initiate the airflow into the pool equipment.

Check sure air is flowing steadily throughout the early stages of inflation by pausing to watch. This step marks the commencement of the process that will rejuvenate your pool equipment and contribute to an enhanced swimming experience.

B. Monitor the Air Pressure Using the Gauge

As the pump is in operation, keep a close eye on the air pressure gauge. This crucial tool provides real-time feedback on the air levels within your pool equipment. Maintaining optimal air pressure is essential for the efficient performance of your pool, so monitor the gauge regularly throughout the inflation process.

Adjust the pumping speed or pause if necessary, ensuring that the air pressure remains within the recommended range. This vigilant monitoring prevents overpressurization, a potential issue that could lead to equipment damage.

C. Inflate Gradually to Avoid Overpressurizing

While it might be tempting to speed up the inflation process, it’s essential to inflate your pool equipment gradually. Overpressurizing can have adverse effects on the integrity of the equipment, potentially leading to leaks or malfunctions.

Exercise patience during this stage, allowing the cycle pump to introduce air at a controlled pace. This measured approach not only safeguards your pool equipment but also contributes to a more durable and reliable system.

Verifying and Adjusting Your Pool’s Air Levels for Peak Performance

With your pool equipment in the process of inflation, the next crucial phase involves continuous monitoring and adjustment to achieve and maintain optimal air levels. This ensures that your swimming pool operates efficiently and provides a refreshing environment for all users.

A. Regularly Check the Air Pressure Gauge

Throughout the inflation process, make it a habit to regularly check the air pressure gauge. This tool serves as your real-time indicator of the air levels within your pool equipment. By keeping a watchful eye on the gauge, you gain insights into the inflation progress and can detect any irregularities promptly.

Frequent checks allow you to intervene if there are unexpected fluctuations in air pressure. By being proactive, you reduce the chance of possible problems and improve the general health of your pool system.

B. Adjust the Air Levels as Needed

Based on the readings from the air pressure gauge, be prepared to make adjustments to the inflation process. Continue slowly pumping air until you reach the acceptable range if the pressure is lower than what is advised. On the other hand, if the gauge indicates overpressurization, pause the inflation process temporarily and release some air to bring the levels back within the optimal range.

This step requires a responsive and attentive approach to ensure that your pool equipment receives the right amount of air. Fine-tuning the air levels according to the specifications not only enhances the performance of your pool but also extends the lifespan of the equipment.

C. Maintain Optimal Pressure for Efficient Pool Operation

The ultimate goal is to maintain optimal air pressure for efficient pool operation. This sweet spot ensures that your pool equipment functions optimally, providing a seamless and enjoyable swimming experience. By consistently monitoring and adjusting the air levels, you contribute to the overall health and longevity of your pool system.

Maintaining optimal pressure prevents unnecessary strain on the equipment, reduces the risk of malfunctions, and promotes energy efficiency. This proactive approach to air level management sets the foundation for a well-maintained swimming pool, ready to provide hours of enjoyment for you and your family.

Safely Disconnecting the Pump and Ensuring Proper Equipment Storage

As your swimming pool equipment reaches the desired air levels, the final steps involve securely disconnecting the cycle pump and preparing your tools for future use. These concluding actions are crucial for maintaining the longevity of your equipment and ensuring a hassle-free experience the next time you embark on the inflation process.

A. Safely Disconnect the Valve Adapter from the Pool’s Air Valve

Once your pool equipment has reached the optimal air levels, it’s time to disconnect the cycle pump. Start by carefully removing the valve adapter from the pool’s air valve.Make sure you follow this step precisely to prevent damaging the valve or any surrounding parts. Take your time during this process, gently pulling the valve adapter out of the air valve. This careful approach ensures a smooth disconnection, preserving the integrity of both the pool equipment and the cycle pump.

B. Release Any Remaining Air Pressure from the Pump

Before storing the cycle pump, it’s essential to release any remaining air pressure within the pump. Most pumps come equipped with a pressure release mechanism or a dedicated valve for this purpose. Activate this release feature to ensure that the pump is depressurized completely.

Releasing the remaining air pressure not only enhances the safety of handling the pump but also contributes to its longevity. This thoughtful step prepares the pump for storage, preventing unnecessary wear on its internal components.

C. Store Equipment Properly for Future Use

With the pump safely disconnected and depressurized, store all equipment properly for future use. Coil the hose neatly, secure the cycle pump in a dry and cool location, and store the valve adapter in a protective case if available. Proper storage safeguards your tools from damage and ensures that they are ready for the next inflation session.

Take into consideration keeping the equipment in a dedicated area out of direct sunlight and extremely extreme temperatures. This proactive approach to storage enhances the lifespan of your tools, guaranteeing their reliability when needed again.

Final Checks and Tips for a Well-Maintained Swimming Pool

How to Fill Air in Swimming Pool with Cycle Pump

As you conclude the process of inflating your swimming pool equipment with a cycle pump, it’s essential to conduct thorough final checks and consider additional tips for ongoing maintenance. These steps ensure that your pool environment remains pristine and functional, providing long-lasting enjoyment for you and your loved ones.

A. Inspect the Pool Area for Any Signs of Damage or Issues

Before you declare the inflation process complete, take a moment to inspect the pool area for any signs of damage or issues. Walk around the pool perimeter and scrutinize the surroundings for potential concerns such as leaks, cracks, or loose components. By taking immediate action, you may keep these problems from getting worse and prolong the life of your pool’s infrastructure. The vicinity of the inflation point, the air valve, and any adjacent equipment require close attention. A vigilant inspection allows you to detect and resolve issues early on, contributing to the overall health and safety of your swimming pool.

B. Ensure All Connections are Tightly Sealed

Verify that all connections, including the valve adapter to the cycle pump and the valve adapter to the pool’s air valve, are tightly sealed. Confirm the snugness of each connection point, checking for any signs of air leakage or loosening. A secure and airtight seal is crucial for the proper functioning of your pool equipment, preventing potential disruptions in the future.

If any connections appear compromised, take the time to readjust and secure them. This attention to detail ensures that your swimming pool remains a reliable and efficient oasis for relaxation and recreation.

C. Provide Additional Tips for Ongoing Pool Maintenance

As a final touch, consider sharing additional tips for ongoing pool maintenance to keep your aquatic haven in top-notch condition:

  • Regularly Clean and Skim: Establish a routine for skimming and cleaning your pool to remove debris and maintain water clarity.
  • Check Water Chemistry: Make sure your pool is safe and comfortable to swim in by testing and balancing the chemical levels on a regular basis.
  • Inspect Pool Equipment: Periodically check all pool equipment, including filters and pumps, to identify and address any issues promptly.
  • Cover Your Pool: Invest in a pool cover to keep the water clean while it’s not in use, limit debris, and lower evaporation.
  • Schedule Professional Inspections: For a yearly evaluation of the general state of your pool and equipment, think about arranging expert inspections.

Conclusion

In conclusion, mastering how to fill air in your swimming pool with a cycle pump is a simple yet impactful way to maintain optimal performance. This eco-friendly and cost-effective solution ensures that your pool equipment operates efficiently, providing a refreshing and enjoyable experience. By following these steps, you not only enhance your swimming environment but also contribute to the longevity of your pool system. Dive into hassle-free pool maintenance and enjoy a revitalized aquatic haven with the straightforward process of inflating your pool equipment using a cycle pump. Cheers to a well-maintained and inviting swimming pool!

Frequently Asked Questions

Q1. How to fill air in swimming pool with cycle pump properly?

Answer: Filling your pool with a cycle pump is simple. Gather a pump, air gauge, valve adapter, and Teflon tape if required. Clean the pool area, find the air valve, and position the pump securely. Attach the valve adapter tightly, using Teflon tape for a secure seal. Insert the adapter into the air valve and pump air gradually, adjusting pressure with the gauge. Disconnect the pump, release remaining air, and store the gear. Check for damage, secure connections, and follow maintenance tips for a well-kept pool. Enjoy!

Q2. What equipment do I need to fill air in my swimming pool using a cycle pump?

Answer: To get started, you’ll need a cycle pump, an air pressure gauge, a valve adapter, and optional Teflon tape for added security.

Q3. How do I identify the pool's air valve for the inflation process?

Answer: Before starting, inspect your pool area for the air valve. It’s typically located near the inflation point, and familiarizing yourself with its appearance is key for a smooth process.

How to Use Sponge Filter Without Air Pump: 3 Easy Steps

How to Use Sponge Filter Without Air Pump: 3 Easy Steps

Welcome to the aquarium enthusiast’s guide on optimizing your tank’s filtration with a twist – discovering how to use sponge filter without air pump. While air pumps are commonly paired with sponge filters, there’s a cost-effective and quieter alternative. In this short guide, we’ll explore the benefits of going air-pump-free, offering you a step-by-step walkthrough to enhance your aquarium’s filtration efficiency. Let’s dive into the world of sponge filters and redefine your aquatic setup, one bubble at a time.

Benefits of Using How to Use Sponge Filter Without Air Pump: Enhancing Aquarium Efficiency

Aquarium enthusiasts often seek efficient filtration solutions that balance functionality with practicality. Opting for sponge filters without the use of air pumps presents a range of advantages, contributing to a harmonious and cost-effective aquarium environment. Explore the following benefits in detail:

A. Energy Efficiency:

  • Sponge filters operate without the need for external air pumps, reducing energy consumption and associated costs. The absence of a pump streamlines the filtration process, making it an energy-efficient choice for aquarium enthusiasts mindful of their ecological footprint.
  • By relying solely on the sponge filter’s intrinsic design, aquariums equipped with this filtration system promote sustainability and energy conservation. For those looking to reduce the environmental effect of their aquarium settings, this is very advantageous.

B. Cost Savings:

  • The utilization of sponge filters without additional air pumps translates into tangible cost savings. Aquarium owners can allocate their budget more efficiently, as there is no need to invest in and maintain separate air pump equipment.
  • Cost-effectiveness extends beyond initial setup expenses to ongoing operational costs. Sponge filters generally have fewer components to replace or maintain, contributing to long-term financial savings while providing effective filtration for the aquarium ecosystem.

C. Quieter Operation:

  • Sponge filters, operating without air pumps, contribute to a quieter and more serene aquarium environment. The absence of the hum or vibration associated with air pumps enhances the overall enjoyment of the aquarium experience for both enthusiasts and aquatic inhabitants.
  • Quieter operation is especially advantageous in settings where aquariums are placed in living spaces or areas where ambient noise levels are a consideration. The tranquility achieved with sponge filters aligns with the desire for a peaceful and enjoyable aquatic habitat.

Choosing sponge filters without the reliance on air pumps aligns with a commitment to energy efficiency, cost-consciousness, and creating a peaceful aquarium ambiance. This filtration approach not only simplifies maintenance but also enhances the overall well-being of aquarium inhabitants, fostering a thriving aquatic ecosystem.

Choosing the Right Sponge Filter: A Comprehensive Guide for Aquarium Enthusiasts

Selecting the appropriate sponge filter is a pivotal decision that directly influences the efficiency and overall health of your aquarium. Dive into the following considerations to guide you in making an informed choice:

A. Size and Capacity:

  • When choosing a sponge filter for your aquarium, its size and capacity are particularly important factors to consider. Consider the size of your tank, the volume of water it holds, and the specific filtration needs of your aquatic ecosystem.
  • Opt for a sponge filter with adequate surface area and sponge density to accommodate the biological filtration process effectively. Ensure that the chosen filter can handle the bio-load of your aquarium, providing ample space for beneficial bacteria colonization.

B. Compatibility with Air Pump-Free Operation:

  • When aiming for an air pump-free setup, choose a sponge filter designed to function optimally without the need for additional air pumps. Look for models specifically engineered for this purpose, ensuring they possess built-in features that facilitate efficient filtration without external air assistance.
  • Confirm that the sponge filter’s design allows for sufficient water circulation and oxygenation without the use of an air pump. Compatibility with air pump-free operation ensures a streamlined and energy-efficient filtration system for your aquarium.

C. Maintenance Requirements:

  • Evaluate the maintenance demands of the sponge filter to align with your preferred level of involvement. Some sponge filters are designed for easy disassembly and cleaning, simplifying routine maintenance tasks.
  • Consider the accessibility of replacement sponges or filter media, as these components may require periodic changes. Assessing maintenance requirements beforehand helps establish a sustainable and manageable routine to keep your aquarium in optimal condition.

Choosing the right sponge filter involves a thoughtful evaluation of size, compatibility, and maintenance aspects. By prioritizing these considerations, aquarium enthusiasts can create a thriving aquatic environment supported by an efficient and tailored filtration system.

Step-by-Step Guide for Using Sponge Filters Without Air Pumps: Optimizing Aquarium Filtration

Integrating sponge filters into your aquarium setup without the need for air pumps requires careful attention to placement, flow rate adjustment, and ongoing maintenance. Follow this comprehensive guide to ensure the effective operation of your sponge filters:

Step 1. Proper Placement in the Aquarium:

  • Begin by selecting an appropriate location within the aquarium for the sponge filter. Ideally, position it in an area with sufficient water flow and circulation to maximize filtration efficiency.
  • Place the sponge filter in close proximity to areas of high biological activity, such as areas with heavy fish traffic or where organic waste accumulates. This strategic placement facilitates effective mechanical and biological filtration, enhancing water quality.

Step 2. Adjusting Flow Rate:

  • Adjust the flow rate of the sponge filter to optimize filtration performance without the use of an air pump. Many sponge filters feature adjustable flow regulators or valves that allow you to control the rate of water flow through the filter.
  • Strike a balance between sufficient water movement and gentle filtration to avoid disrupting the aquarium ecosystem. Experiment with different flow settings until you achieve an optimal balance that promotes adequate filtration without causing undue stress to aquatic inhabitants.

Step 3. Monitoring and Cleaning:

  • Regularly monitor the condition of the sponge filter to ensure uninterrupted filtration. Keep an eye out for signs of debris accumulation or clogging, which can impede filtration efficiency.
  • To keep the sponge filter working well, set up a regular cleaning schedule. Depending on your aquarium’s bio-load and water quality, clean the sponge filter as needed to prevent excessive buildup of organic matter.
  • When cleaning the sponge filter, gently rinse it in dechlorinated water to remove debris and organic waste.Steer clear of tap water as it contains chemicals and chlorine that can damage aquatic life and good bacteria.
  • As part of routine maintenance, periodically replace the sponge filter or its media to prevent degradation and maintain optimal filtration performance.

By following this step-by-step guide, you can effectively utilize sponge filters in your aquarium setup without the need for air pumps. Sponge filters help your fish and other aquatic life have a healthy and vibrant aquatic environment when they are installed correctly, have their flow rate adjusted, and are maintained with care.

Alternative Methods for Sponge Filter Operation: Exploring Diverse Filtration Approaches

How to Use Sponge Filter Without Air Pump

Embracing versatility in sponge filter operation opens up a world of alternative methods that cater to various preferences and circumstances. Delve into these alternative approaches to discover inventive ways of optimizing your aquarium filtration without solely relying on conventional methods:

A. Manual Squeezing Method:

  • The manual squeezing method involves periodic, controlled squeezing of the sponge filter to expel accumulated debris and detritus. This hands-on approach allows aquarium enthusiasts to physically remove excess waste, restoring the sponge’s filtration capacity.
  • Implement this method cautiously, avoiding excessive squeezing that could harm beneficial bacteria residing in the sponge. Conduct manual squeezes during regular maintenance sessions, providing a quick and effective means of enhancing sponge filter performance.

B. Gravity-Driven Filtration Systems:

  • Gravity-driven filtration systems leverage the natural force of gravity to facilitate water movement through the sponge filter. By positioning the sponge filter in an elevated location within the aquarium, gravity induces a continuous flow of water through the sponge.
  • This method is particularly suitable for aquariums with a height differential, as it harnesses the inherent force of gravity to drive water through the sponge filter. Adjust the placement and elevation of the filter to align with the aquarium’s specific layout and water circulation patterns.

C. DIY Solutions:

  • Enthusiasts often explore do-it-yourself (DIY) solutions to adapt sponge filters to unique aquarium setups. This can involve creative modifications such as integrating additional components or altering the sponge filter’s design to suit specific requirements.
  • DIY solutions empower aquarium keepers to customize their filtration systems based on individual preferences and the needs of their aquatic environment. It is important to guarantee that any alterations uphold the fundamental features and soundness of the sponge filter.

By exploring alternative methods for sponge filter operation, aquarists can tailor their filtration strategies to align with specific preferences and aquarium configurations. Whether embracing manual techniques, leveraging gravity-driven systems, or crafting DIY solutions, these alternatives offer flexibility and adaptability in enhancing the effectiveness of sponge filters within the aquatic ecosystem.

Factors to Consider When Using Sponge Filters without Air Pumps: Optimizing Aquarium Filtration

When opting for sponge filters without the traditional accompaniment of air pumps, careful consideration of various factors becomes pivotal. These factors are essential to guaranteeing both the general health of the aquarium’s occupants and the efficiency of the filtration system. Dive into the nuanced aspects that demand attention when embracing sponge filters sans air pumps:

A. Tank Size and Stocking Levels:

  • Tailoring your choice of sponge filter to the dimensions of the aquarium and the number of inhabitants is paramount. Larger tanks or those densely populated with fish may require multiple sponge filters strategically placed to maintain adequate filtration coverage.
  • Assess the specific needs of your aquatic community and select sponge filters that align with the tank’s size and the volume of waste produced by the inhabitants. This thoughtful approach prevents overworking the sponge filters and promotes a balanced filtration environment.

B. Filtration Needs:

  • Understanding the specific filtration requirements of your aquarium is essential for effective water purification. Different aquarium setups may necessitate varying degrees of mechanical and biological filtration.
  • Evaluate whether your aquarium primarily requires mechanical filtration to remove debris or if biological filtration, facilitated by beneficial bacteria within the sponge, is the focal point. Choosing sponge filters with appropriate densities and configurations ensures that your filtration needs are met adequately.

C. Water Flow and Oxygenation:

  • The absence of air pumps in conjunction with sponge filters prompts a closer examination of water flow and oxygenation levels. Sponge filters generate water movement through the sponge, contributing to aeration and oxygen exchange.
  • Consider the oxygen requirements of your aquatic inhabitants and ensure that the chosen sponge filters promote sufficient water circulation. Adjust the placement and orientation of the filters to optimize water flow, supporting both effective filtration and oxygenation.

Navigating the nuances of tank size, stocking levels, filtration needs, and water flow is integral to successfully implementing sponge filters without air pumps. By conscientiously addressing these factors, aquarium enthusiasts can create a well-balanced and thriving aquatic environment, where sponge filters serve as efficient allies in maintaining water quality and the health of aquatic life.

Troubleshooting Tips: Navigating Challenges in Sponge Filter Operation

Embarking on the journey of utilizing sponge filters in your aquarium without air pumps brings forth a realm of possibilities for efficient and silent filtration. However, like any system, occasional challenges may arise. This thorough guide will help you troubleshoot possible problems and guarantee that sponge filters work flawlessly.

A. Adjusting Flow if Necessary:

  • Periodically assess the water flow generated by your sponge filters to maintain an optimal balance. In some instances, the flow may be too vigorous or insufficient for the aquarium’s needs.
  • To fine-tune the flow, consider adjusting the placement or angle of the sponge filters within the aquarium. Experiment with different orientations to achieve the desired water movement while preventing any disruption to the aquatic environment.

B. Ensuring Adequate Filtration:

  • Regularly monitor the filtration performance of the sponge filters to confirm that they effectively capture debris and particulate matter. Inadequate filtration may lead to water cloudiness or diminished water quality.
  • If filtration seems compromised, inspect the sponge for clogs or debris accumulation. Rinse or clean the sponge as needed to restore its filtering capacity. Additionally, ensure that the sponge filters are appropriately sized for the aquarium’s volume and the quantity of waste produced.

C. Addressing Potential Issues:

  • Stay vigilant for any signs of deterioration or wear in the sponge material. Over time, sponges may degrade, affecting their efficiency and structural integrity.
  • If issues persist, consider rotating or replacing the sponge filters. Routine maintenance, including gentle cleaning of the sponge material, aids in preventing clogs and optimizing the filters’ longevity.
  • Check for any loose connections or displacement of sponge filters, ensuring they are securely positioned to prevent disruptions in water circulation.

By proactively addressing flow adjustments, maintaining filtration efficacy, and promptly resolving potential issues, aquarium enthusiasts can troubleshoot common challenges associated with sponge filters. This proactive approach contributes to the sustained health and clarity of the aquarium, allowing the silent efficiency of sponge filters to shine in creating a thriving aquatic habitat.

Conclusion

In conclusion, embracing the use of a sponge filter without an air pump brings a new level of simplicity and cost efficiency to your aquarium maintenance. By following our guide, you’ve unlocked a quieter, energy-efficient filtration alternative that doesn’t compromise on effectiveness. This technique enables you to easily construct a thriving aquatic environment, regardless of your level of experience. Take the plunge into a hassle-free aquarium experience, where sponge filters reign supreme without the need for constant air pump hums.

Frequently Asked Questions

Q1. How to use sponge filter without air pump properly?

Answer: To use a sponge filter effectively without an air pump, choose the right size for your tank, position it correctly for good water flow, and maintain it regularly by rinsing it in tank water. This technique keeps your fish in a quieter habitat while also saving money and energy. Experiment with placement for optimal results.

Q2. Can a sponge filter effectively operate without an air pump?

Answer: Absolutely! Our guide details the step-by-step process of optimizing sponge filter performance without the need for an air pump, offering a quieter and cost-effective solution.

Q3. What are the benefits of using a sponge filter without an air pump?

Answer: Going air-pump-free not only saves costs but also ensures a quieter operation and energy efficiency. Both your pocketbook and the fish in your aquarium will benefit from it.

Q4. How do I choose the right sponge filter for this method?

Answer: Selecting the suitable sponge filter is crucial. Our guide provides insights into factors like tank size, filtration needs, and water flow, helping you make an informed decision.

Q5. Are there alternative methods for operating a sponge filter without an air pump?

Answer: Yes, we explore various alternatives, including manual squeezing methods and gravity-driven filtration systems, offering flexibility and customization based on your aquarium’s unique needs.

Q6. Can this method be applied to any aquarium size?

Answer: While adaptable to various tank sizes, it’s essential to consider factors like stocking levels, filtration needs, and oxygenation requirements. We offer guidance on how to best optimize the approach for various configurations.

How to Get Air out of Pool Pump Hayward: 7 Easy Steps

How to Get Air out of Pool Pump Hayward: 7 Easy Steps

Welcome to your go-to guide on how to get air out of pool pump hayward – air entrapment. If you’ve noticed reduced pump efficiency or poor water circulation in your pool, chances are, air has found its way into your Hayward pump. Fear not! In this quick-read article, we’ll walk you through simple, actionable steps on how to get air out of your Hayward pool pump, ensuring your pool stays crystal clear and refreshing. Say goodbye to pump hiccups and hello to a hassle-free pool experience. Let’s dive in!

Understanding How to Get Air out of Pool Pump Hayward

Hayward pool pumps are a performance cornerstone when it comes to dependable and effective pool circulation. In this exploration, we’ll delve into the intricate details of Hayward pool pumps, offering a comprehensive overview of different models, dissecting the components that contribute to their functionality, and understanding the impact of air on pump performance.

A. Overview of Hayward Pool Pump Models:

Hayward boasts a diverse range of pool pump models, each designed to meet specific performance needs. From the venerable Super Pump series, known for its durability and versatility, to the Energy Efficient MaxFlo and the technologically advanced TriStar, Hayward caters to a spectrum of pool sizes and requirements. Knowing the subtle differences between each model enables pool owners to make decisions that best suit their particular needs for circulation and energy efficiency.

B. Components of a Hayward Pool Pump:

To comprehend the inner workings of Hayward pool pumps, it’s essential to dissect their components. At the heart of these pumps lies a robust motor, often thermally protected for longevity and reliability. A vital component of water circulation, the impeller effectively transports water throughout the system. Housing and seals ensure a watertight environment, preventing leaks and optimizing pump efficiency. Hayward pumps also feature user-friendly interfaces for ease of operation and monitoring.

C. The Role of Air in Hindering Pump Performance:

Air intrusion can significantly impact the performance of Hayward pool pumps. The smooth flow of water is disturbed when air gets into the system, which can cause damage and lower pump efficiency, among other problems. Identifying the sources of air ingress, whether through suction leaks or worn-out seals, becomes paramount for maintaining optimal pump performance. Regular inspections and prompt repairs are essential to mitigate the adverse effects of air on Hayward pool pumps, ensuring seamless water circulation and a prolonged pump lifespan.

Understanding Hayward pool pumps involves navigating through the array of models available, dissecting their integral components, and addressing challenges posed by factors like air intrusion. Armed with this knowledge, pool owners can not only make informed choices during the pump selection process but also implement effective maintenance practices, ensuring their Hayward pool pump operates at peak efficiency for years to come.

Signs of Air in Hayward Pool Pump

A well-functioning Hayward pool pump is crucial for maintaining a pristine and properly circulated pool. However, the presence of air in the pump system can compromise its efficiency and lead to various issues. In this exploration, we’ll delve into the signs that indicate the presence of air in Hayward pool pumps, understand the impact on pool circulation and water quality, and highlight the potential damage that can ensue if air-related issues are not promptly addressed.

A. Identifying Symptoms of Air in the Pump System:

  • Unusual Noise: Air in the pump system often manifests as a distinctive gurgling or hissing noise. If you notice sounds that deviate from the usual hum of the pump, it could be indicative of air intrusion.
  • Visible Air Bubbles: Air bubbles in the pump basket or returning jets are a clear sign of air entering the system. Regularly inspecting the pump components can help spot this visual cue.
  • Inconsistent Pressure: Fluctuations in water pressure, including sudden drops or intermittent surges, may signal the presence of air affecting the pump’s ability to maintain a steady flow.
  • Reduced Water Flow: A decrease in water flow through the pool jets or inadequate circulation can be attributed to air hindering the pump’s capacity to move water effectively.

B. Impact on Pool Circulation and Water Quality:

  • Poor Water Filtration: Air in the pump system can compromise the filtration process, leading to inadequate removal of debris and contaminants from the pool water.
  • Altered Water Chemistry: Inconsistent water circulation due to air intrusion can disrupt the proper distribution of pool chemicals, affecting water balance and potentially leading to issues like algae growth or pH imbalances.
  • Impaired Skimmer Performance: Air in the pump system can impede the skimmer’s ability to efficiently collect debris, resulting in a less effective cleaning process.

C. Potential Damage if Air is Not Addressed Promptly:

  • Pump Damage: Prolonged exposure to air can cause the pump to operate under stressful conditions, potentially leading to premature wear and damage to vital components.
  • Cavitation: Air in the system can contribute to cavitation, where the formation and collapse of air bubbles create intense pressure fluctuations, damaging impellers and other pump elements over time.
  • Increased Energy Consumption: Hayward pool pumps struggling with air-related issues may experience increased energy consumption as the pump works harder to overcome inefficiencies, leading to higher operational costs.

Addressing air in the Hayward pool pump promptly is crucial to maintaining optimal performance, preserving water quality, and preventing potential damage. Regular inspections, identifying symptoms early, and addressing the root causes of air intrusion ensure a smoothly functioning pool pump and a consistently enjoyable swimming experience.

Comprehensive Step-by-Step Guide: How to Effectively Remove Air from Your Hayward Pool Pump

Maintaining the optimal performance of your Hayward pool pump is essential for ensuring efficient water circulation and filtration in your pool. However, air trapped in the pump system can hinder its operation and lead to issues such as reduced flow and potential damage. Here’s a detailed step-by-step guide to effectively remove air from your Hayward pool pump:

Step 1. Power off the Pool Pump:

The foremost step in addressing any pool pump-related concerns is prioritizing safety. Switch off the power supply to the pool pump to eliminate any risk of electrical accidents during the maintenance process.

Step 2. Locate and Inspect the Pump Lid and O-ring:

Begin by identifying the pump lid, typically situated atop the pump housing. Conduct a thorough inspection of both the pump lid and its accompanying O-ring. Keep an eye out for any indications of wear, damage, or debris that could erode the seal’s effectiveness.

Step 3. Properly Seal the Pump Lid:

Ensure the pump lid is correctly aligned and securely seated on the pump housing. The effectiveness of the pump can be increased by lubricating the O-ring with a small layer of silicone-based lubricant, which promotes a tight and seamless seal.

Step 4. Check and Tighten All Connections:

Delve into a meticulous examination of all connections associated with the pool pump, including inlet and outlet pipes, valves, and fittings. Identify any indications of looseness or leaks and utilize the appropriate tools to tighten connections, thereby preventing unwanted air intrusion.

Step 5. Prime the Pool Pump:

For non-self-priming Hayward pool pumps, the next step involves manual priming. This can be achieved by filling the pump housing with water using a hose or bucket until it reaches the desired level. This process helps eliminate air pockets within the pump system.

Step 6. Bleed Air from the System using Designated Valves:

Identify the air relief valve designated for this purpose, commonly found on the pool filter or other components of the circulation system. Slowly open the valve to release any trapped air, continuing until water flows consistently without the presence of air bubbles.

Step 7. Monitor the System for Any Additional Air Leaks:

Post-bleeding, maintain a vigilant eye on the pool pump and associated components. Scrutinize the pump basket, filter, and piping system for signs of air bubbles or unusual hissing sounds, indicative of potential air intrusion points that may require further attention.

You may successfully remove air from your Hayward pool pump by carefully following this thorough step-by-step instruction. Regular adherence to such maintenance practices not only ensures optimal performance but also contributes to a clean and healthy swimming environment for you and your loved ones.

Preventive Measures for Air in Hayward Pool Pump

Maintaining the efficiency and longevity of your Hayward pool pump involves not only addressing existing air-related issues but also implementing preventive measures to mitigate future problems. Here’s a detailed exploration of preventive measures to keep air out of your Hayward pool pump:

A.Regular Maintenance Schedule:

It’s critical to set up a reliable and comprehensive maintenance schedule. Regularly inspect the pump, filter, and associated components for signs of wear, leaks, or debris. Cleaning the pump basket and ensuring proper lubrication of O-rings during routine checks can significantly contribute to preventing air intrusion.

B. Monitoring Water Levels and Skimmer Performance:

Vigilantly monitor the water levels in your pool to prevent the pump from drawing in air due to insufficient water. Additionally, keep a close eye on the skimmer’s performance. A well-functioning skimmer efficiently removes debris, reducing the likelihood of air entering the pump system.

C. Addressing Issues with Pool Plumbing:

Conduct periodic assessments of your pool’s plumbing system. Examine couplings, valves, and pipelines for leaks, corrosion, or other damage. Timely addressing plumbing issues can prevent air from infiltrating the system and disrupting the pump’s operation.

D. Installing Additional Equipment for Air Prevention:

Consider enhancing your pool system with additional equipment designed to prevent air-related issues. Air relief valves, for instance, can automatically release trapped air from the filter, safeguarding against potential air blockages. Consult with pool professionals to explore suitable options based on your pool’s specific configuration.

Implementing these preventive measures not only minimizes the risk of air entering your Hayward pool pump but also contributes to the overall health and longevity of your pool system. Consistency in monitoring, regular maintenance, and strategic enhancements can ensure a trouble-free and enjoyable swimming experience for you and your family.

Troubleshooting Hayward Pool Pump Air Issues: Navigating Causes and Solutions

Encountering persistent air-related problems in your Hayward pool pump can be a frustrating experience. Restoring optimal functionality requires an understanding of the possible reasons and the use of workable solutions. Here’s an in-depth exploration of troubleshooting strategies:

A. Persistent Air Issues: Possible Causes and Solutions:

Damaged Pump Lid or O-ring:

  • Cause: A compromised seal due to a damaged pump lid or O-ring.
  • Solution: Inspect and replace the damaged components, ensuring a secure and airtight seal.

Loose or Leaky Connections:

  • Cause: Looseness or leaks in connections, allowing air to infiltrate.
  • Solution: Thoroughly check and tighten all connections, addressing any signs of leaks promptly.

Plumbing Issues:

  • Cause: Damaged or faulty pool plumbing, leading to air ingress.
  • Solution: Conduct a comprehensive inspection of the plumbing system, repairing or replacing damaged components as necessary.

Insufficient Water Levels:

  • Cause: Inadequate water levels in the pool, causing the pump to draw in air.
  • Solution: Maintain proper water levels to ensure the pump functions optimally without introducing air.

Clogged Skimmer or Pump Basket:

  • Cause: Debris buildup within the pump basket or skimmer.
  • Solution: Regularly clean the skimmer and pump basket to prevent blockages and air entrapment.

B. Seeking Professional Help When DIY Efforts Fail:

Despite diligent DIY efforts, some air-related issues may persist, indicating underlying complexities. It becomes imperative to seek expert aid in such instances. A pool service professional can conduct an in-depth assessment, utilizing specialized tools and expertise to identify and resolve intricate problems.

Remember, troubleshooting Hayward pool pump air issues requires a systematic approach, addressing both common and unique challenges. By combining DIY diligence with professional guidance, you can navigate and overcome persistent air-related issues, ensuring your pool pump operates seamlessly for a refreshing and trouble-free swimming experience.

Conclusion

In wrapping up our guide on how to get air out of your Hayward pool pump, it’s clear that maintaining a clear and efficient pool is a breeze with the right knowledge. By addressing air issues promptly, you ensure your pump operates at its best, promoting optimal water circulation and a sparkling pool. Remember, regular maintenance is the key to a trouble-free pool season. Keep those Hayward pumps humming, and enjoy a refreshing swim every time you dive in. Here’s to crystal-clear waters and hassle-free pool days!

Frequently Asked Questions

Q1. How to get air out of pool pump hayward perfectly?

Answer: To perfectly get air out of your Hayward pool pump, follow these steps:


  • Turn off the pump.
  • Make sure the O-ring is properly sealed by checking and tightening the pump lid.
  • Inspect all connections for any signs of leaks and tighten if necessary.
  • Pump basket should be filled with water to prime the pump.
  • Open designated air release valves to let out any trapped air.
  • Restart the pump and monitor for optimal performance.

Regular maintenance and prompt action ensure a perfectly functioning Hayward pool pump.

Q2. Why is there air in my Hayward pool pump?

Answer: A broken O-ring, a loose pump cover or plumbing problems are some of the possible causes of air in your Hayward pool pump. Our guide outlines steps to identify and address these common culprits.

Q3. Can air in the pump affect pool water quality?

Answer: Yes, air in the pump can lead to reduced water circulation and negatively impact water quality. Regularly removing air from your Hayward pool pump ensures optimal performance and helps maintain crystal-clear water.

Q4. How often should I check for air in my Hayward pool pump?

Answer: Routine checks are recommended, especially during the pool season. If you notice any symptoms of air-related issues, such as cavitation or reduced water flow, follow our guide’s steps to promptly eliminate air from your Hayward pump.

Q5. Are there preventive measures to avoid air in the pump?

Answer: Absolutely. Regular maintenance, checking for leaks, and ensuring proper sealing of the pump lid are key preventive measures. Our guide provides insights into maintaining a trouble-free Hayward pool pump.

Q6. What if I can't resolve air issues in my Hayward pump?

Answer: If DIY efforts fall short, it’s advisable to seek professional assistance. Persistent air problems may indicate underlying issues that require expert attention. Don’t hesitate to consult a pool maintenance professional to ensure your Hayward pump operates efficiently.