
As an Amazon Associate I earn from qualifying purchases.
Welcome to our guide on tackling a common pool dilemma: How to remove air from pool pump. If you’ve noticed decreased water circulation, strange noises, or irritating air bubbles in your pool, it’s time to learn how to remove air from your pool pump. In this step-by-step walkthrough, we’ll unravel the mysteries behind proper pump function, equipping you with the knowledge to troubleshoot and maintain a crystal-clear pool. Let’s dive in and ensure your pool pump is at its prime!
Signs of Air in Pool Pump: Indicators of Potential Issues
It’s critical to check if your pool pump has air in it to keep both water quality and performance at their best. The following are thorough descriptions of typical symptoms that point to the possibility of air in your pool pump system:
A. Decreased Water Circulation:
One of the primary indicators of air in the pool pump is a noticeable decrease in water circulation. If you observe weaker water flow from the pool jets or a diminished water output from the return lines, it could signal the presence of air pockets within the pump system. Air can disrupt the normal flow of water, leading to reduced circulation and potentially impacting the overall efficiency of the pool pump.
B. Unusual Noises:
Unusual sounds emanating from the pool pump, such as gurgling, hissing, or persistent vibrations, may be indicative of air entrapped in the system. As air moves through the pump and plumbing, it creates distinctive noises that differ from the usual hum of a well-functioning pump. Monitoring and identifying these atypical sounds can help pinpoint the location of air ingress and guide corrective actions.
C. Air Bubbles in the Pool:
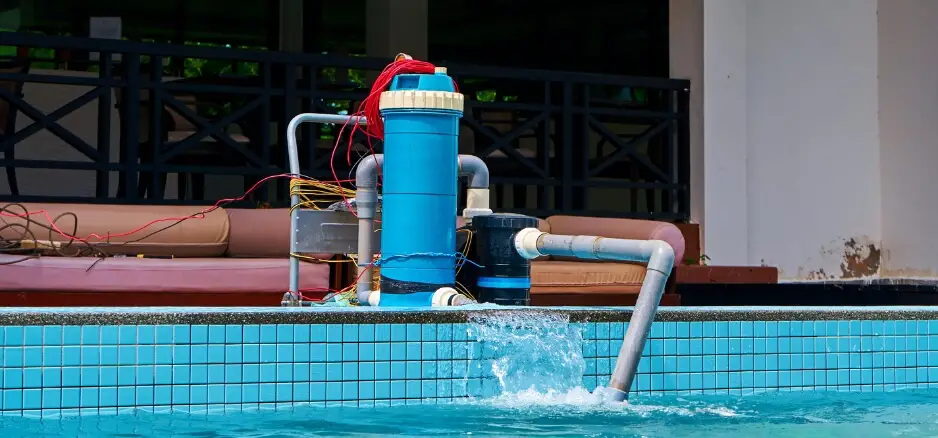
Perhaps the most visually apparent sign of air in the pool pump system is the presence of air bubbles in the pool water. These bubbles may be visible through the pool return jets or accumulate in certain areas of the pool. Air bubbles suggest that air is being drawn into the pump, possibly through leaks or issues with the pump’s priming process. Regularly inspecting the pool for the emergence of air bubbles provides a clear visual cue for addressing potential air-related issues promptly.
Step-by-Step Guide to How to Remove Air from Pool Pump: Ensuring Optimal Performance
Addressing air in your pool pump is a crucial maintenance task to maintain efficient water circulation and overall system performance. To safely and successfully remove air from your pool pump, adhere to this detailed guide:
Step 1. Turn Off the Pool Pump:
Before undertaking any maintenance on your pool pump, it’s essential to prioritize safety. Turning off the pool pump is the first step in this process. A summary of this important first phase is as follows:
- Importance of Safety:
- Prioritizing safety above everything else is imperative while servicing pool equipment. Before turning off the pump, ensure that all electrical connections are secure and that you are following recommended safety procedures.
- Be cautious around wet surfaces and ensure that your hands are dry when interacting with electrical components. If uncertain, consult with a professional or seek guidance from your pool’s maintenance manual.
Shutting Down the Pump Properly:
- Find the pool pump’s circuit breaker or power switch, and flip it off. This procedure guarantees a controlled shutdown and helps avoid electrical mishaps.
- If your pump has a dedicated power disconnect near the pump, use it to cut power. This additional precaution ensures that the pump is completely de-energized.
After turning off the pool pump, you’ve laid the foundation for a safe and controlled environment to proceed with the next steps of removing air from the system. Following safety protocols is paramount in any pool maintenance task, and this guide emphasizes the significance of a secure starting point for the overall well-being of both the pool and the individual performing the maintenance.
Step 2. Identify and Inspect Equipment:
Once the pool pump is safely turned off, the next crucial step in removing air from the system involves a meticulous inspection of the equipment. Here is a comprehensive guide on recognizing and examining different parts:
Checking for Leaks:
- Start by visually examining each part of the pool pump system to look for any possible leaks. Inspect the fittings, pipe connections, and pump housing for any indications of moisture or seepage of water. Air leaks can lower the system’s efficiency by allowing air to enter.
- Look closely examine the O-ring seal and the lid of the pump. Air leaks into systems can occur from a misseated or cracked O-ring. Replace any worn-out O-rings and ensure a proper seal to prevent future air ingress.
Examining Valves and Seals:
- Move on to inspecting valves and seals within the pool pump system. Valves that are not fully closed or have damaged seals can contribute to air infiltration. Verify that the seals on each valve are intact and that they are all positioned correctly.
- Carefully examine the pump’s impeller for any debris or obstruction. A clean and unobstructed impeller ensures smooth water flow and minimizes the likelihood of air getting trapped in the system.
Identifying and addressing potential issues during this inspection phase is crucial for maintaining the integrity of the pool pump system. Addressing leaks, ensuring proper sealing, and examining valves contribute to the prevention of air entering the system and promote efficient water circulation. A thorough inspection sets the stage for effective troubleshooting and corrective measures in the subsequent steps of the air removal process.
Step 3. Locate and Open the Air Release Valve:
After inspecting the equipment, the next step in removing air from the pool pump system involves locating and opening the air release valve. This process is integral to releasing trapped air and ensuring optimal water circulation. Here’s a detailed guide:
Understanding the Valve’s Purpose:
- The air release valve serves a crucial role in expelling air that may have accumulated within the pool pump and plumbing. Its purpose is to provide a designated point for trapped air to escape, preventing it from impeding the pump’s performance.
- The valve is strategically placed in areas prone to air entrapment, such as high points in the plumbing or near the pool pump. Understanding the valve’s role is essential for effective air removal.
Proper Technique for Opening:
- Begin by locating the air release valve, which is typically a small manual valve positioned on top of the pool filter, near the pump, or along the pool plumbing.
- Before opening the valve, ensure that the pool pump is turned off to create a safe working environment. Opening the valve while the pump is running can result in water spurting out, posing safety risks.
- Using a suitable tool, such as pliers or a wrench, gently turn the air release valve counterclockwise to open it. Avoid forcing or over tightening the valve as this might lead to damage.
There may be a hissing sound as you open the valve, which is the trapped air releasing. Allow the valve to remain open until water starts flowing steadily without air bubbles.
Understanding the role of the air release valve and employing the proper technique for opening it are pivotal in facilitating the removal of trapped air. This step contributes to restoring optimal water flow, preventing air-related issues, and maintaining the efficiency of the pool pump system.
Step 4. Prime the Pool Pump:
After releasing trapped air, the next critical step in the process of maintaining an efficient pool pump system involves priming the pump. Priming is essential for ensuring the pump is filled with water and ready to operate seamlessly. Here’s a comprehensive guide:
Importance of Priming:
- The procedure of priming involves adding water to the pool pump in order to generate a vacuum and start the pumping motion. This is crucial because an unprimed pump can lead to issues such as cavitation, reduced water flow, and potential damage to the pump’s components.
- Proper priming ensures the pump is fully operational, promoting optimal water circulation and preventing air from re-entering the system.
Step-by-Step Priming Process:
- Begin by locating the pump’s lid, which is typically positioned on the pump housing. Remove the lid carefully to access the pump chamber.
- If required, clean the pump basket by checking for any dirt or obstructions. A clean basket allows for efficient water intake during the priming process.
- Using a hose or a designated fill port, add water to the pump chamber until it reaches the top. This step helps eliminate air pockets within the pump.
- Once the pump chamber is filled, replace and securely tighten the pump lid. Ensure the lid’s O-ring is in good condition to maintain a proper seal.
- Activate the pool pump and keep an eye on the water’s movement. You should observe a steady stream of water indicating successful priming.
- If the pump has a sight glass, pay attention to that as well as the pressure gauge. These indicators provide insights into the pump’s performance.
Priming the pool pump is a fundamental aspect of regular maintenance, promoting efficient water circulation and preventing issues associated with air pockets. Following a systematic priming process ensures the pump is ready to operate optimally, contributing to the overall longevity and effectiveness of the pool pump system.
Step 5. Check and Tighten Connections:
In the quest to maintain a robust and efficient pool pump system, it is imperative to scrutinize and secure all connections. Loose or compromised connections can introduce air into the system and hinder optimal water circulation. Here’s a detailed guide on how to inspect and tighten connections effectively:
Inspecting Hoses and Fittings:
- Commence the inspection process by carefully examining all hoses and fittings connected to the pool pump. Check for any obvious evidence of damage, degradation, or wear.
- Pay close attention to hose clamps, ensuring they are securely fastened. If any horses show signs of cracks or wear, consider replacing them to prevent potential leaks.
Tightening Loose Connections:
- Utilize appropriate tools, such as a wrench or pliers, to systematically check and tighten all connections within the pool pump system. This includes connections between hoses, pipes, valves, and the pump itself.
- Exercise caution to avoid overtightening, as this can lead to damage. Instead, aim for a firm but not excessive tightening of connections to ensure a secure seal.
Tightening up loose connections is essential to keeping the pool pump system structurally sound and preventing air infiltration. This meticulous inspection and tightening process contribute to a stable and efficient system that is less prone to issues associated with air entrapment. Regular checks of connections should be incorporated into routine pool maintenance practices to uphold the system’s overall reliability and performance.
Step 6. Monitor Pressure Gauge:
Keeping a vigilant eye on the pressure gauge of your pool pump is a proactive measure that provides valuable insights into the system’s health. Understanding pressure readings and making necessary adjustments contribute to the ongoing efficiency and functionality of the pump. Here’s a comprehensive guide on monitoring the pressure gauge:
Interpreting Pressure Readings:
- The pressure gauge on your pool pump serves as a diagnostic tool, reflecting the pressure within the system. A normal pressure reading typically falls within a specific range, which varies based on the pump and filtration system specifications.
- A sudden increase in pressure may indicate a clog or blockage in the filtration system, such as a dirty filter. Conversely, consistently low pressure might suggest issues with water intake, possibly caused by air leaks or insufficient water in the pump chamber.
- Regularly noting the baseline pressure when the pump is operating optimally allows you to identify deviations and address potential issues promptly.
Adjusting Pressure if Necessary:
- If the pressure gauge indicates an unusually high reading, it’s advisable to check the pool filter for clogs or debris. Cleaning or replacing the filter as needed can restore normal pressure levels.
- In the case of persistently low pressure, consider inspecting the pool pump for potential air leaks. Revisiting the steps of releasing air from the system, priming the pump, and checking connections may help resolve the issue.
- Some pool systems are equipped with a pressure relief valve. A relief valve adjustment may be necessary if the pressure is higher than the advised range. For exact instructions, refer to the pump’s handbook or get expert advice.
Regularly monitoring the pressure gauge empowers pool owners to proactively address potential issues, ensuring the smooth operation of the pump and filtration system. By interpreting pressure readings and making necessary adjustments, you contribute to the longevity and efficiency of your pool pump, fostering a consistently well-maintained aquatic environment.
Step 7. Restart the Pool Pump:
After addressing air-related issues and ensuring the necessary adjustments, restarting the pool pump is the final step to resume normal operation. A gradual and observant approach is key to verifying that the system functions efficiently and remains free from air-related complications. Here’s a detailed guide on restarting the pool pump:
Gradual Restarting Process:
- Begin by turning on the pool pump in a gradual manner. Avoid abrupt starts, as this can lead to water hammer and potential stress on the pump’s components.
- Allow the pump to run initially at a lower speed before gradually increasing to the desired operating speed. This gradual approach helps in reestablishing water flow and minimizing the risk of introducing additional air into the system.
- Throughout this procedure, keep a constant eye on the pump and listen for any strange noises or sensations. If any issues arise, promptly power off the pump and investigate the cause before proceeding.
Observing for Continued Air Issues:
- While the pump is running, closely monitor for any signs of continued air-related problems. Look for air bubbles in the pool, check the pump’s pressure gauge, and listen for unusual sounds.
- If air quality problems continue, it can be a sign of a longer-term concern that needs more research. Revisit earlier steps in the guide, including inspecting connections and the air release valve, to identify and address any lingering issues.
- If concerns persist or if you are unsure about the pump’s performance, consider seeking professional assistance for a thorough inspection and diagnosis.
A careful and methodical restart is crucial for ensuring the successful resolution of air-related issues. By adopting a gradual approach and remaining vigilant for any signs of continued problems, pool owners contribute to the sustained efficiency and reliability of their pool pump systems. Regular maintenance, including periodic checks for air-related issues, enhances the overall health of the pool infrastructure, providing a safe and enjoyable swimming experience.
Preventive Measures to Avoid Future Air Accumulation: Nurturing a Healthy Pool System
Safeguarding your pool system against the recurrence of air accumulation involves adopting preventive measures that prioritize regular maintenance and attentive care. By implementing a proactive approach, pool owners can foster a resilient and efficient pool infrastructure. Here’s an in-depth exploration of preventive measures:
A. Regular Maintenance Schedule:
- Establishing a consistent and comprehensive maintenance schedule is fundamental to preventing future air-related issues. Regularly inspect and service key components, including the pool pump, filter, and associated plumbing.
- Schedule routine filter cleanings or replacements to ensure unobstructed water flow. Clogged or dirty filters can contribute to increased pressure within the system, potentially leading to air entrapment.
- Make sure the skimmer in the pool is clear of dirt and operating at peak efficiency by doing comprehensive inspections. A well-maintained skimmer promotes efficient water intake and minimizes the risk of air entering the system.
B. Properly Sealing Connections:
- Diligently inspect and maintain all connections within the pool pump system. Air can enter connections that are leaky or insufficiently sealed, preventing the water from flowing freely.
- Regularly tighten hose clamps, fittings, and valves to mitigate the risk of air leaks. A secure and well-sealed system is less susceptible to air infiltration, preserving the overall integrity of the pool pump infrastructure.
C. Addressing Potential Leak Points:
- Identify and address potential points of leakage in the pool plumbing system. Examine pipes, valves, and other parts visually for evidence of deterioration, corrosion, or wear.
- If any component is beginning to deteriorate, replace it or fix it right away. Addressing potential leak points eliminates opportunities for air ingress and contributes to the sustained efficiency of the pool pump.
Troubleshooting Tips: Navigating Persistent Air Issues in Your Pool Pump
Even with preventive measures in place, pool owners may encounter persistent air-related challenges. Effectively troubleshooting these issues requires a combination of observation, analysis, and, when necessary, professional intervention. Delve into the following troubleshooting tips to address lingering air problems:
A. Persistent Air Issues:
- If air-related problems persist despite regular maintenance, consider conducting a systematic inspection of the pool pump system. Revisit each step of the air removal process, paying close attention to potential leakage points, loose connections, and the pump’s prime.
- Check for any unusual noises, vibrations, or fluctuations in pressure that could indicate ongoing air entrapment. To ensure a tight and airtight seal, check the pump lid and O-ring for wear or damage.
- Reevaluate the condition of the air release valve and associated components. Proper functioning of the air release valve is crucial for expelling air from the system.
B. When to Seek Professional Help:
- It could be wise to seek expert assistance if extensive troubleshooting fails to fix chronic air difficulties. Certified pool technicians possess the expertise and diagnostic tools needed to identify complex problems and implement effective solutions.
- Consider involving a professional when dealing with issues related to the pool pump’s internal components, such as impellers, seals, or valves. To properly diagnose and repair these complex components, certain training and equipment may be needed.
- Professional intervention becomes particularly crucial if there are indications of structural damage, extensive leaks, or malfunctioning components beyond the scope of routine maintenance.
Conclusion
In conclusion, maintaining optimal pool performance requires you to become skilled at extracting air from your pool pump. By following the steps outlined in this guide, you can address common issues like decreased water circulation and annoying air bubbles. Remember, all season long enjoyment of a clean, dazzling pool depends on routine care and close attention to detail. Dive into action today and keep your pool pump running smoothly for endless summer fun!
Frequently Asked Questions
Q1. How to remove air from pool pump completely?
Answer: To remove air from your pool pump, turn it off, check for leaks, open the air release valve, prime the pump, tighten connections, and adjust the pressure gauge. Restart the pump gradually. Regular maintenance and addressing potential leaks prevent future air issues, keeping your pool pump bubble-free and running smoothly.
Q2. Why is there air in my pool pump?
Answer: If you’re noticing air bubbles or reduced water flow, it could be due to a variety of reasons, such as leaks, loose connections, or issues with the pool pump’s priming.
Q3. Can I remove air from the pool pump without professional help?
Answer: Absolutely! Our guide provides a user-friendly, step-by-step process to help you remove air and maintain your pool pump. Simple troubleshooting can solve the majority of difficulties.
As an Amazon Associate I earn from qualifying purchases.