
As an Amazon Associate I earn from qualifying purchases.
Welcome to our guide on how do make roads for LEGO race cars! If you’re ready to take your LEGO racing adventures to the next level, creating custom roads for your race cars adds excitement and realism to your playtime. In this tutorial, we’ll show you simple and creative ways to construct roads that are perfect for showcasing your speedy LEGO vehicles. Whether you’re building a cityscape, a racetrack, or a rugged off-road course, crafting custom roads allows you to design thrilling environments for your LEGO race cars to navigate. So grab your bricks and let’s explore how do make roads for Lego race cars!
Crafting the Ultimate How do Make Roads for LEGO Race Cars
For the LEGO enthusiast, the joy of creation is only amplified by the interplay of aesthetics and functionality. The path to building a perfect LEGO race track is paved with precision and creativity. Whether you’re a parent looking to engage in STEM activities with your child, an educator seeking innovative lesson plans, or simply a LEGO lover, this comprehensive guide will walk you through every turn of the process.
Materials Needed for LEGO Race Track Construction
Before hitting the accelerator, you’ll need to gather the right LEGO elements and tools. Here’s a basic list to get started:
- LEGO bricks: A range of colors and sizes. Recall that your track can be more realistic and intricate the more varied your collection is.
- Baseplates: These will be the canvas on which your roads are painted, so to speak.
- Road Markings Stickers or Decals: For the fine details of your road layout.
- Optional Landscaping Elements: Think miniature trees, shrubs, and anything else to give your track character.
With all these components at your disposal, it’s time to set up your pit stop and dive into the building process! Prepare to bring your vision to life, piece by piece, as you embark on this creative journey.
Step 1: Planning Your Road Layout
Every successful construction project starts with a plan, and your LEGO race track is no different.
Choosing the Location:
Select a suitable space for your track. A large tabletop or a playroom floor should do the trick. Ensure you have enough room to design the type of track you envision, considering both length and complexity.
Sketching Out the Road Layout:
Grab a pencil and some paper (or a digital drawing tool) and sketch out your ideas. How many turns will there be? Do you want some long straightaways for speed? Will you have any cross sections for added challenges? Don’t forget a start and finish line for your racing pleasure.
Planning for Realism:
Consider real racetracks for inspiration. Whether it’s the famous ‘S’ curves of Monaco or the expansive straits of Le Mans, realism will add a new level of excitement to your LEGO track.
Step 2: Building the Foundation
To ensure your LEGO race track is durable enough for heavy racing, you need a solid foundation.
- Laying Down Base Plates: Start your project by carefully assembling the baseplates. These foundational pieces are crucial as they will serve as the groundwork for all subsequent construction. The baseplates play a key role in ensuring the stability and durability of your track. Ensure that they are positioned and aligned correctly to provide appropriate support for the overall structure.
- Stabilizing the Base: After placing the baseplates, the next step is to securely connect them. Ensure tight interlocking at the edges, leaving no gaps or loose areas. For extra stability, use LEGO bricks as supports under the track, especially at curves where instability and derailment risks are higher. Reinforcing these areas improves the track’s robustness and reliability.
Step 3: Constructing the Road
Now for the fun part—the exhilarating process of building the road itself.
- The Surface Layer: Start by focusing on one section at a time, creating a smooth ground base for optimal racing. Ensure the surface is even and clear of debris to not hinder vehicle performance. Getting this foundation right is key for a great racing experience.
- Adding the Details: This stage is where you add creative touches. Focus on the details like stickers for speed bumps to add challenge, directional arrows to guide racers, and clear lane dividers to keep the race orderly. These elements make your track look professional and thoughtful.
- Going Vertical: Add ramps and elevation changes to make the race more dynamic and exciting. Hills and valleys test racers’ skill and can be decisive in close races. Plan these changes carefully to ensure they are well integrated, providing a seamless and engaging racing experience.
By paying attention to these elements, you will create a racing track that is not only fun to compete on but also a work of art that participants and spectators can admire.
Step 4: Adding Surrounding Elements
To truly bring your LEGO road to life, it needs more than just a smooth surface. It needs an environment.
- Decorate the Roadside: Utilize the optional landscaping elements available to you to enhance the aesthetic appeal of your track’s sidelines. This strategy not only elevates the visual aspect but also acts as an effective natural barrier. It keeps the cars on track, especially during those challenging tight turns, preventing them from veering off course and adding an element of realism to the racing experience.
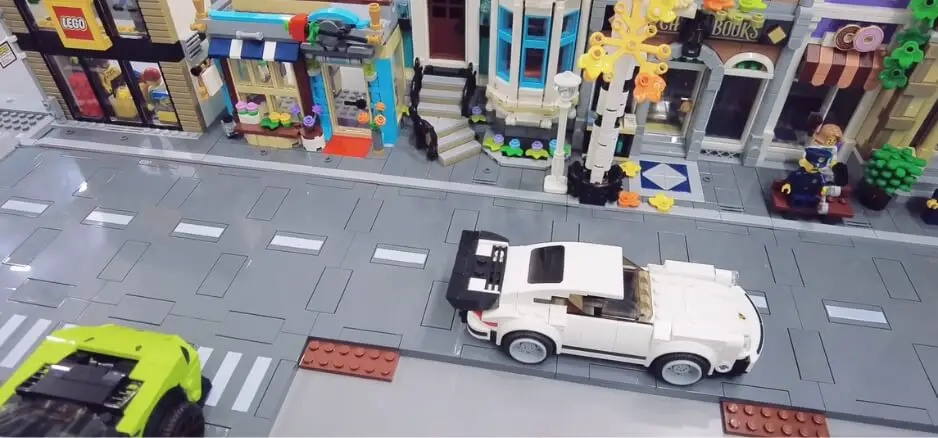
- Structures and Signage: No race track feels complete without the buzzing atmosphere of a pit stop. By incorporating various buildings, signage, and even enthusiastic spectators, you can transform your simple track into a lively racing circuit. This addition brings a layer of depth and engagement, making racers feel like they’re competing in a grand event, cheered on by crowds and guided by clear signage.
- The Lights Go Green: To truly immerse racers in the experience, consider the installation of dynamic lighting. Introducing day-night transitions or the ambient glow from city lights not only adds a dramatic flair but also challenges racers with varying visibility conditions. This feature can make each race feel unique and thrilling, enhancing the overall appeal of your LEGO race with a touch of cinematic brilliance.
Step 5: Testing and Adjustments
With the track and all its trimmings in place, it’s time to see how your LEGO race cars perform.
- Trial Runs: Conduct multiple trial runs using a variety of cars and drivers to thoroughly test the track’s performance. Carefully observe and make note of any sections where cars seem to struggle with traction or stability. This critical observation is vital as it will highlight areas that may require track adjustments to improve safety and performance.
- Tweaking for Performance: Should you notice any imbalance in how races are unfolding, whether it’s due to certain cars consistently underperforming or sections of the track causing unexpected difficulties, take the initiative to adjust the tracks accordingly. Occasionally, the answer may be as easy as simply shifting a curve or changing the incline’s angle. A balanced and competitive race environment can be achieved with these modifications, which can have a big impact.
- Fine-Tuning Aesthetics: Remember that the visual appeal of the track contributes significantly to the overall racing experience. Take the time to fine-tune the aesthetic details, ensuring that all decorative elements, such as stickers and thematic decorations, are perfectly placed and contribute to the storytelling of the track. Pay attention to the surroundings, making sure they enhance the narrative you want to convey, adding to the excitement and immersion of the racing experience.
Step 6: Maintenance and Further Customization
Just like a real race track, your LEGO roads will need some maintenance now and then.
- Regular Check-Ups: It’s crucial to periodically inspect your racetrack for any signs of wear and tear. This could include checking the integrity of the track surface, reapplying stickers that may have come loose, or making necessary structural updates to preserve the track’s condition. The longevity and performance of your racetrack significantly depend on the meticulous care and maintenance it receives.
- Going the Extra Mile: Don’t hesitate to explore advanced customizations to continuously inject excitement into your race track experience. This can involve creating themed race tracks tailored to various LEGO sets or series, thereby introducing a new level of innovation and personalized flair to your racetrack. Such customizations not only enhance your building experience but also make your track standout.
- Share With the Community: The LEGO community is a diverse and enthusiastic network of builders, always eager to see and learn from creative projects. By sharing your track online or with local LEGO enthusiast groups, you open up opportunities to inspire and be inspired. This exchange of ideas can lead to improved designs and a deeper appreciation for the creativity and engineering behind LEGO projects. Interacting with the community can also yield insightful criticism to help you improve your builds even further.
Conclusion
As we wrap up our guide on how do make roads for LEGO race cars, we hope you’ve discovered new ways to enhance your racing adventures. Building custom roads not only adds realism to your playtime but also sparks creativity and imagination. With these techniques, you can create dynamic environments that elevate the excitement of LEGO racing to new heights. So gather your bricks, let your imagination run wild, and go on exhilarating adventures as your LEGO race cars drive down specially constructed highways. The journey is yours to build, so hit the road and enjoy the ride!
Frequently Asked Questions
Q1: How do make roads for Lego race cars to enhance the play experience?
Answer: Creating a realistic and fun LEGO race car track requires careful planning and attention to detail. Start with baseplates for stability, incorporate curves and elevation for excitement, and enhance the scene with landscaping, structures, and lighting for immersion. Make frequent changes and customizations to keep it interesting and engaging.
Q2: What types of materials are needed to build a LEGO race track?
Answer: To build a LEGO race track, you need baseplates, LEGO bricks, and optional elements like stickers and structures for landscaping. Sketching tools like pencils or digital tools for the road layout and lighting for ambiance can also be useful.
Q3: How can I ensure my LEGO race track is durable enough for heavy racing?
Answer: Stabilizing the baseplates and adding extra LEGO bricks for support, particularly at curves, ensures your LEGO race track is stable for heavy racing. Regular maintenance and adjustments will also extend its durability.
Disclaimers: The trademark LEGO® is owned by the LEGO Group of Companies; this article is not connected to, approved by, or in favor of it. Fans of LEGO are expected to find the material offered here to be both amusing and educational.
Personal Experience: I always found the assembly of a LEGO road to be a meditative exercise. It’s a balance between structure and design, functionality and aesthetic. My most vivid memories of road-building stem from bonding with my father, a civil engineer who would meticulously plan every turn of our LEGO circuits with me. This shared activity laid the groundwork (literally!) for my later fascination with all things engineering.
Why Trust Our Guide?
This guide is not just the result of extensive research into best practices for LEGO road construction, but also from a genuine passion for LEGO and the endless creativity it inspires. I have seen the joy and the learning outcomes that stem from building these tracks, and know that with the right approach, anyone can turn a handful of bricks into a thrilling race course. Trust our guide as a starting line for your LEGO road adventure.
As an Amazon Associate I earn from qualifying purchases.